Friday Fun: Adafruit Gemma M0 and Neopixels
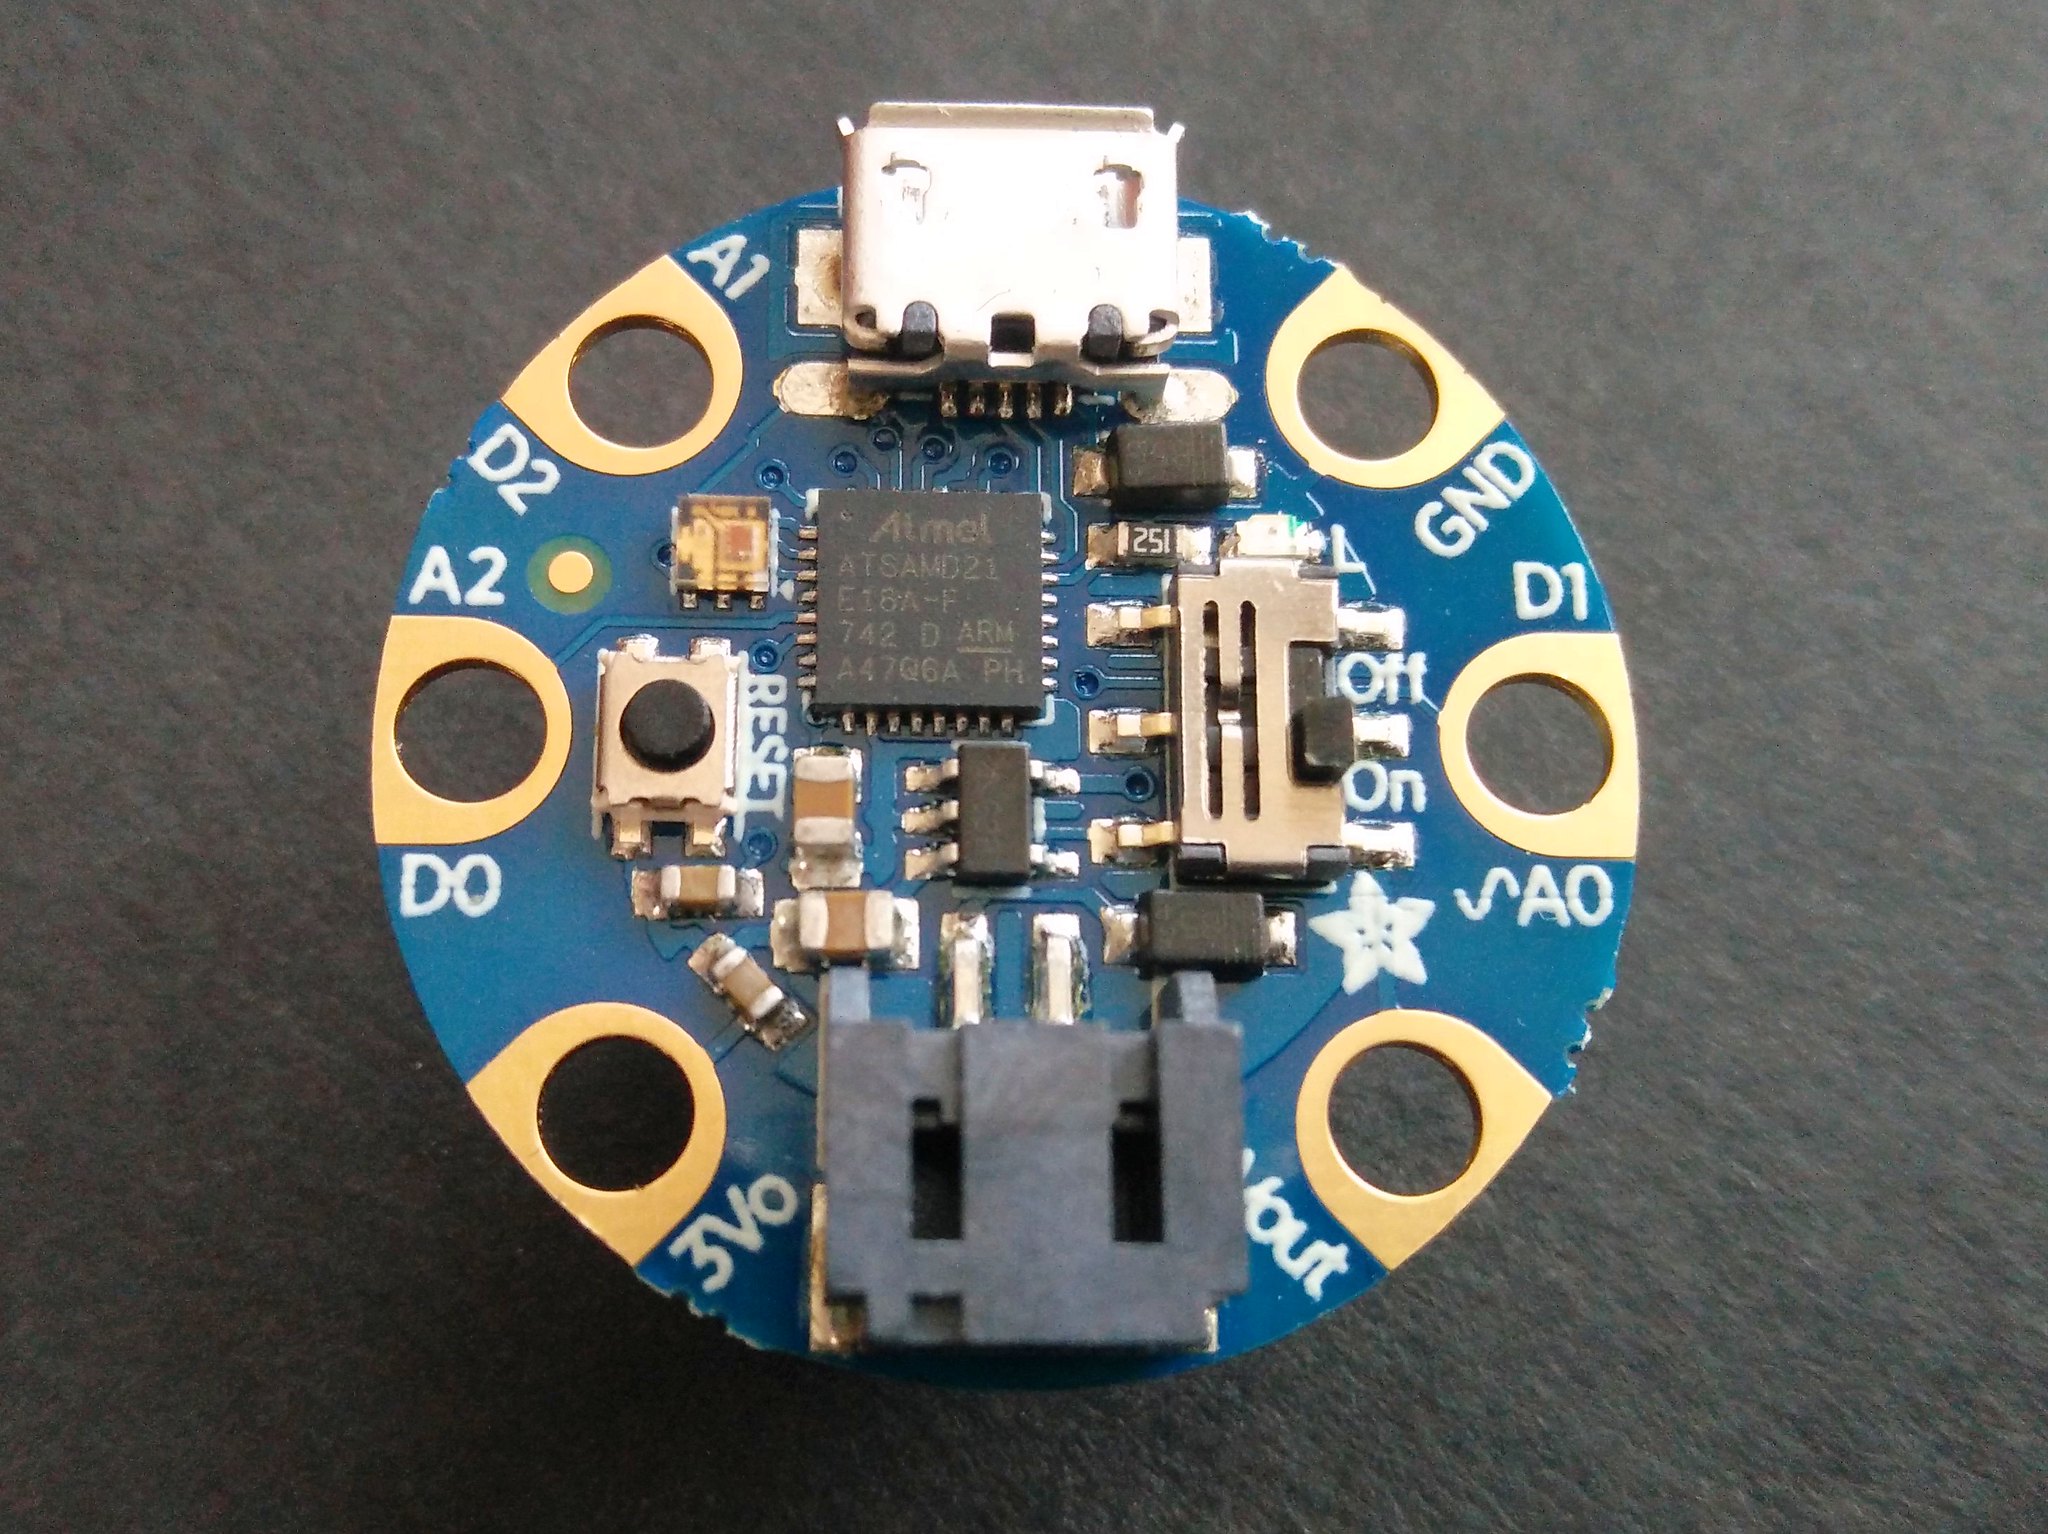
Meet Gemma M0
Last week I was in Cleveland, Ohio for PyCon 2018...what a week! Lots to see and do, and I made lots of new friends including the Adafruit team, who I spent lots of time with, learning more about Circuit Python, a fork of Micro Python, but a little easier to understand.

All of the conference attendees got an Adafruit Gemma M0, a >tiny< wearable micro controller that runs CircuitPython.
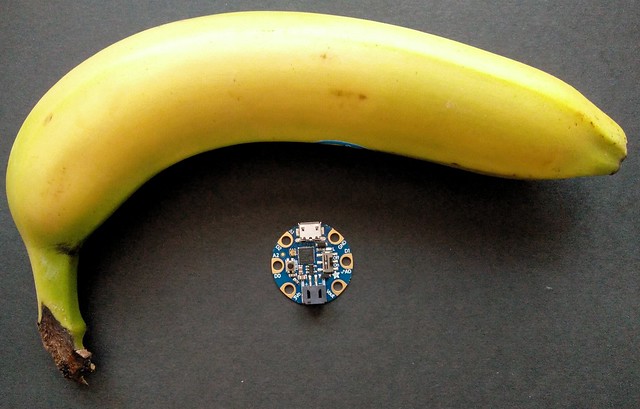
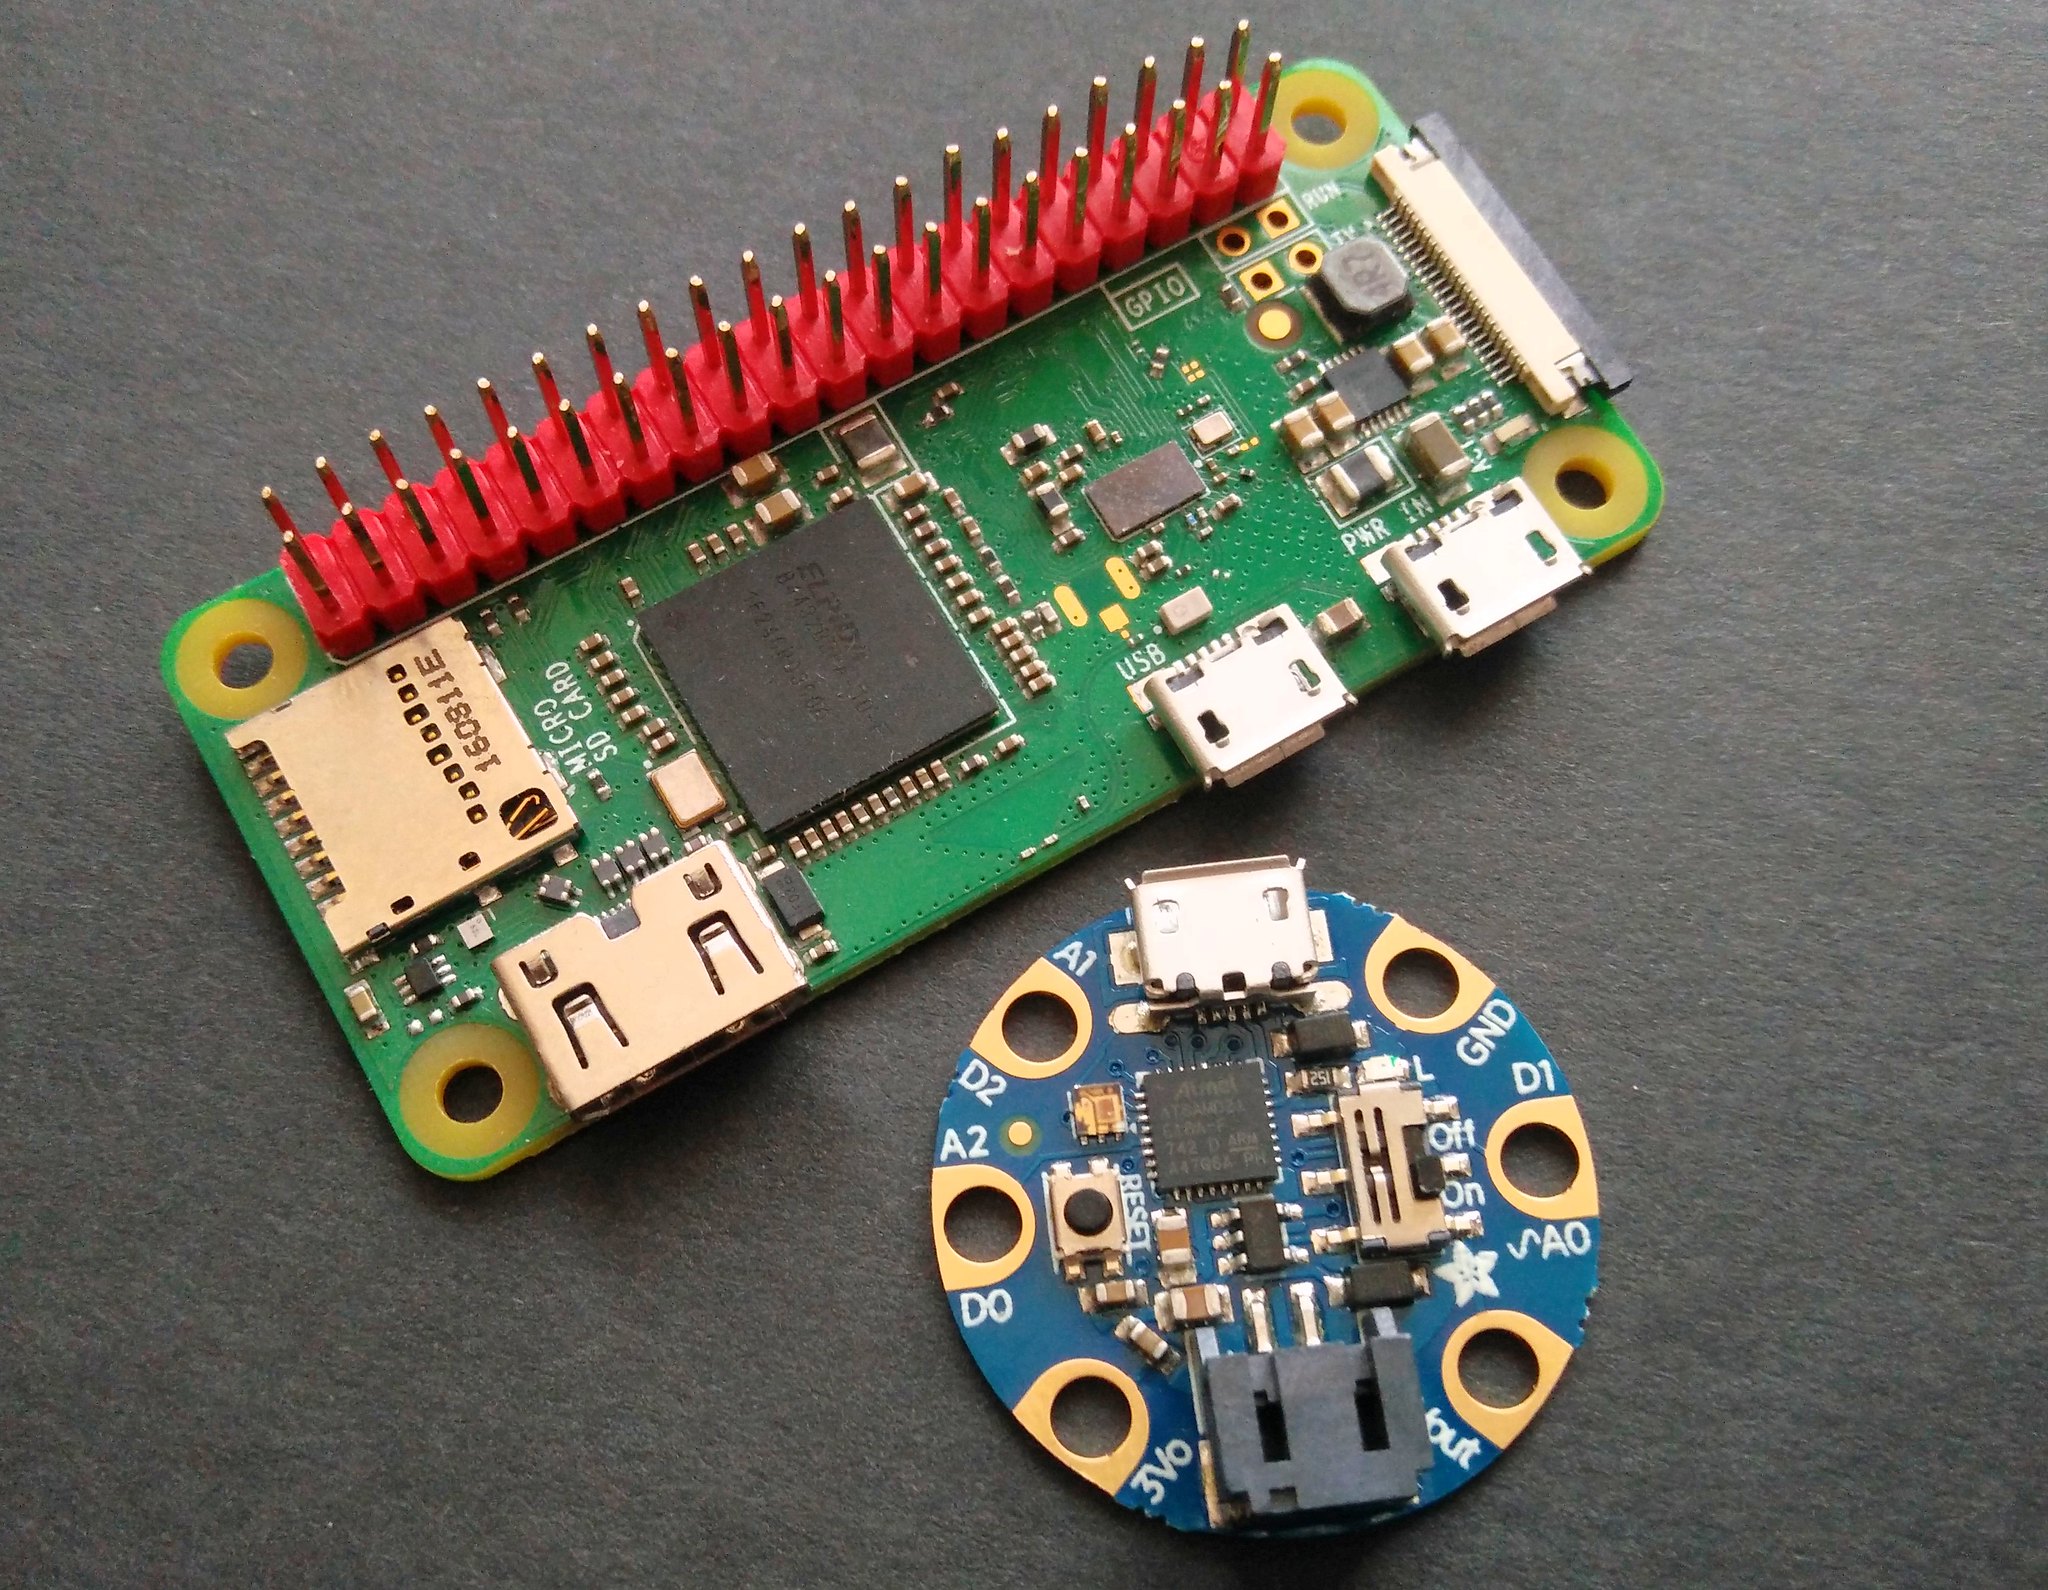
How tiny...lets check the scales!
ISO Standard Banana Scale
Raspberry Pi Zero W Scale
Specifications
Taken from Adafruit's Gemma M0 page
- Same size, form-factor, and pinout as classic Gemma
- ATSAMD21E18 32-bit Cortex M0+
- 256KB Flash
- 32 KB RAM
- 48 MHz 32 bit processor
- Native USB supported by every OS - can be used in Arduino or CircuitPython as USB serial console, Keyboard/Mouse HID, even a little disk drive for storing Python scripts.
- Can be used with Arduino IDE or CircuitPython (via Mu for best results)
Built in RGB DotStar LED - Three big-hole sew-pads can be used for conductive thread or alligator-clips for fast prototyping
- Each I/O pad can be used for 12-bit analog input, or digital input/output with internally connected pullups or pulldowns
- We gave the M0 pads the exact same names as the original Gemma so all your existing Arduino code will work exactly the same as-is without changes
- True analog output on one I/O pad - can be used to play 10-bit quality audio clips
- Two high speed PWM outputs on other two I/O Pads - for servos, LEDs, etc
- All three pads can also be used as hardware capacitive touch sensors with no additional components required
- Can drive NeoPixels or DotStars on any pins, with enough memory to drive 8000+ pixels. DMA-NeoPixel support on one pin so you can drive pixels without having to spend any processor time on it.
- Native hardware I2C or Serial available on two pads so you can connect to any I2C or Serial device with true hardware support (no annoying bit-banging)
- Same Reset switch for starting your project code over
- On/Off switch built in
- JST battery connector for plugging in AAA's or LiPoly battery (no built-in LiPoly charging so it is safe to use with NiMH/Alkalines)
So what are we gonna do with it?
Well I met Kattni from Adafruit at PyCon and she gave me two Neopixel rings to play with...that is for a future project...can you guess?
I got an award from @ntoll at @pycon for my work promoting python and computing in the UK. pic.twitter.com/76MhtNVuKg
— biglesp (@biglesp) May 10, 2018
So in this blog post we take a look at using Neopixels with the Gemma M0, nothing too fancy just a good grounding from which we can do great things.
For this project you will need
- An Adafruit Gemma M0 $9.95
- UK readers, Pimoroni have Gemma M0 for £10
- A 16 pixel Neopixel ring, soldered to croc clips
- UK readers, Pimoroni have Adafruit Neopixels for £12.50
- Micro USB lead
- Mu installed on your Windows / Linux or Mac osX computer
First we need to connect our Neopixels to the Gemma M0, in this case Kattni has kindly soldered some croc clips to the ring and that means I can connect them as is. Sorry but you will need to solder your own connections.
Your connections are as follows.

Insert the Gemma M0 into your computer and it will appear as a USB flash drive.
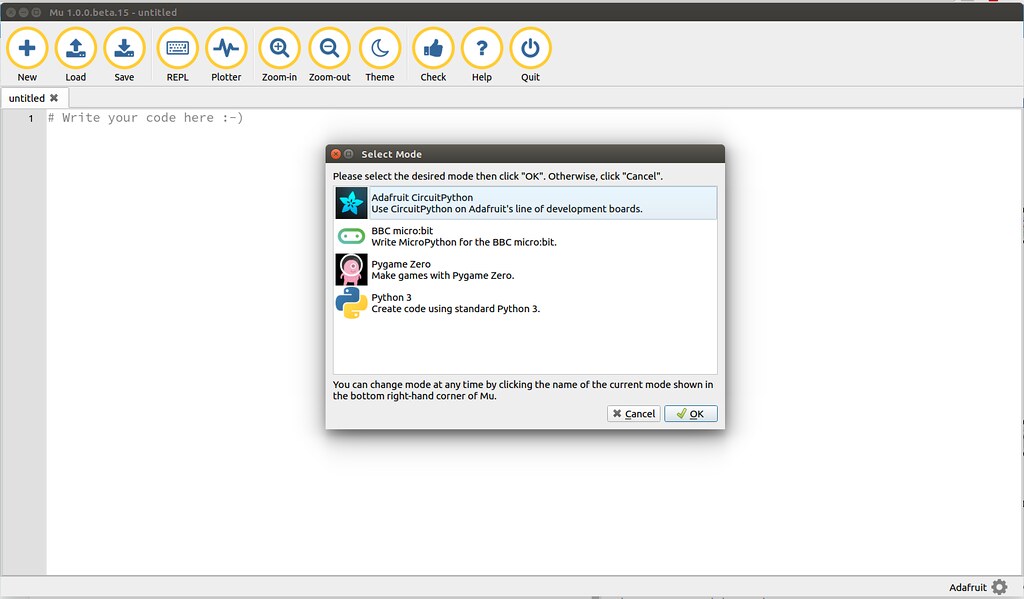
Then open Mu and in the bottom of the screen will be some text next to a cog, this is a way to change the "mode" of Mu. We need to change the mode to Adafruit CircuitPython then click Ok. All of the code that we write now will be in CircuitPython, which is not to different to Python 3.

Project 1 R G B Colour Wipes
For the first project lets keep it simple, and tell our Gemma M0 to change all 16 of the Neopixels to either Red, Green or Blue (RGB) and to repeat this pattern so that we see a colour wipe from one colour to the next.
Our first step is to tell CircuitPython what libraries we need. These are
- board: Used to enable configuration of the inputs / outputs that encircle the board.
- neopixel: Used to control our Neopixel ring.
- time: To ensure our code runs at a certain speed, enforcing a wait time between actions.
import board, neopixel, time
Now lets tell Gemma M0 where our Neopixels are connected, and the number of LEDs in the Neopixel ring. For this we use an object called pixpin to identify that D1 is being used, and then we create a variable called numpix to store the number of LEDs.
pixpin = board.D1
numpix = 16
Why do we create a variable to store the number of LEDs in our Neopixel ring? Well by doing this, if we add more LEDs, all we need to do is update the number stored in the variable, rather than update every reference that we make to it.
Next we create another object that will serve as a configuration for the Neopixels, it tells Gemma M0 where to find them, how many there are, and how bright they should be.
pixels = neopixel.NeoPixel(pixpin, numpix, brightness=.3)
The brightness value is a float value (a number with a decimal point) and it ranges from 0.0 (off) to 1.0 (on), we chose 0.3 as our value as Neopixels are insanely bright and can cause eye strain and headaches.
Ok on to the main body of the code, and here is where we see a while True loop which is used to run the code contained inside of it.
while True:
Now the next line of code is indented by four spaces (or one TAB key press) automatically by Mu, and this identifies that the code belongs inside the loop. This line of code is a for loop that is used to run a loop for a certain number of times. In this case the loop runs for the number of LEDs that we have in our Neopixel ring, as stored earlier in the numpix variable.
for i in range(numpix):
Our loop once again indents, ready for the next line of code.
Each time the for loop goes round, the value of i changes by 1. So it starts at 0, then 1,2,3... all the way to 16. So when we call the pixels object and pass it the value of i we are really saying that we want to change the colour of the LED at that value. The colour of our LED is handled via an RGB value, stored in a tuple (a data storage object that can be created and destroyed, but not updated) By telling the pixel that we want (255,0,0) we are really saying "Turn RED on full, and the other colours are off."
pixels[i] = (255,0,0)
To create a colourful "wipe" animation we set a 0.01 second delay to give the impression of flowing movement. This value can be changed to meet your preference.
time.sleep(0.01)
We now break out of the for loop but remain in the while True loop. And in order for us to see the changes made to the Neopixels, we need to write the changes to them.
pixels.write()
We then repeat this block of code for the Green and Blue wipe animations.
Green
    for i in range(numpix):
        pixels[i] = (0,255,0)
        time.sleep(0.01)
    pixels.write()
Blue
    for i in range(numpix):
        pixels[i] = (0,0,255)
        time.sleep(0.01)
    pixels.write()
Complete Code Listing For Project 1
import board, neopixel, time
pixpin = board.D1
numpix = 16

pixels = neopixel.NeoPixel(pixpin, numpix, brightness=.3)

while True:
    for i in range(numpix):
        pixels[i] = (255,0,0)
        time.sleep(0.01)
    pixels.write()

    for i in range(numpix):
        pixels[i] = (0,255,0)
        time.sleep(0.01)
    pixels.write()

    for i in range(numpix):
        pixels[i] = (0,0,255)
        time.sleep(0.01)
    pixels.write()
Writing the code to the Gemma M0
This is the simple part. Your Gemma M0 is connected to your computer and it is acting as a flash drive called CIRCUITPY. So all we need to do is save our project to the Gemma M0 as a file called code.py.

After a few seconds...you will see this!

Project 2: Random Wipe
So red to green then blue is cool, but lets ask Gemma M0 to pick a new colour each time the loop goes round. For this we need to add a few extra bits to our code. The first addition is the use of the random library, which introduces random numbers.
import board, neopixel, time, random
Then we tell Gemma M0 where our Neopixels are connected, how many we have and create an object to access them, just as in Project 1.
pixpin = board.D1
numpix = 16
pixels = neopixel.NeoPixel(pixpin, numpix, brightness=.3)
Inside of while True we create three variables, r,g,b (Red, Green, Blue) and from the random library we use the randint function to generate a random number between a range, in this case 0 and 128. These are then stored in the variable for later use.
while True:
    r = random.randint(0,128)
    g = random.randint(0,128)
    b = random.randint(0,128)
Why 128? Well Neopixels use a scale of 0 to 255, with 0 = off, and 255 = full intensity of the colour. By using 128 we get a nice pastel colour, rather than harsh colour changes.
Then we use a for loop that will iterate over each LED in the Neopixel ring, and set the colour to the r,g,b values we have stored in the variables.
    for i in range(numpix):
        pixels[i] = (r, g, b)
Then we tell the code to wait for 0.1 seconds, before we come out of the for loop. show the change to the LEDs and then pause the code for three seconds before repeating the process again.
        time.sleep(0.1)
    pixels.write()
    time.sleep(3)
Complete Code Listing For Project 2
import board, neopixel, time, random
pixpin = board.D1
numpix = 16

pixels = neopixel.NeoPixel(pixpin, numpix, brightness=.3)

while True:
    r = random.randint(0,128)
    g = random.randint(0,128)
    b = random.randint(0,128)
    for i in range(numpix):
        pixels[i] = (r, g, b)
        time.sleep(0.1)
    pixels.write()
    time.sleep(3)
Save this code to the Gemma M0, just as we did in Project 1, and you will see this!

Note - I sped mine up a bit otherwise the GIF would be realllly looong
Project 3: Random Sparkles
For the final project we go completely random, but still reuse the majority of the code from the previous projects.
This first section of code remains unchanged from Project 2.
import board, neopixel, time, random
pixpin = board.D1
numpix = 16

pixels = neopixel.NeoPixel(pixpin, numpix, brightness=.3)

while True:
Inside the for loop that iterates over the LEDs in our Neopixel ring, we instruct that each time the loop goes round, the value of the LED (remember it starts at 0 and iterates by 1 each time the loop goes round) is changed to a random value between 0 and 255 (0 = Off, and 255 = Full colour) for each of the three colours (RGB).
    for i in range(numpix):
        pixels[i] = (random.randint(0,255), random.randint(0,255), random.randint(0,255))
Then we tell the code to pause for 0.1 between each step in the for loop, before we write the colour to the LED and then pause the code for three seconds.
        time.sleep(0.1)
    pixels.write()
    time.sleep(3)
Complete Code Listing For Project 3
import board, neopixel, time, random
pixpin = board.D1
numpix = 16

pixels = neopixel.NeoPixel(pixpin, numpix, brightness=.3)

while True:
    for i in range(numpix):
        pixels[i] = (random.randint(0,255), random.randint(0,255), random.randint(0,255))
        time.sleep(0.1)
    pixels.write()
    time.sleep(3)
Save this code to the Gemma M0, just as we did in Project 1 and 2, and you will see this!

So there we have it!
Three projects, reusing a lot of code, but giving us three great ways to tinker with the Gemma M0 and Neopixels. Enjoy!