Friday Fun: Intro to Node-RED
I've recently developed a love for Node-RED...
At first I was afraid, I was petrified, of this language as it seemed so far removed from what I would normally use.
But isn't it just Scratch...with wires?
Well yeah Node-RED is a block based languages, but the blocks are called nodes and each node is joined using a wire.
What makes Node-RED interesting (for me) is that we can...
- Connect projects to Twitter (input and output).
- Use MQTT to work with remote sensors / devices.
- Use the Raspberry Pi GPIO with electronic components.
- Convert text to speech using Google TTS service
- Add extra libraries of software for third party add-ons, such as Pimoroni's Explorer HAT
Nodes are connected into a flow and this flow is our algorithm/ sequence of code Node-RED is very powerful and easy to learn, you just need to understand how it works. So lets undertake a small project to learn how it can be used.
Project Goal: Control an LED from our mobile/cell/tablet device!
The basic "Hello World" of electronics is to control an LED, and to do this we shall use Node-RED to trigger the LED on and off using a web interface called a Dashboard. The Dashboard user interface is not installed as standard, but we can add it using only two lines of code. So lets start hacking!
For this project you will need
- Any model of Raspberry Pi
- The latest version of Raspbian
- Power for your Raspberry Pi
- An LED (any colour)
- A 220 Ohm resistor (RED-RED-BROWN-GOLD)
- A breadboard
- 2 x Male to female connectors
- An Internet connection
- A mobile / cell / tablet device connected to the same WiFi as your Pi
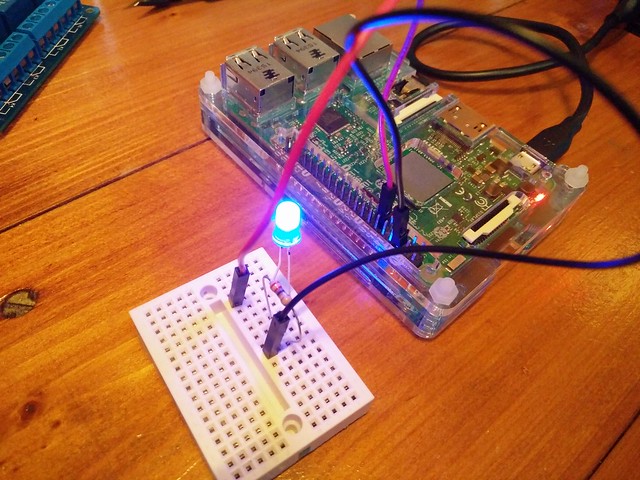
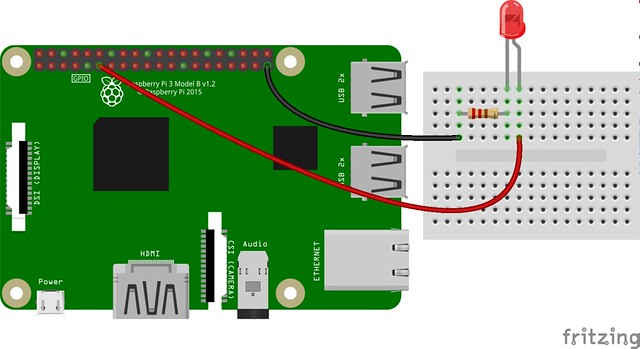
Hardware Build
Create the following circuit with the components.
When done, connect up the keyboard, mouse etc for your Raspberry Pi and power up!
Writing the code
Boot up your Raspberry Pi to the Raspbian desktop. But before we start writing any code in Node-RED we need to install some extra software.
Dashboard
As mentioned earlier we need to install a software library that will be our user interface, the Dashboard. To install the software firstly you will need to open a Terminal, the icon for which is in the top left of the screen.
In the terminal we need to navigate to the Node-RED directory that is inside, but hidden in our home directory. To do this type this command and press Enter.
cd ~/.node-red
Top tip: ~ is Unix shorthand and it means your home directory
/home/pi/in this case.
Now that we are inside the directory we can install the Dashboard library by typing the following.
npm i node-red-dashboard
This may take a little while to install, and when it is completed control of the terminal will be handed back to us. Now is a great time to reboot the Pi to ensure that the software has been installed correctly.
Dude, where's my Pi?
In order to control our Pi remotely, we need to know its IP address. With our Pi freshly rebooted and back to the Raspbian desktop, once again open the terminal and enter this command.
hostname -I
You should now see something like 192.168.0.99, this is the IP address of your Pi write it down :)
Running Node-RED
Node-RED runs in a web browser, this can the browser installed on our Raspberry Pi, or another browser on another computer. I prefer to start Node-RED remotely and use it from my laptop.
You can find the Node-RED application in the Programming menu, and clicking on this will launch the Node-RED application via a terminal. Now in my testing this would just loop round and round and not launch Node-RED. Weird! So if that happens to you, close the terminal and then open a fresh terminal and enter the following command.
node-red start
No matter how you start Node-RED you will see lots of text whizzing along the screen. But the most important part is...
[info] Server now running at http://127.0.0.1:1880/
If you are planning to use the web browser on your Pi, this is the IP address that you need to use to see the Node-RED application.
If you are planning to use another computer to write the Node-RED code then change 127.0.0.1 to match the IP address that you wrote down http://192.168.0.6:1880/ you did write it down, right?
So using your chosen method open the browser and go to that IP address
Layout of Node-RED
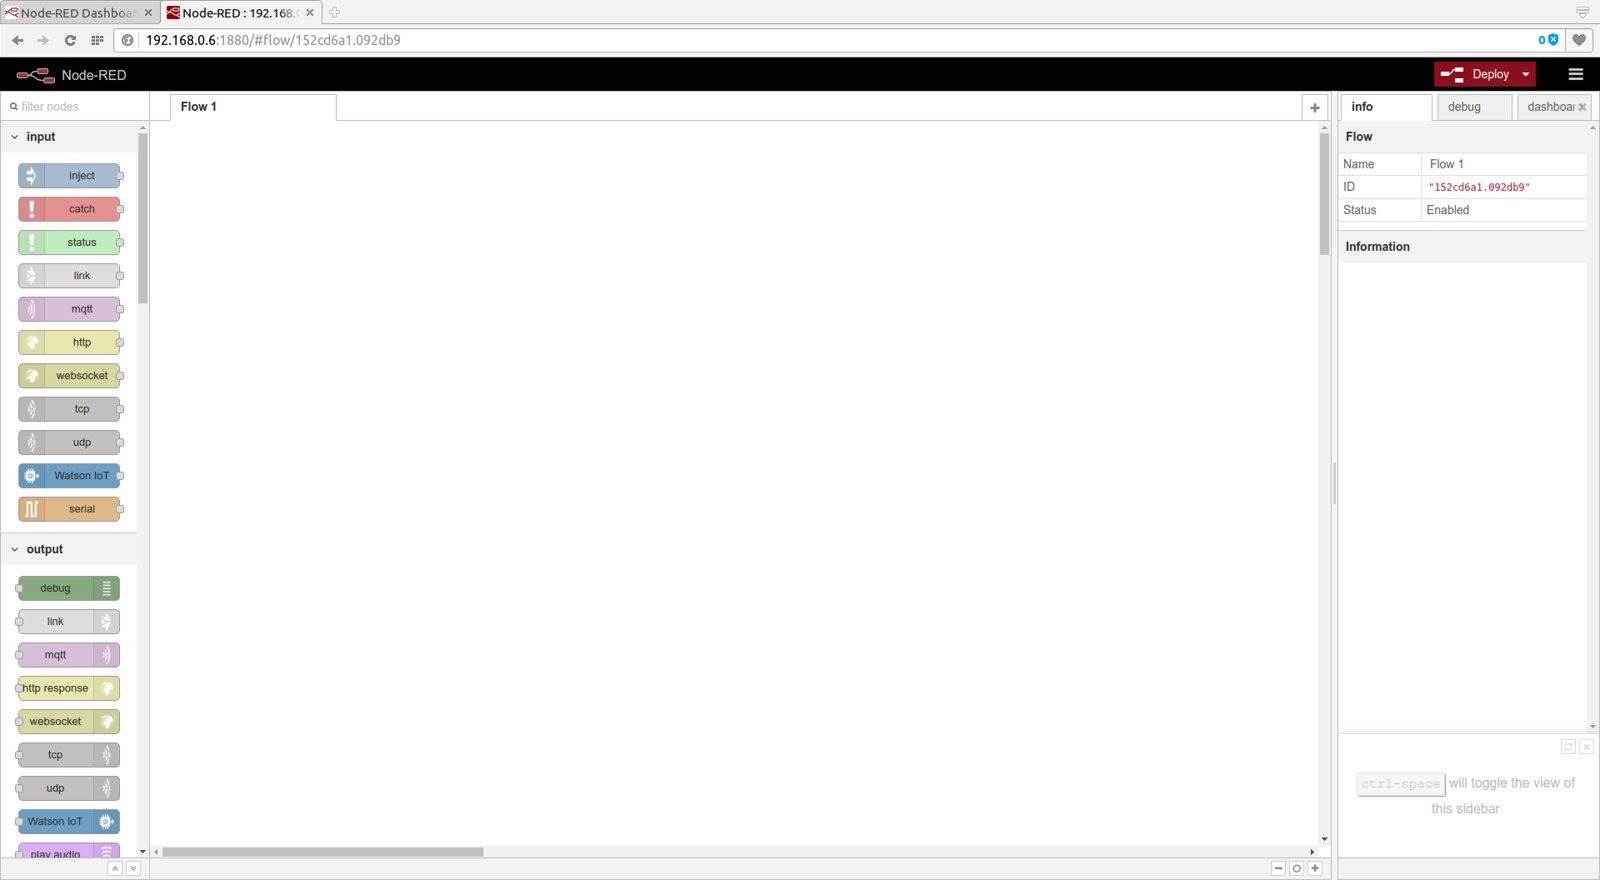
We are finally here and ready to start writing some code! But first lets take a look at the Node-RED interface.
On the left you can see the nodes that can be dragged to the centre of the screen, much like Scratch. Scroll down the nodes and hover your mouse over them to see a quick tooltip explaining the purpose of the node.
As mentioned already the centre of the screen is where we shall be building our flow using nodes
The right of the screen has three tabs
- info: Usage information for the node that is selected.
- debug: Shows the output from a node if we use the debug node.
- dashboard: Used to create a dashboard user interface.
Create a dashboard
Our first task is to create a dashboard user interface which shall be populated by a switch to control the LED.
Click on the dashboard tab and ensure that Layout is selected.
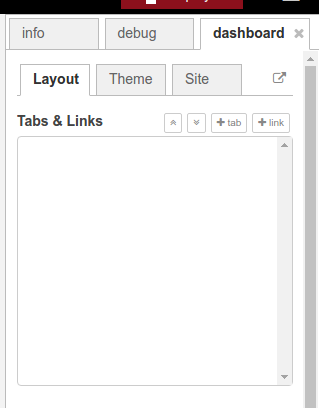
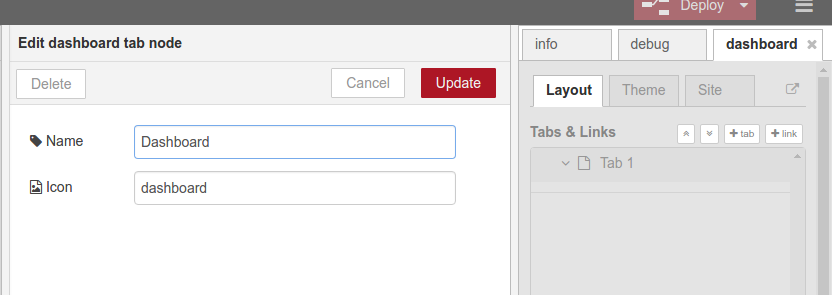
Now click on the + tab button to create a new tab. You should see Tab 1 appear, to the right of this you can see edit click on it and change the name from Tab 1 to Dashboard then press Update to save the details
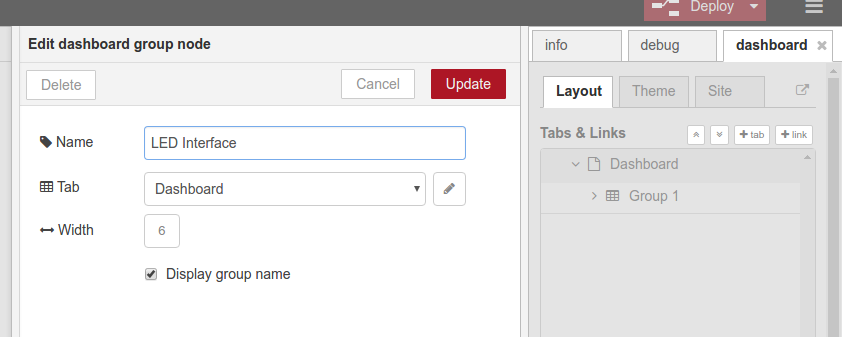
Our next task is to create a Group which is used to hold all of the elements that will make our user interface (buttons, dials, sliders etc.) Hover the mouse over the newly created Dashboard and you will see + groups appear. Click on it to create a new group. Now hover over Group 1 and select edit and rename the group to LED Interface and press Update to save the details.
Creating a switch
Our focus moves to the nodes specifically the switch node which can be found in the dashboard section. Drag this node into the centre of the screen, this is the start of our flow.
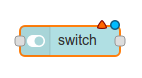
We now need to configure our switch node, so double left click on the node and set the configuration as per the image.

The group is the dashboard that have just created. Notice the When clicked, send: well this will send a payload when clicked and when it resets. There is a drop down arrow for the On Payload set this to Number and enter the value 1, for the Off Payload set this to 0. So now when the switch is clicked it will send a 1, otherwise known as On and when it is clicked again it will send a 0, off. Turning the LED on and off. Remember to click on Done to save the configuration.
LED Output
We now need another node, this time we need rpi gpio from the Raspberry Pi nodes collection. Notice that there are two nodes that have this name.
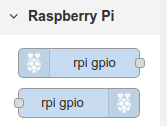
The first node is an input node as it has the grey connector on the right of the node. The second is an input node and the connector is on the left.
Drag the rpi gpio input node to the flow.
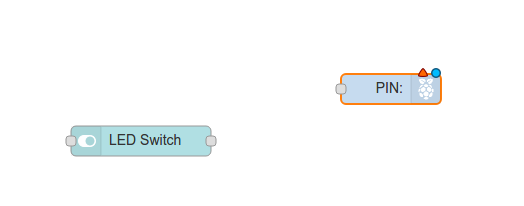
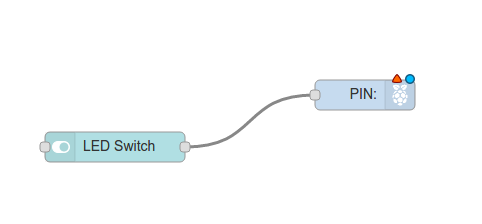
Now lets join them up! Left click and hold on the greay dot of LED Switch node and join the wire to the grey dot of PIN node, our rpi gpio node.
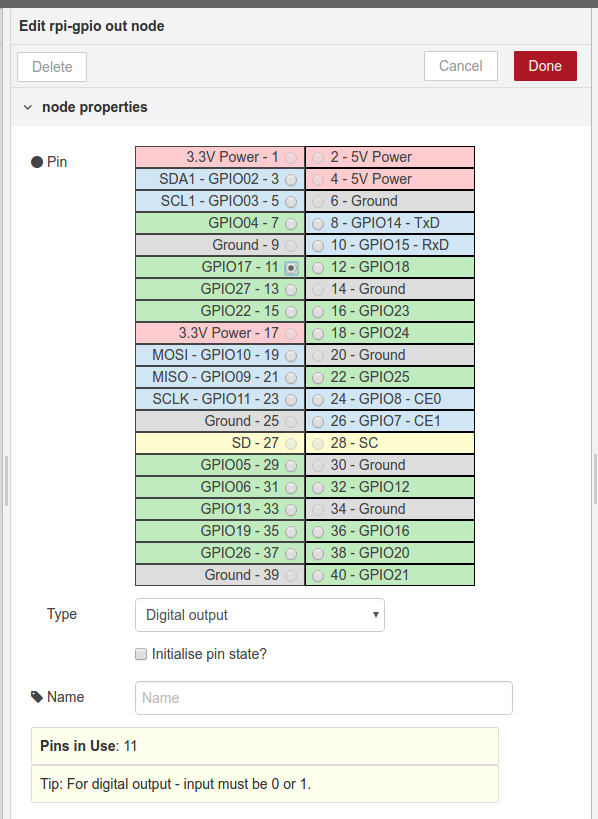
Our last configuration step is to double left click on the PIN node and configure which pin we shall be using. In this case we are using GPIO17 (Physical Pin 11) when selected click on Done to save the config.
DEPLOY DEPLOY DEPLOY!!!
In order to start the code we need to deploy it to the server. To do this we click on Deploy and we should see a popup say "Successfully Deployed"
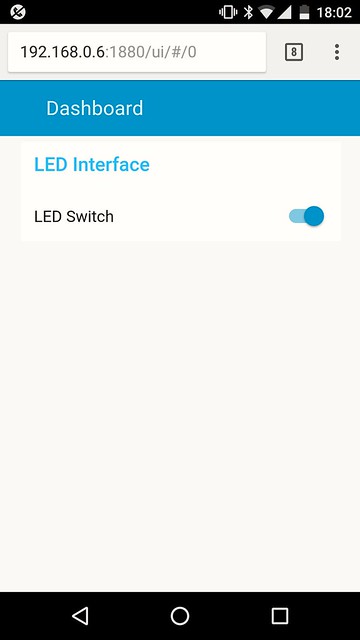
Using The Dashboard
So we have a switch that controls an LED, but where is it? Well for that we need to use our mobile / cell / tablet device and open a web browser to the IP address of our Pi, you did write it down, right? followed by the port number and the folder.
For example in my test it was
http://192.168.0.6:1880/ui/
If you are doing this from your Pi then use the loopback IP address of
http://127.0.0.1:1880/ui/
I tested this from my Android phone and saw this.
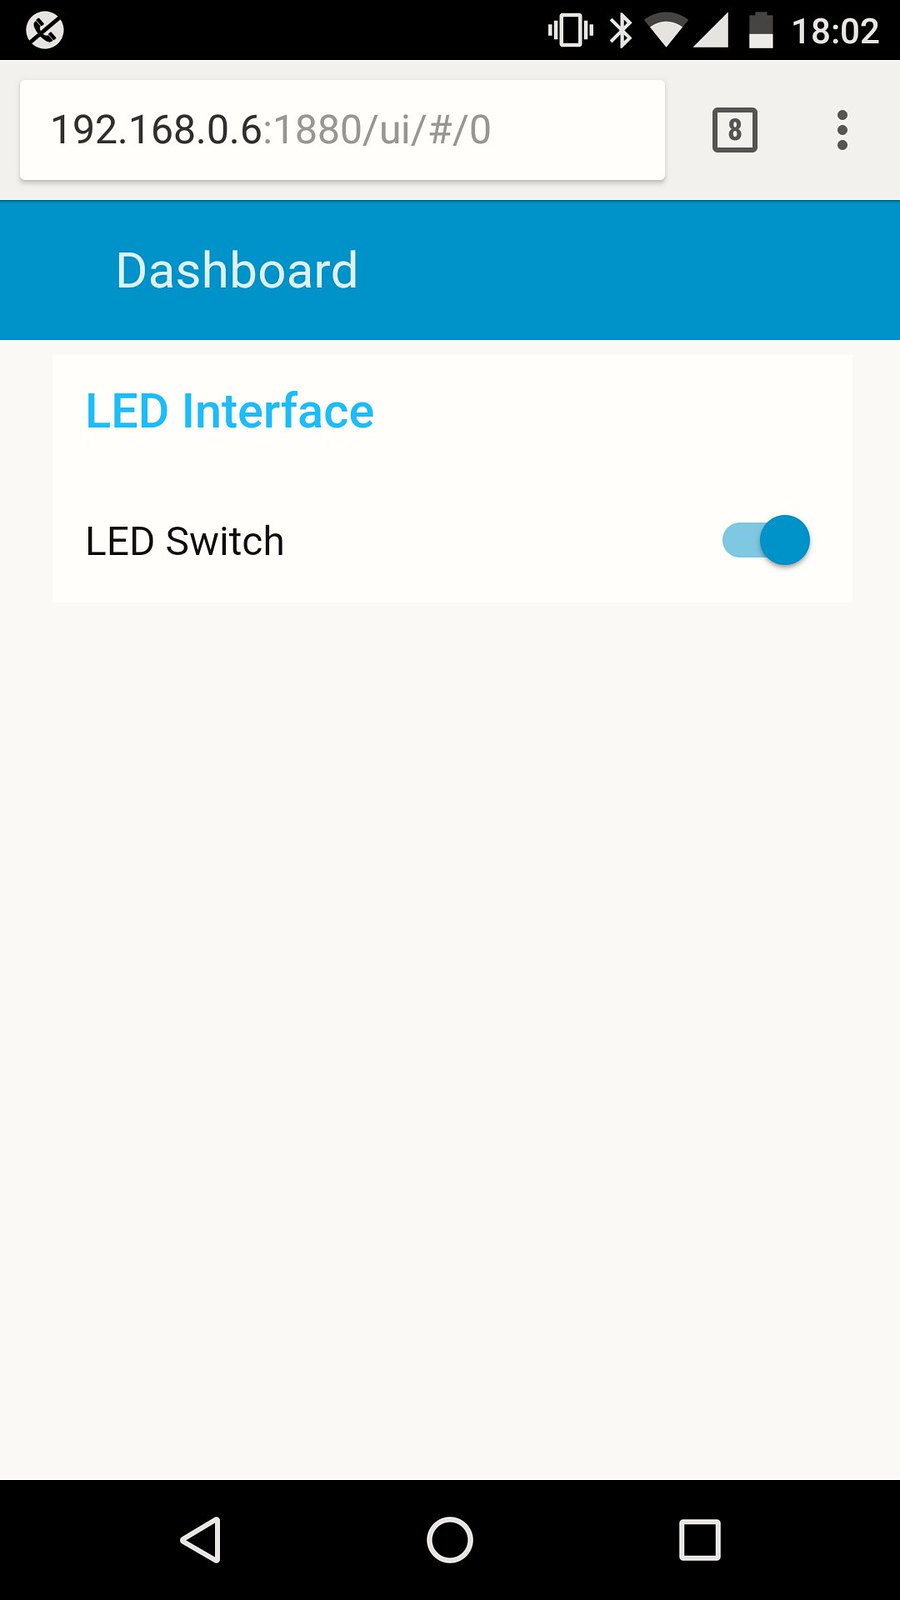
Success!!!!
But why did we just do that?

Follow my train of thought.
I start with an LED, I learn how to control it, turn it on and off. This can be applied to controlling a motor (using a motor control board), so now I can make things light up and move! If I can make things move then if I add more wheels / motors I can build a robot that can be programmed to navigate a maze using an algorithm.
The basic act of turning the LED on / off is the start of what can be an amazing adventure, it is how I started my adventure only five years ago.
Enjoy!