Friday Fun - SMS Controlled Neopixels
If you have read my blog for a bit, you will know that I love Neopixels and I love hacking with them. So when I learnt about Nexmo, a service that offers SMS and voice telephony over the web, I wondered how I could use it with my favourite hack.
If you like what you read...
The Project Goal
To create an SMS interface to control a series of Neopixels connected to a Raspberry Pi Zero W.
How will I do this?
Using the Nexmo API and Node-RED to read an incoming SMS and extract either the name of a pre-determined colour, or an RGB colour value. This is then passed to a node which will control the Neopixels.
What do I need for this project?
- Any model of Raspberry Pi connected to the Internet.
- For one boot only, we will need to boot up with a keyboard, mouse, screen attached to the Pi so that we can configure Node-RED.
- The latest Raspbian operating system.
- Optional: A laptop / computer connected to the Internet. If you have a Pi 3B+ or Pi 4 then you can do all of this from the Pi. You could do it with older Pis too, but it will take ages!
- Some Neopixels, I used a 16 pixel Neopixel ring. You will need to solder this, if you can't solder this is a great way to learn.
- A Nexmo account, topped up with some credit.
Setting up a Nexmo account.
This entire project depends on having a Nexmo account. and it is free to sign up and take it for a trial.
Getting your API details

To use the Nexmo API you will need your API key and secret. These can always be found on the main page of the dashboard.
Setting up a phone number
But the trial is limited to only sending SMS. In order to receive SMS we need to lease a phone number.
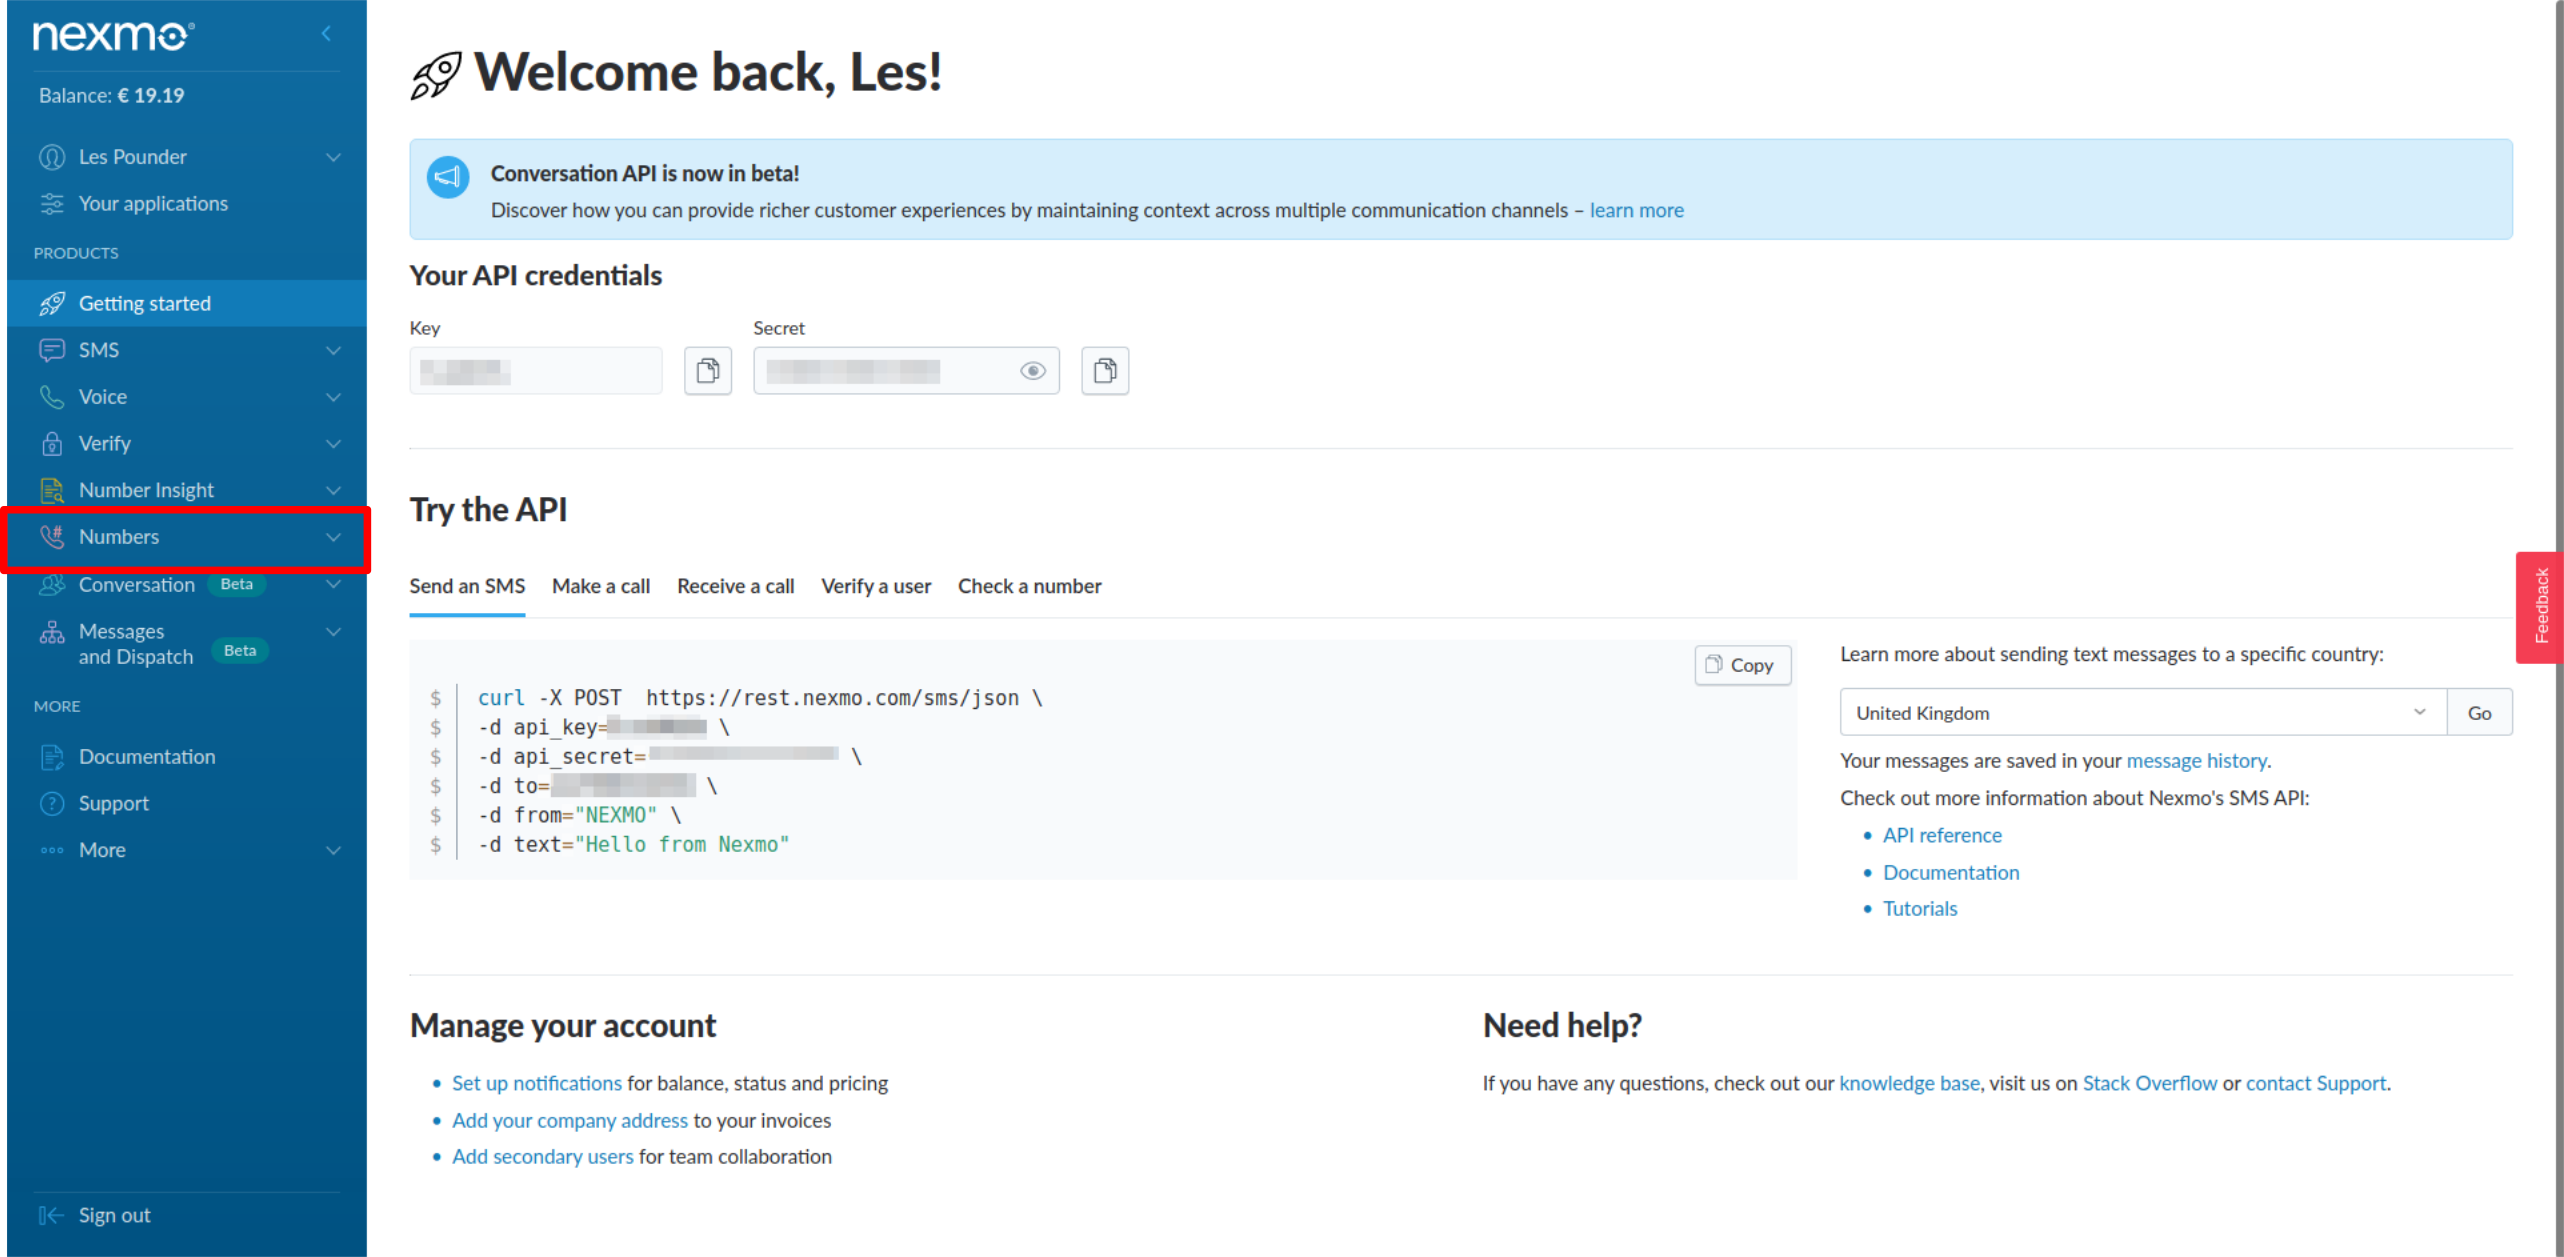
Once you have signed in, and topped up your Nexmo account, look to the left of the screen.
In the menu you will see Numbers click on the heading and a new menu will appear. Select Buy Numbers.
In the Buy Numbers screen we need to select the
- Country - In my case UK
- Features - SMS & Voice
- Type - Mobile
- Number - Optional, here you can search for a cool number, i.e 007, 1701 etc.
Pick a number and buy it. This will be leased and renewed every month.
 Make a note of the number, in fact put the number in your phone contacts!
When a number is no longer needed, you can go into Your Numbers and click on the red trashcan button to delete the number.
Nexmo Checklist
So right now we should have...
- A Nexmo account
- Credit on the account
- A leased phone number
- The API key and secret ready for use.
Before moving on, make sure that you have all of these!
The Hardware Bit
![]()
The circuit for this project is rather simple, in that it only uses three wires.
The Red wire connects 5V from the Raspberry Pi to the Vcc pin of the neopixels.
The Black wire connects GND from the Raspberry Pi to the GND pin of the neopixels.
The Yellow wire has to connect to GPIO18 (Physical pin 12) on the Raspberry Pi as the Neopixel node wil only use that pin. The yellow wire connects to the IN pin of the neopixels.
The Node-RED bit
On to the coding bit! We shall be using Node-RED which is installed by default on Raspbian.
Setup Node-RED to start on boot
In order to use Node-RED remotely we shall first need to boot our Raspberry Pi to the Raspbian desktop.
Open a terminal, the icon for which is in the top left of the screen, and in the terminal enter the following command. This will start Node-RED each time the Pi is booted.
sudo systemctl enable nodered.service
Creating a project in Node-RED
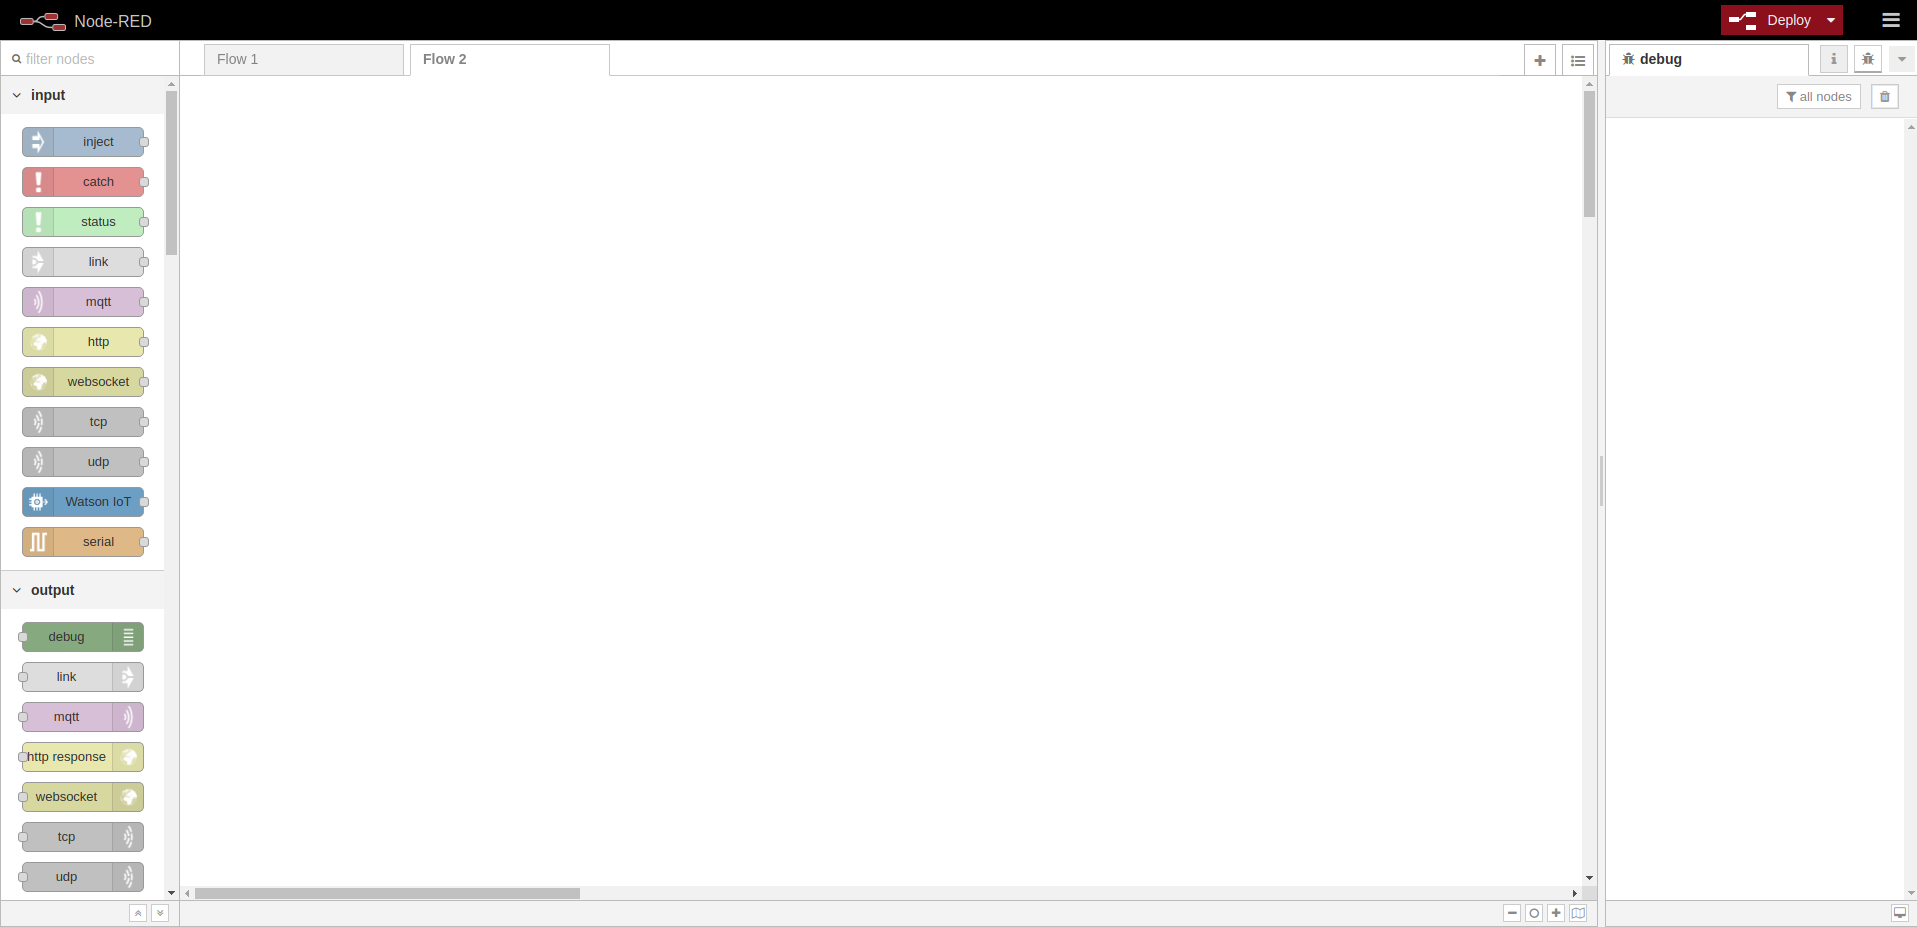
Node-RED is running on our Raspberry Pi and we can connect to it by opening a web browser and going to 127.0.0.1:1880 and we shall see a screen like this.
You can remotely connect to the Node-RED interface from a computer / laptop on the same network. All you need is the IP address of the Pi. My machine was
192.168.0.6:1880on my home network.
This is the Node-RED interface. On the left of the screen are nodes which are packed with functionality and they will make up the code for this project. Nodes are dragged from the left, to the centre of the screen.
The nodes are joined together by drawing connecting lines from one node to another. You will see that nodes have grey circles on their left/right/both sides. Left clicking and dragging from these grey circles will create a connector between the nodes.
Typically a grey circle on the left means that it is an input node, and a on the right it is an output node. Some nodes can have both, and some for example switch can have multiple outputs.
The code written in Node-RED is called a flow.
On the far right of the screen is a combined info / debug window. There we can see details for a selected node and we can click on the debug tab to see output from our flow.
Installing Nexmo API, Neopixels and ngrok
In the top right of the screen, next to Deploy is a menu with three horizontal lines. Click on this menu and select Manage Palette.
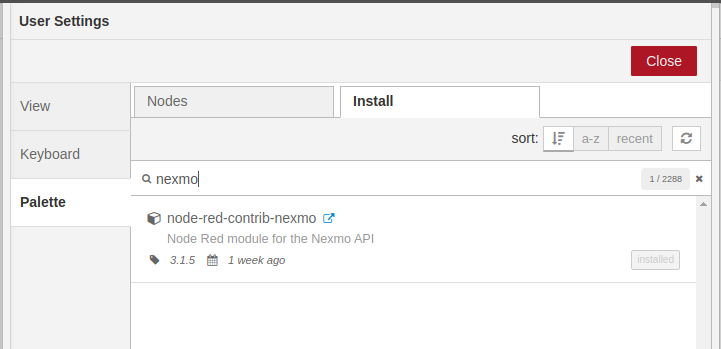
In the new screen click on Install and in the search box type nexmo and you should see node-red-contrib-nexmo pop up. Install this package.
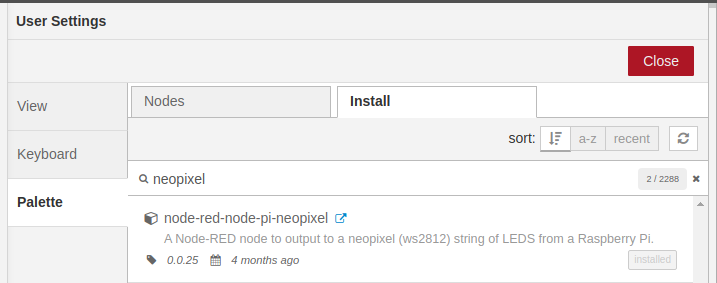
Do the same for neopixel and you should see node-red-node-pi-neopixel install this package also.
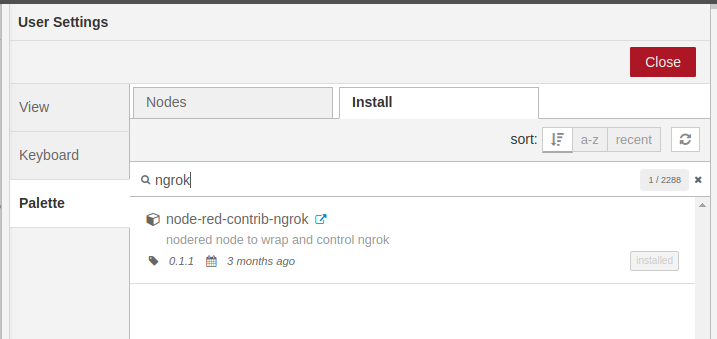
The last package to install is ngrok A secure tunnel for our messages
In order to get our SMS messages from Nexmo we need a secure tunnel to the API from our Raspberry Pi, which is protected behind our router.
That is all of the installation completed in Node-RED, but we have to go back to our Pi and open a new terminal. This is because the Neopixel package in Node-RED requires installation of a further package from Pimoroni that has everything needed to use Neopixels on a Pi.
In a terminal type the following to download and run an install script.
\curl -sS https://get.pimoroni.com/unicornhat | bash
Woah hang on there! What is in that code?
The install script from Pimoroni is quite safe to use, but you are free to download and examine the source code of the script. In general, do not trust scripts from the Internet, they might be bad. I just happen to know that Pimoroni's is fine.
Now would be a good time to reboot the Pi to ensure that the changes have been correctly made.
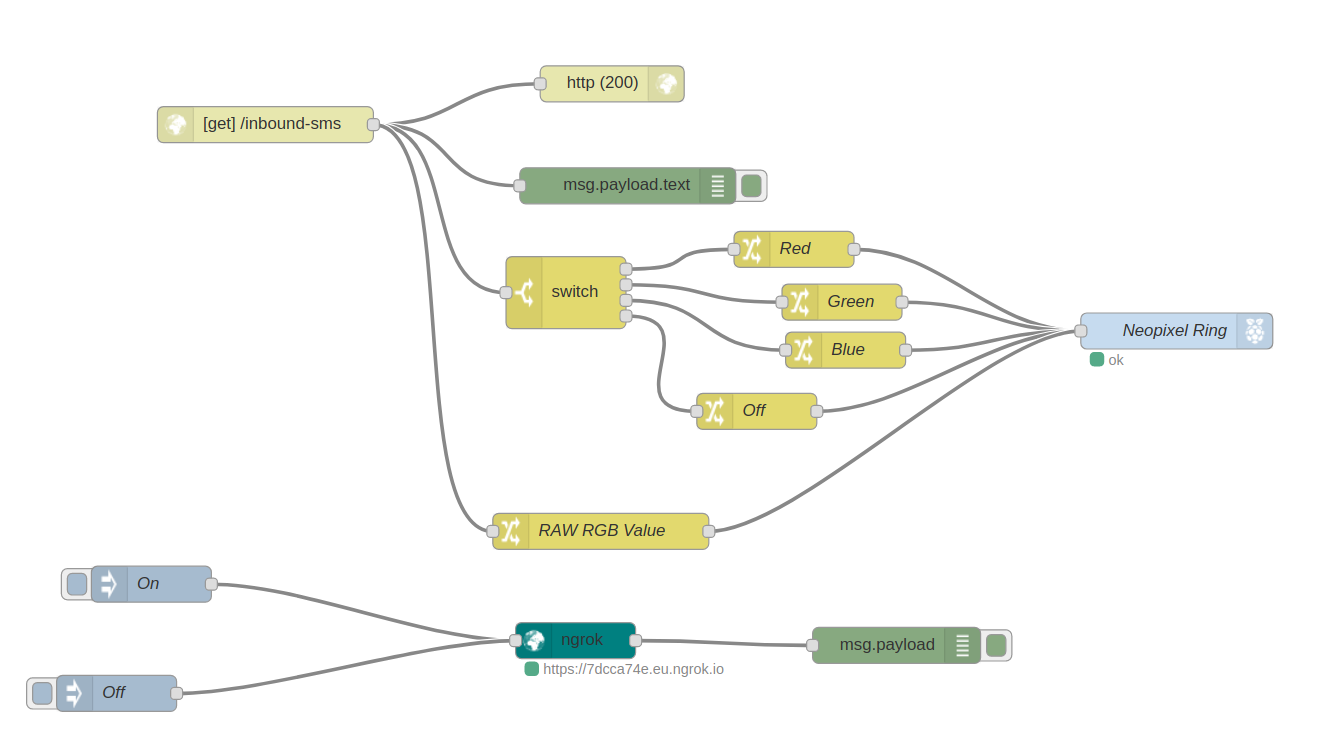
Building the flow
The first node to use is from input and it is called http. Drag the node to the flow and then double click on it. Change the URL property to /inbound-sms. This is going to form a webhook endpoint which shall be configured later, suffice to say it will enable the SMS message received at Nexmo to be used in the flow.
Next an http response node is added to respond to the previous node. It expects a 200 Status (All good).
To see the contents of the SMS message in the debug tab a debug node is used. This will print the contents of msg.payload.text, the SMS message, to the debug tab.
Adding a switch
Switches are similar to conditional tests in other languages (if..elseif..else) and work by checking the input against a series of tests. If a match is made, then the output is routed to the corresponding output of the node.

The input for this node is the contents of the SMS message msg.payload.text and this is checked against four tests Red, Green, Blue and Off. If the SMS contains Red, then the output of the node is routed via the first output. If I then send an SMS containing Off, then the fourth output is used.
To add further tests click on the Add button, and yeah it is REALLY tiny!
Change the colour to red
The first output from the switch is for the colour red, and so I use a change node to change the output from that node into a sequence of numbers. 255,0,0 is the RGB colour code for red.
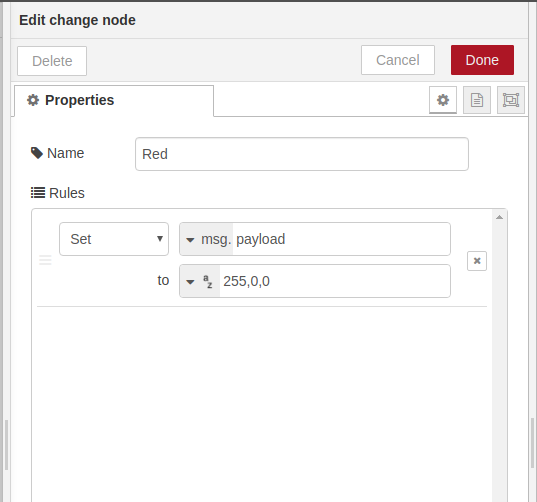
So I name the node Red and then set msg.payload to a string containing 255,0,0.
I do the same process for Green, changing the value to 0,255,0
and Blue, changing the value to 0,0,255

For the final output, Off, I set the output to be 0,0,0 which means that the Neopixels will not be lit.
Raw RGB Values
There may come a time when you need a specific colour quickly using raw RGB colour values (255,0,0) and to do that I used another change node to set msg.payload to match the contents of the SMS message msg.payload.text
The Neopixels!
![]()
The Neopixel node is where the output of all the previous nodes is sent. It controls how many LEDs are in the Neopixel string (or ring), the mode, background and foreground colours, wipe time and brightness.
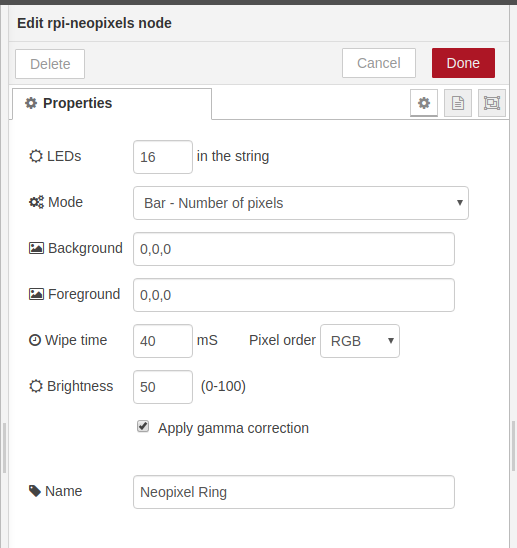
I have set my Neopixel node to
- LEDs: 16
- Mode: Bar - Percent of Length
- Background: 0,0,0
- Foreground: 0,0,0
- Wipe Time: 40mS
- Pixel order: RGB
- Brightness: 50
- Name: Neopixel Ring
Setting up ngrok with Node-RED
Remember ngrok? The node for this was installed at the start of the post. Now is the time to configure it. But first...we need to go to the ngrok website and sign up for a free account.
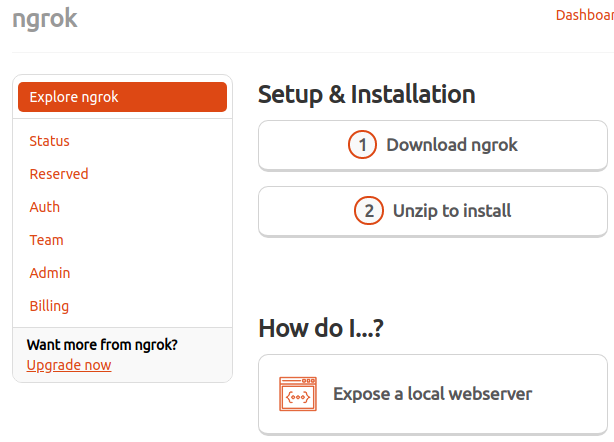
When you have an account, go to your dashboard and click on the Auth menu option.

Copy your Authtoken and go back to Node-RED.
Drag the ngrok node into the flow, it does not connect to any current node.
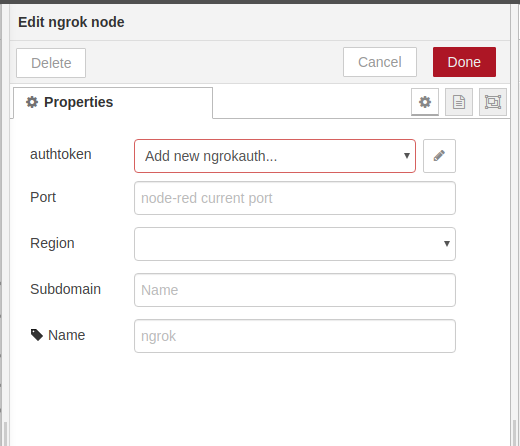
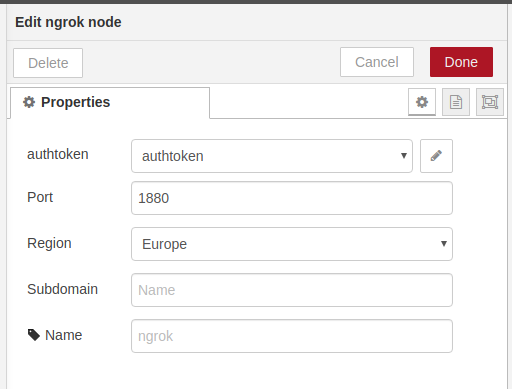
Double click on the ngrok node and in the authtoken property select Add new ngrokauth then paste your authtoken into the next menu and click Add.

To start and stop the ngrok secure tunnel two inject nodes are required. One will inject a string "on" to start ngrok, the other will turn ngrok off.
To see the URL that has been assigned via ngrok, a debug node will print the output to the debug tab.
That is all the code in Node-RED! Click on Deploy to run the code!
Click on the On node to inject "on" to the ngrok node. This will start the ngrok service, and give a URL. Copy the URL!
Remember to turn off ngrok when you are not using your Neopixels, as it is offering a direct connection to your device!
Final Push!!
In order for Nexmo to know where to direct your SMS, the phone number attached to the Nexmo account needs to be told the ngrok URL and the webhook endpoint!

Go to Your Numbers and click on the Cog / Settings button.
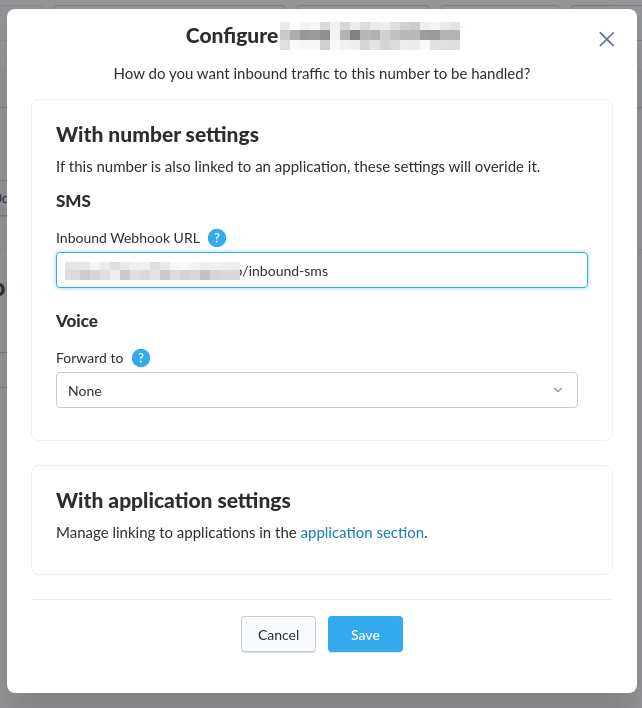
In the new screen, copy the ngrok URL from Node-RED into the Inbound Webhook URL and add /inbound-sms to the end.
For example
https://ngrok-my-secret-url/inbound-sms
Then click Save
That is all the code done!
So now head over to your phone, and send a text to your Nexmo phone number.
Start off with Red, then Green, Blue and finally Off. Your Neopixels should react accordingly.
Then test the raw RGB value by sending 168,0.164 which is a lovely shade of purple!