Raspberry Pi 4 - 8GB Desktop Setup
Did somebody say...MOAR RAM!?
Happy New Pi 4 Day
Today the latest Raspberry Pi 4 model was released, and it comes with even more RAM. 8GB of DDR4 RAM to be exact.
So we get...
- Broadcom BCM2711, Quad core Cortex-A72 (ARM v8) 64-bit SoC @ 1.5GHz
- 1GB, 2GB, 4GB or 8GB LPDDR4-3200 SDRAM (depending on model)
- 2.4 GHz and 5.0 GHz IEEE 802.11ac wireless, Bluetooth 5.0, BLE
- Gigabit Ethernet
- 2 USB 3.0 ports; 2 USB 2.0 ports.
- Raspberry Pi standard 40 pin GPIO header (fully backwards compatible with previous boards)
- 2 × micro-HDMI ports (up to 4kp60 supported)
- 2-lane MIPI DSI display port
- 2-lane MIPI CSI camera port
- 4-pole stereo audio and composite video port
- H.265 (4kp60 decode), H264 (1080p60 decode, 1080p30 encode)
- OpenGL ES 3.0 graphics
- Micro-SD card slot for loading operating system and data storage
- 5V DC via USB-C connector (minimum 3A*)
- 5V DC via GPIO header (minimum 3A*)
How to spot a Pi 4 8GB...

The RAM chip has 0AA47 D9ZCL printed upon it.
So more RAM is good, what can I do with it?
Since the Raspberry Pi was released, there have been experiments in using the Pi as an everyday desktop computer. With the release of the Pi 4 we saw this become a serious possibility, and with the new 8GB model we can use it just like a Linux desktop computer. But can we tweak the setup to give us even more power?
Activate EXTREME MODE!
Yes we can, and in this post I will be overclocking the Raspberry Pi 4 to 2GHz...AND booting from an external USB3 hard drive.
The steps taken in this blog post are at your own risk. Overclocking always carries a small risk of damaging the CPU. Updating the firmware also carries a risk of bricking (making a device non-functional) the Raspberry Pi. I've tested these steps and they have worked for me, and others in the community. But always proceed with caution, and don't go blaming me.
What will we need for this project?
- A Raspberry Pi 4. I used the 8GB model, but this will work with 1,2, and 4GB models.
- A computer running Windows, MacOS or Linux
- The Raspberry Pi Imager tool.
- A spare 16GB micro SD card.
- A USB 3 hard drive. I used a USB3 to NVME adapter with a spare 256GB NVME drive. But you can use any USB 3 drive, even a flash drive.
- Good cooling for the Pi 4. Overclocking will generate more heat, so cooling is essential. The cheapest and most effective option is Pimoroni's Fan SHIM. I used an Argon ONE case as it offers both passive (heat sink) and active cooling (fan).
- Keyboard, mouse, power, HDMI and wires Internet for your Pi 4. You can, if you wish, configure WiFi once the Pi 4 has booted.
Creating Raspbian micro SD card
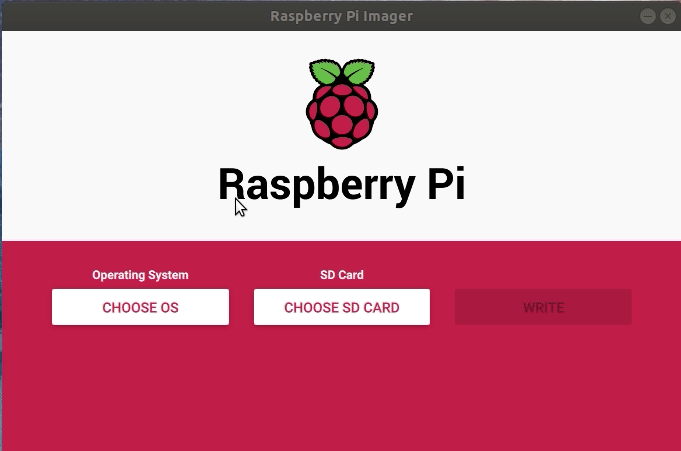
On your computer, insert a spare 16GB micro SD card and then open the Raspberry Pi Imager tool.
Click on Choose OS
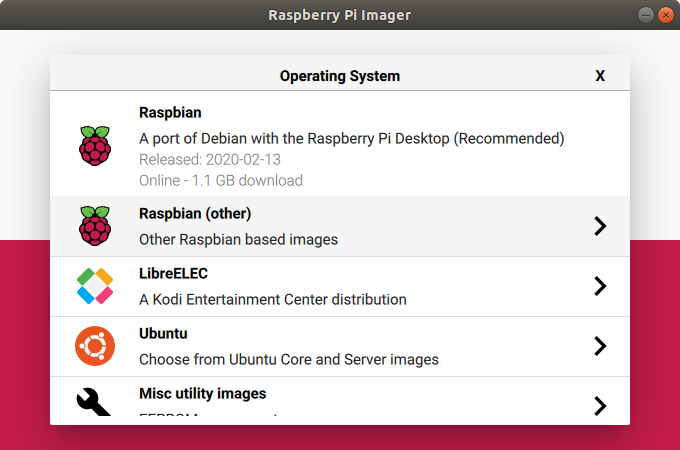
Click on Raspbian (other)
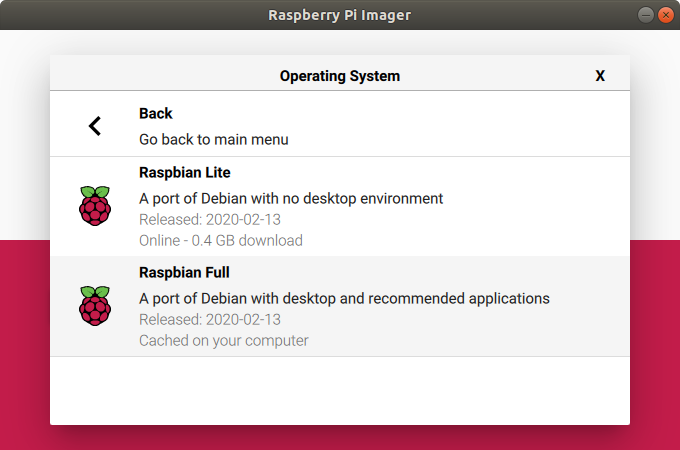
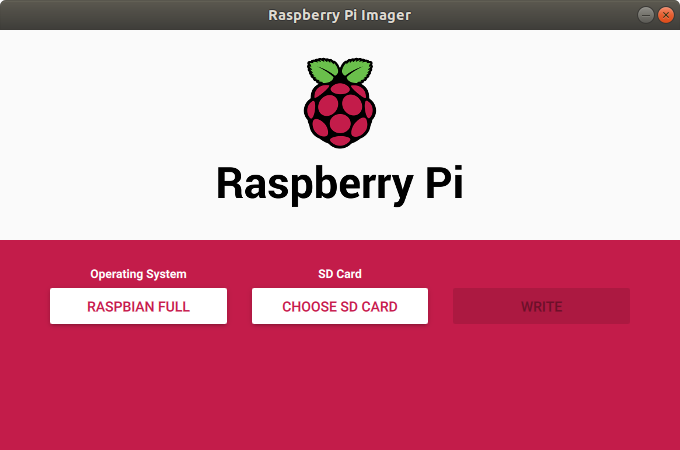
Click on Raspbian Full
This will download the full version of Raspbian, with all of the applications we need.

Click on CHOOSE SD CARD
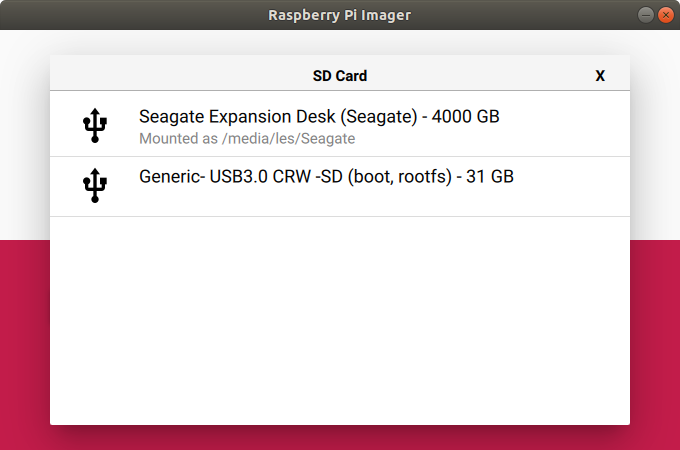
Click on your micro SD card.

Click on WRITE to start. This will trigger the Imager tool to download the latest version of Raspbian Full, and then write it to your micro SD card.
When complete, insert the micro SD card into your Pi and power on the Pi 4.
Booting from USB 3
The goal for this section is to create a USB 3 drive from which the Pi 4 will boot. Replacing the micro SD card completely, and giving us a little more speed.
First we need to ensure that our system is up to date, open a terminal (CTRL + ALT + T) and enter each of these commands, line by line, and press ENTER at the end of each line.
sudo apt update
Check that our list of installed software is up to date.
sudo apt upgrade
Check for any available upgrades. If asked to confirm, press Y to install.
sudo rpi-update
This is a tool to get the latest bleeding-edge firmware and kernel for your Raspberry Pi 4. Use this tool with caution.
sudo reboot
Reboot the Raspberry Pi for the updates to take effect.
Flashing new firmware
The next steps will update the firmware, the bit of electronics that enables the software (operating system) to talk to the hardware (Pi 4). This is the bit that must be followed with great care or you may brick your Pi 4.
Open a terminal and once again enter the following line by line.
sudo apt install rpi-eeprom
This will install the rpi-eeprom flashing tool.

sudo nano /etc/default/rpi-eeprom-update
To edit the rpi-eeprom-update file we need to use the nano text editor, with sudo privileges. Change critical for beta and then press CTRL X and then press Y followed by Enter to save and exit.
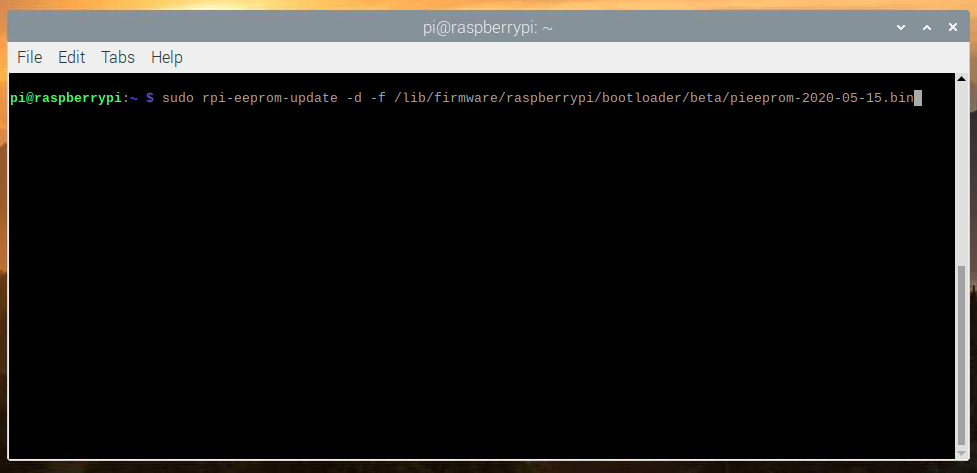
sudo rpi-eeprom-update -d -f /lib/firmware/raspberrypi/bootloader/beta/pieeprom-2020-05-15.bin
This step will write a new firmware to the Raspberry Pi 4, and this section will change once the beta firmware becomes standard.
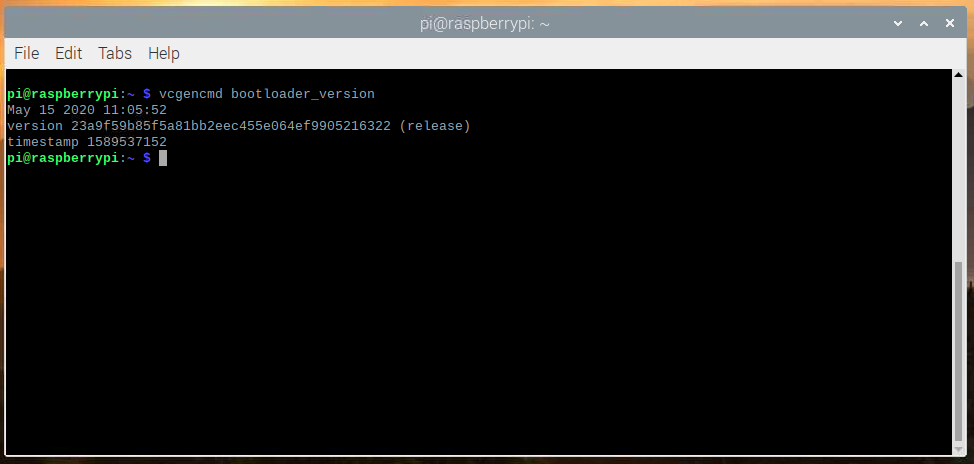
vcgencmd bootloader_version
This command with check that the new firmware has been installed. At the time of writing the current firmware is May 15 2020 11:05:52 version 23a9f59b85f5a81bb2eec455e064ef9905216322 (release) timestamp 1589537152 but this will change in the future.
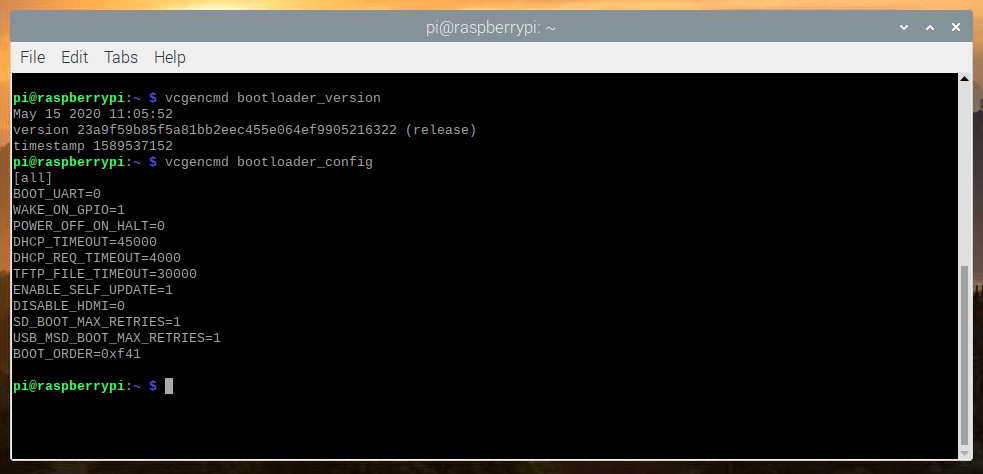
vcgencmd bootloader_config
The next step is to check that the boot order for the Pi, by which I mean the order in which our Pi will look for devices to boot from. The order should now be, USB then micro SD and we can identify this by looking for BOOT_ORDER=0xf41 in the output of the command.
We can now close the terminal.
Creating a bootable hard drive
The simplest way to make a bootable Raspberry Pi hard drive is to use the built in SD Card Copier, which can be found in Accessories.
Plug in your external USB 3 hard drive into a spare USB 3 port.
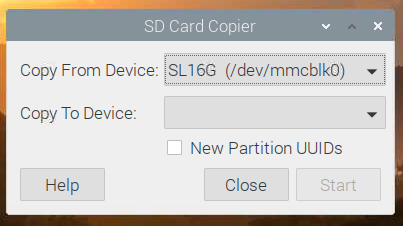
The Copy From Device is our micro SD card.
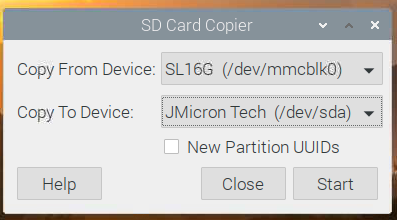
The Copy To Device is the USB 3 hard drive.
Click on Start to copy the micro SD card to the USB 3 drive. This will take some time.
When complete, power off the Raspberry Pi. Remove the micro SD card (but keep it safe) and then power up the Pi, and it should boot from the USB hard drive.
Overclocking the Pi 4 to 2GHz!
Before we launch into this, get some cooling for your Pi 4 before you attempt this, otherwise your Pi will overheat and throttle the CPU.
Overclocking a Raspberry Pi is really easy, all we need to do is edit a text file called config.txt.
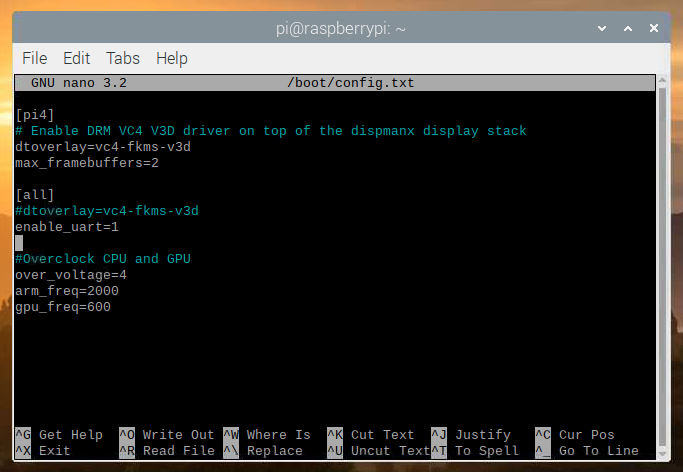
On your Raspberry Pi 4 open a terminal and type the following.
sudo nano /boot/config.txt
Scroll all the way to the bottom of the file and add the following lines.
#Overclock CPU and GPU
over_voltage=4
arm_freq=2000
gpu_freq=600
The first line is a comment, used to remind us that the next few lines will overclock the Pi.
over_voltage=4 will set the CPU/GPU voltage to 1.3V, a 0.1V increase from the stock 1.2V.
arm_freq=2000 will set the CPU speed to 2GHz (2000MHz) and gpu_freq=600 will set the GPU speed to 600MHz.
Press CTRL X and then press Y followed Enter to save and exit. Then reboot your Pi.
All being well, your Pi will reboot and you will have more power in your Pi!
So can I use this as a desktop?
Short answer, yes, but there are some caveats.
Going online, emails, YouTube, editing images, writing docs, paying bills etc are all possible.
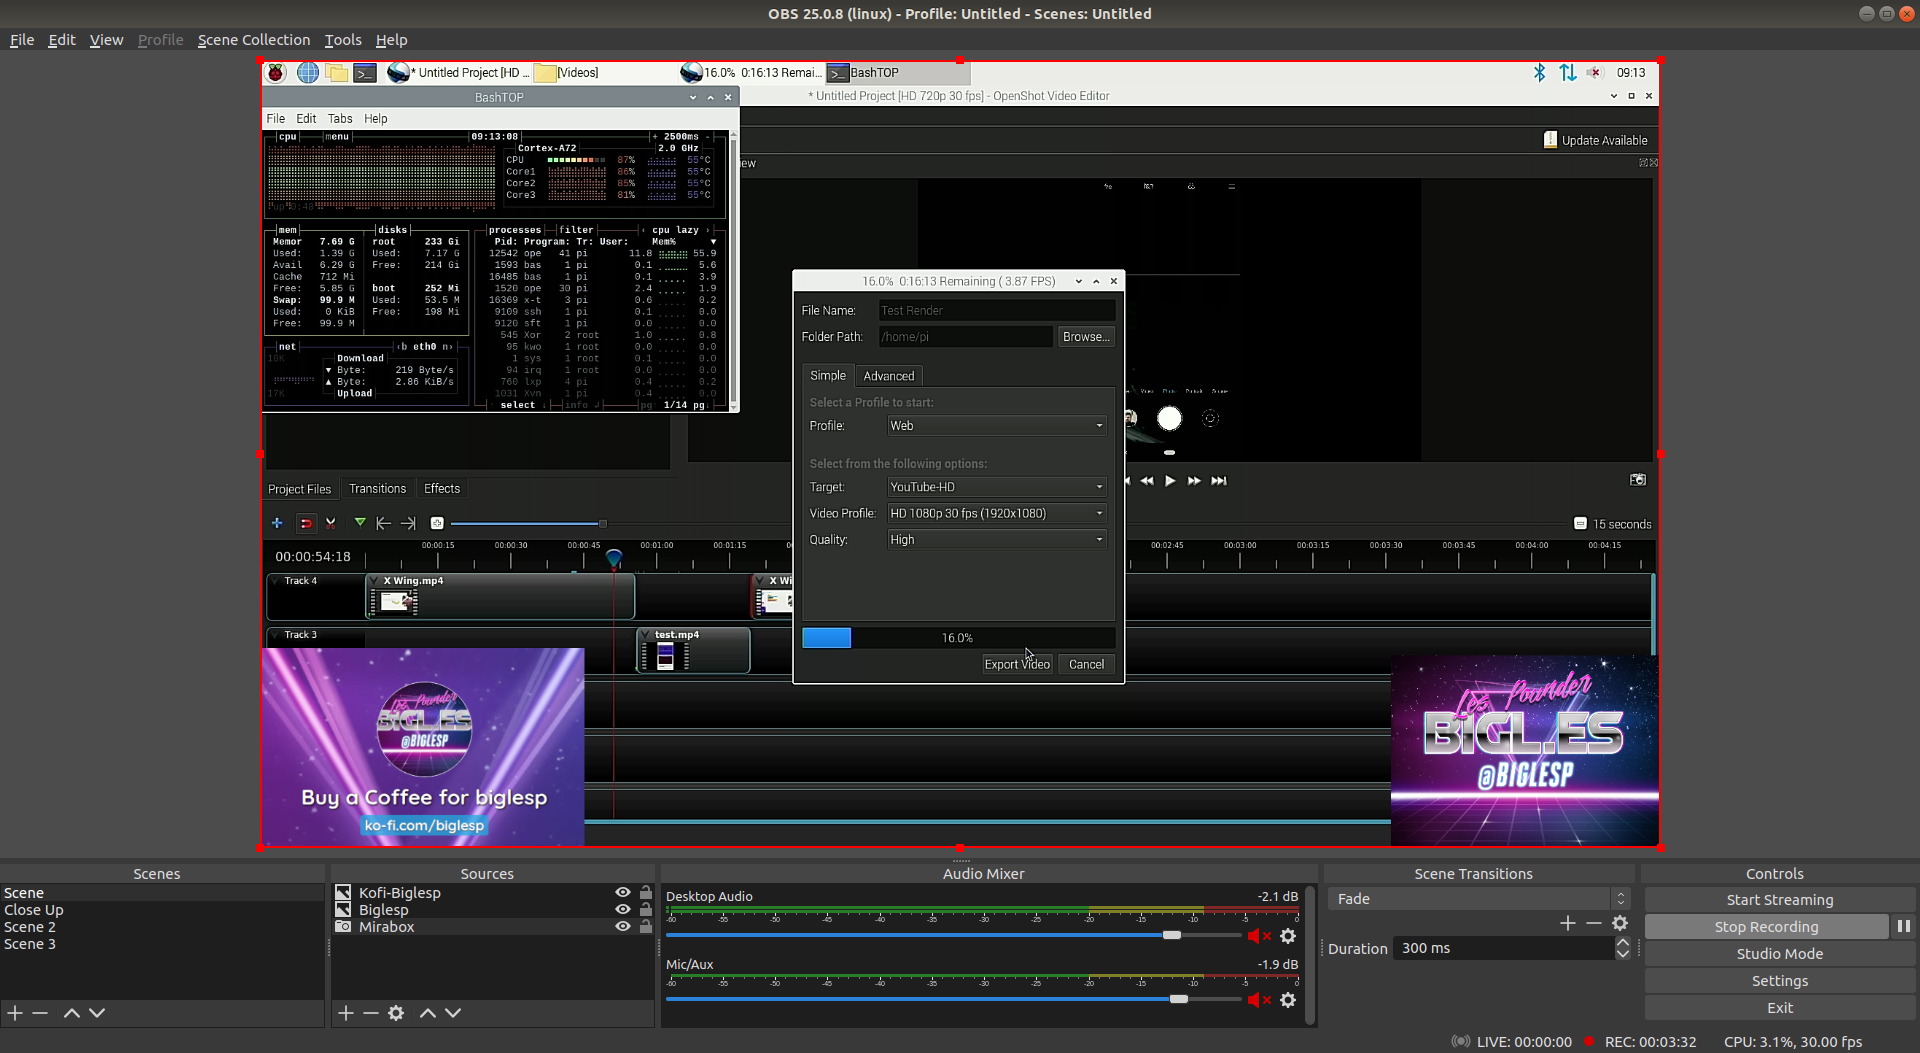
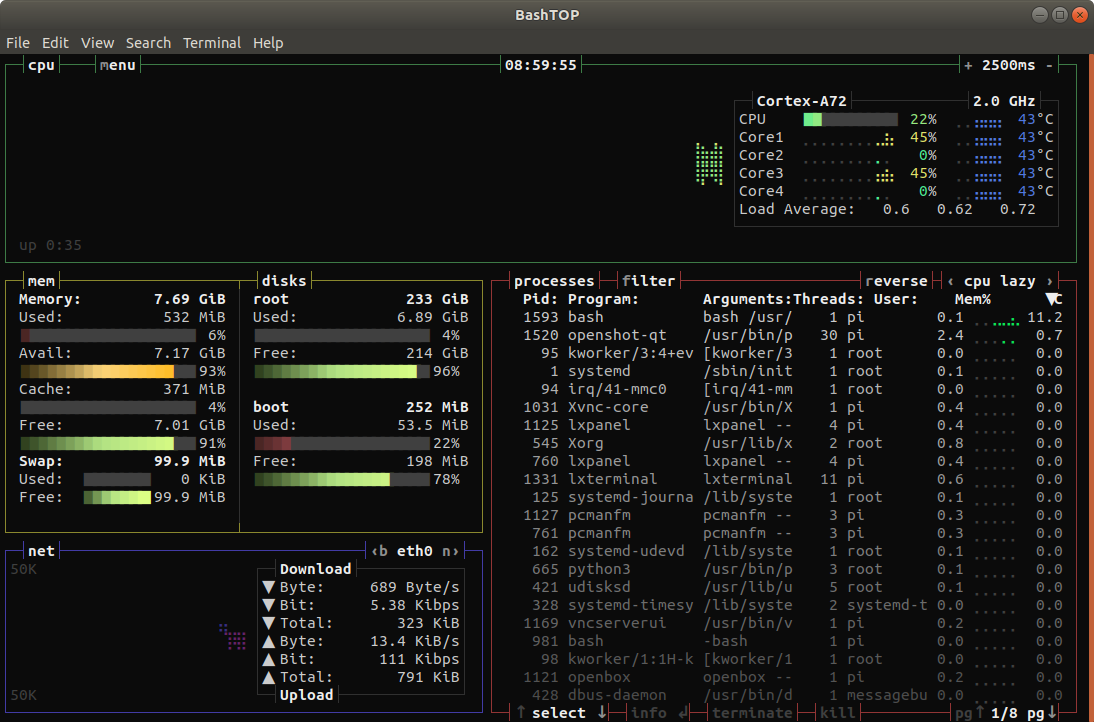
But more powerful tasks, video editing for example, are still slow, even with more RAM, overclocked CPU and a fast USB 3 drive. In a quick test to render a 1080p 30fps video it took well over 15 minutes to render a 2m 20s video which is good enough if you are not always editing video, but slow if you are hoping to use a Pi 4 for that task.
This is a desktop replacement for 80% of the tasks that we do. If we need a little more power then obviously we need a more powerful computer. But for quite a lot of us, this is plenty of power for our day to day tasks.