Tuesday Tooling: Node-RED
Want to write an IoT (Internet of Things) application without writing any code? Node-RED is just what you need!
So what is it?
Node-RED is a flow-based development tool for visual programming developed originally by IBM for wiring together hardware devices, APIs and online services as part of the Internet of Things.
Source : Wikipedia
Created by Nick O'Leary and Dave Conway-Jones, Node-RED is an awesome tool and anyone, yes anyone can make something with it. All you need is a web browser and a device with Node-RED. Node-RED uses JavaScript syntax, but we do not have to write any code, rather we link nodes together.
Node-RED can work with
- MQTT: Message Query Telemetry Transport, a brokered IoT service which can connect devices using a publish / subscribe model.
- TCP, UDP and HTTP
- Serial connections
- Telegram
- Local files
- Execute commands in a Linux terminal
- Parse RSS feeds
- OLED screen
- Nexmo telephony
- And lots more!
So how can I use it?
The way that most experience Node-RED is via the Raspberry Pi, as it comes pre-installed in Raspbian. If you would like to use it in the cloud then you can, more details on the Node-RED website.
Node-RED Terminology
As with any programming language, Node-RED has some terms that we need to understand.
- A flow is the sequence of code (algorithm) which makes our project.
- A node is a block in the flow, it works in the same manner as lines of code.
- The palette is where all of the nodes that we can use are located.
- The workspace is where nodes are connected to make a flow.
- Msg is an object which contains data, it can be a simple string, float, boolean (true / false) value. Or it can be a JSON object (similar to a Dictionary in Python)
- The first msg object that you will come across is msg.payload which will contain a message.
So show me something!
In my case I use Node-RED on a Raspberry Pi. To start Node-RED on my Pi I typed the following command in to a terminal.
node-red-start
To stop Node-RED.
node-red-stop
I also set Node-RED to start on boot by starting it as a background service on boot.
sudo systemctl enable nodered.service
This can be disabled using.
sudo systemctl disable nodered.service
You can read more about using Node-RED on Raspberry Pi here
Here is a simple Hello World. That uses two nodes.
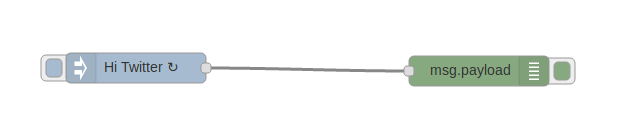
The inject node is used to insert data into a flow.
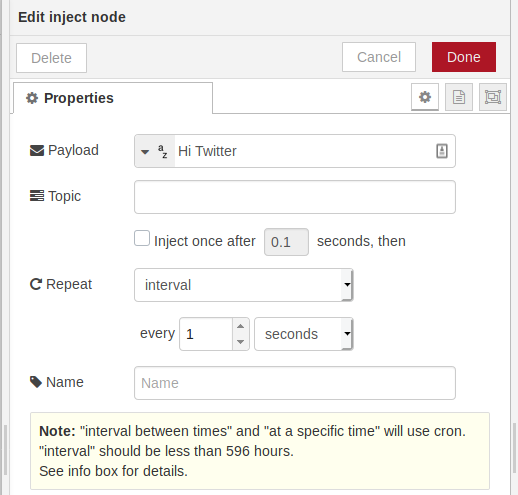
The configuration for the inject node is accessed by double clicking on the node.
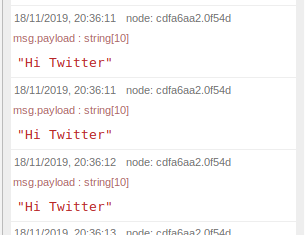
The debug node is used to show the output in the debug tab.
So is that it?
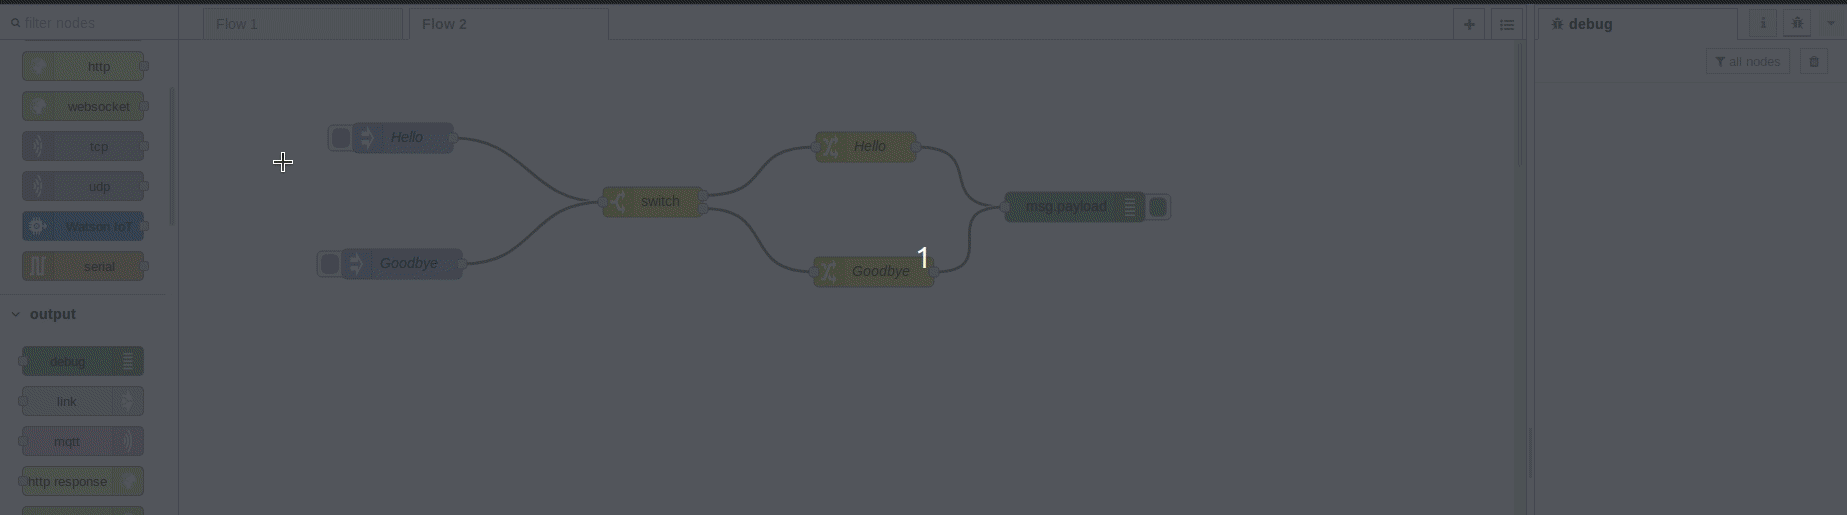
Here is another flow which uses a switch node, similar to a if...elseif...else conditional which will route the message based on the contents.
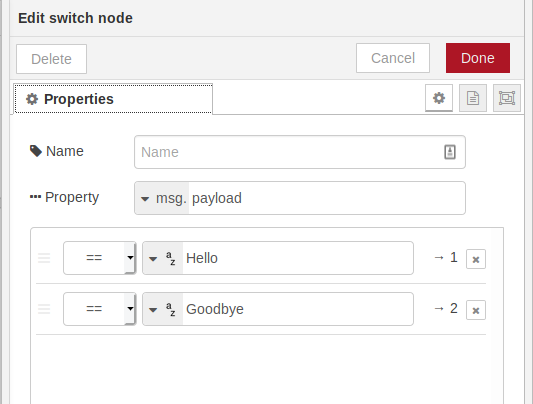
Switch nodes are powerful! They make decisions using logic!
Make an LED turn on and off!

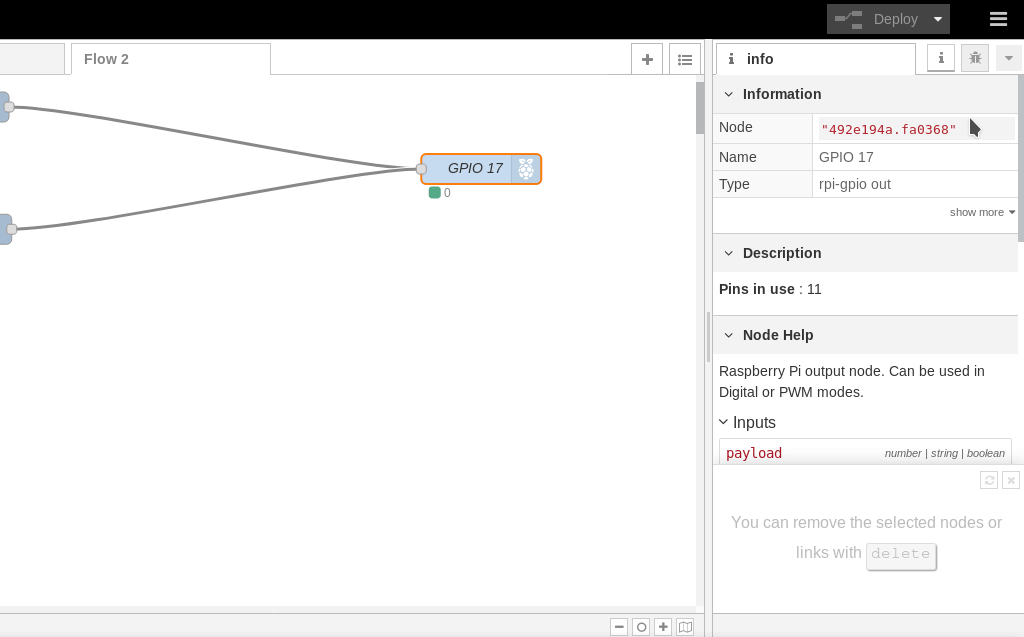
Yes you can control the GPIO of the Raspberry Pi!
The on / off inject nodes are used to send the number 1 (on) and 0 (off) directly to the rpi-gpio node.
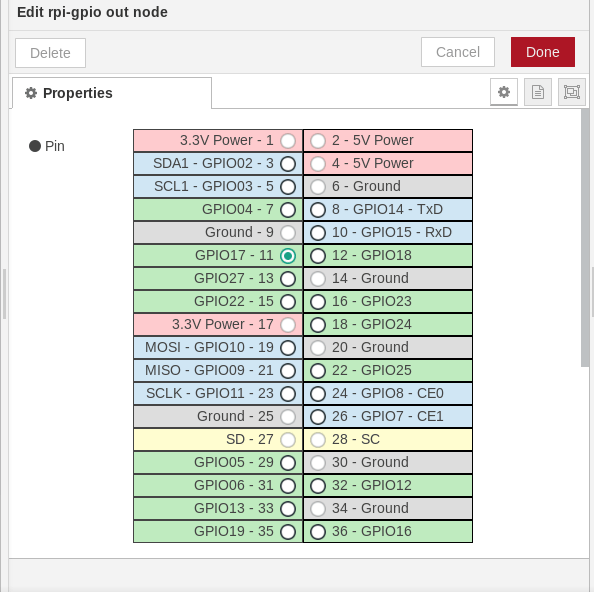
In this case the rpi-gpio node is configured to use GPIO 17 as an output. so if I can control an LED, then I can control ANYTHING!
So how can I add extra packages
Using the top right menu, look for Manage palette and in the new menu click on Install and search for a package. Here I install a GUI menu creator, the same as used in my Christmas tree project.
Sometimes the installation may fail, but fear not
So now go and have fun with Node-RED

Here are six further blog posts where I have used Node-RED for a project.