Using a Displaylink USB3 to HDMI display adaptor with Ubuntu 18.04
phew that title is long and boring...
Also from Maplin a USB3 display adapter to HDMI for £8 (was £65!) pic.twitter.com/UgNHY6CSUM
— biglesp (@biglesp) May 27, 2018
So I popped in to Maplin, the long standing UK electronics retailer which is sadly closing down, and something caught my eye. A Displaylink USB3 to HDMI Display Adaptor. Promising 1920x1080p over USB3 to a convenient HDMI connection. And the price... It was £65 but now it had been reduced to £8! So yeah I bought one thinking that I could use it with my Teclast F7 running Ubuntu 18.04.
So I eagerly got it home and set forth tinkering. Plugging it in and running dmesg in the Terminal told me that the device was recognised as a display adaptor but checking the monitor settings, well it should nothing!
To the Internet!
A little Googling and I found the Displaylink website and (takes a stiff drink) a driver for Ubuntu 16.04 and 17.10...but not 18.04. That's ok though as we can make it work!
So how can we get it to work?
Well dear reader, by now you are curious as to how I got it to work?
Ok, go here and download the driver ZIP archive. Extract the contents somewhere.
Open a Terminal and we install the Dynamic Kernel Module Support package (dkms) that will enable us to install the display driver.
sudo apt update && sudo apt install dkms
Now in the terminal go to where you extracted the files, you will see a file that has the extension .run this is an executable installer and to run it we need to type the following...
In this case the driver is at version 4.2.29, but for future versions you will need to change the version number to match the version you wish to install.
sudo ./displaylink-driver-4.2.29.run
So sit back and let it install! Oh and make sure that you attach a suitable monitor, power it up and ensure you have the right channel / source selected. /me whistles innocently...
Configure the display

Take note of the SWEEEET IMAX Star Wars The Force Awakens posters as my background..
With the adaptor installed we now need to go to the Settings menu, found in the top right of the screen, click on the little spanner icon to load the Settings menu.
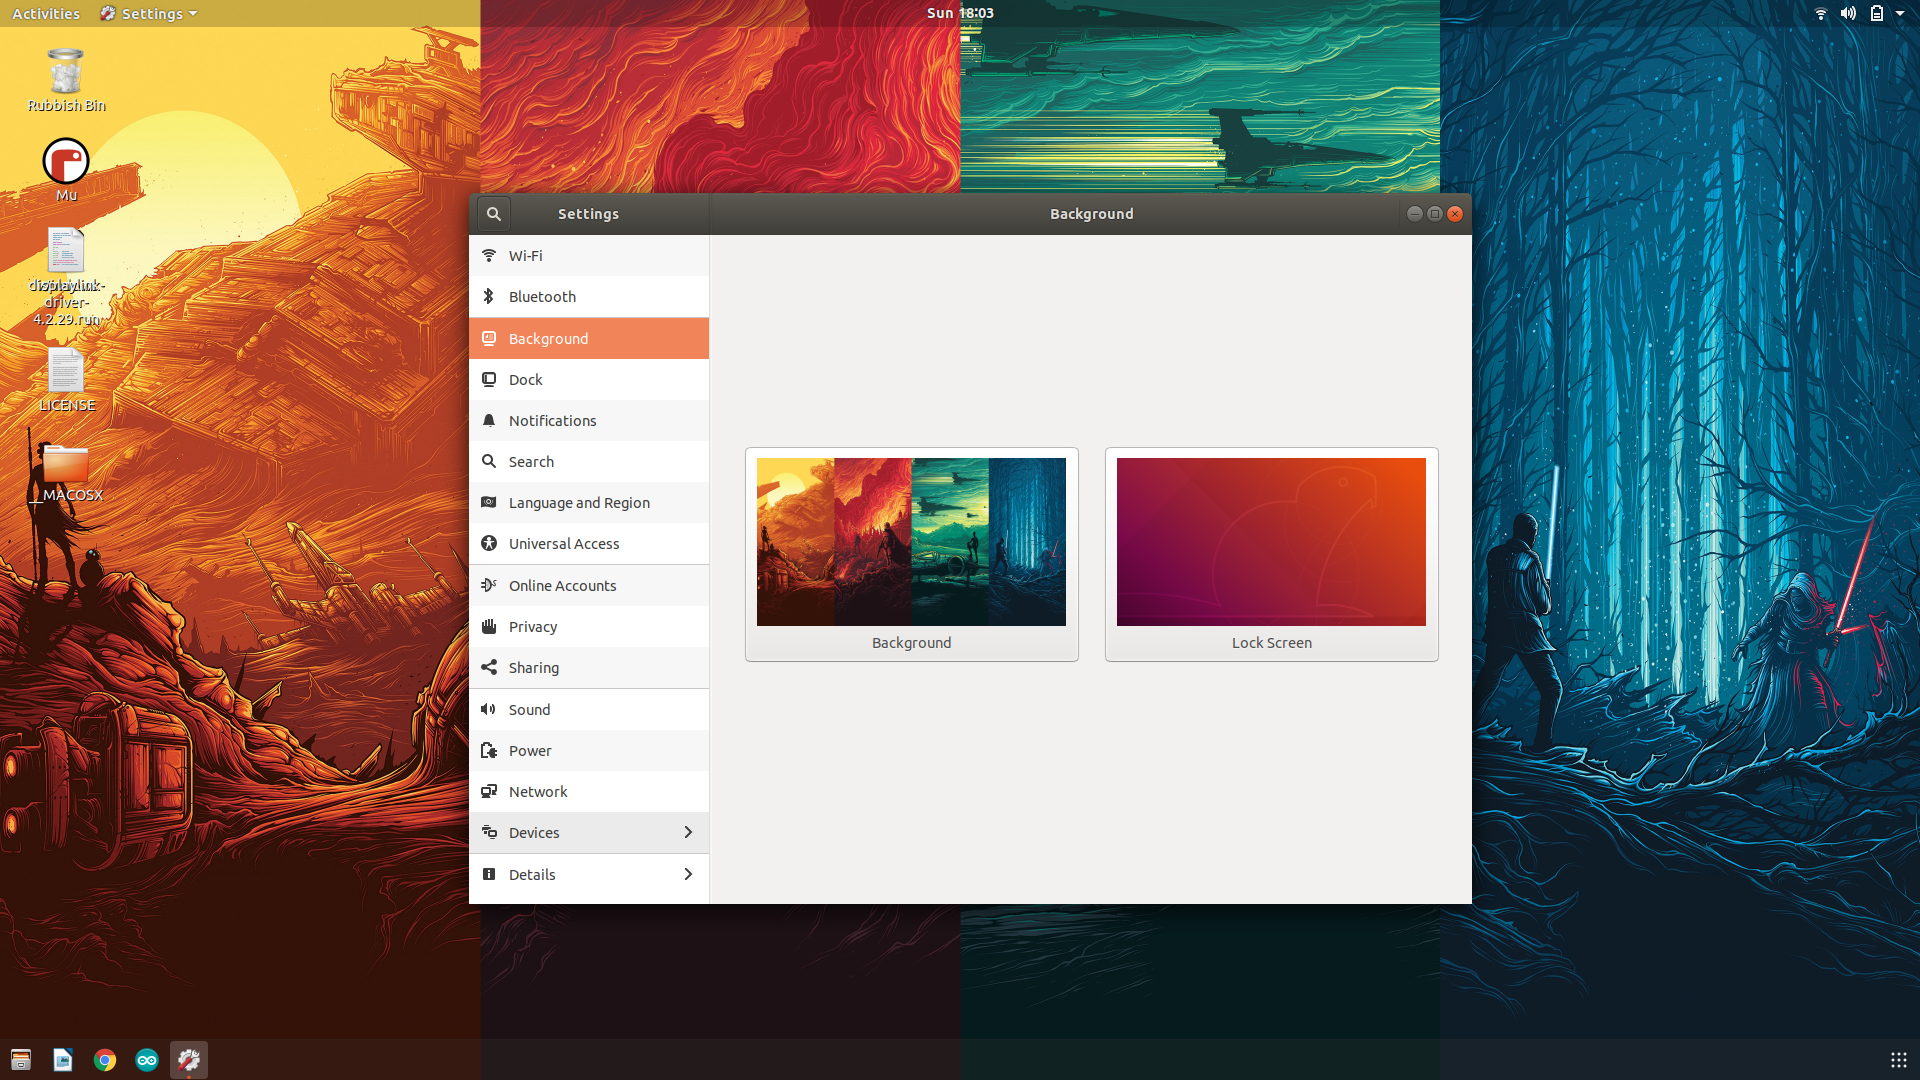
In the Settings menu look for Devices option and click on it.

We are now at the Screen Display menu and from here we can configure the external display.

We can Join Displays to extend our virtual desktop so that we have acres of space!
We can Mirror the display so that we can...mirror...the...displays...
Or we can go back to a Single Display as in the laptop monitors internal screen.
BONUS CONTENT!
Oh and I found out that by default the audio is output via the USB3 display adaptor, so if the screen has speakers, then all is good. If not, go to the Sound settings and change the default output device!
Conclusions!
Originally this was £65 and at that price I wouldn't touch something like this as I didn't know if it works with Ubuntu. But for £8 this is a gamble that paid off. Hopefully now I can drive **3** screens from the Teclast F7 (Internal, micro HDMI and the USB3 adaptor) all at 1080p...I need to test this soon! Oh and I need to test this with USB2 on my Thinkpad X220 as it might just offer a cheap way to add ANOTHER screen! All be it at a lower resolution as USB2 bandwidth is poor compared to USB3.Well getting that £8 Maplin USB3 display adapter to work with Ubuntu on my Teclast F7 didn't take too long! pic.twitter.com/0cYlvrOB3s
— biglesp (@biglesp) May 27, 2018
AWOOGA! Works with my Lenovo X220 USB2
Bingo! The £8 USB3 display adapter works with USB 2 at 1080p and no noticeable slowdowns! pic.twitter.com/sccBHpp1qy
— biglesp (@biglesp) May 27, 2018
Come here...THERE'S MORE!
Triple screen setup for my X220 using the £8 USB3 display adapter and an @adafruit 7" HDMI screen. pic.twitter.com/C5m9Ezvu0R
— biglesp (@biglesp) May 28, 2018
Sooo I connected the USB3 adaptor to my existing dual screen X220 setup and now I can have 3 x 1080p screens! In this quick test I hooked up an Adafruit 5 inch (800x480 resolution) screen and used it to display htop (running processes) in a terminal window.