DS18B20 Temperature Sensor With Python (Raspberry Pi)
Yesterday at Liverpool Makefest, which incidentally was great, I spoke to a young man who wanted to use the Raspberry Pi to control his petrol powered radio control car.
His first idea for a project was to monitor the temperature of the engine, so he purchased a DS18B20 sensor from ABX Labs (aka Electronics Sweetie Shop) but didn't know how to use the sensor, so this post was triggered by that conversation.
What will you need?
- A Raspberry Pi (any model)
- A DS18B20 Temperature Sensor
- A 4.7K Ohm Resistor (Colour Code: Yellow Purple Red Gold)
- A Breadboard
- 3 x Female to male jumper cables.
- 1 x Male to Male jumper cable (Optional, see the comment in the Getting Started paragraph below)
- An Internet connection for your Raspberry Pi
Getting Started
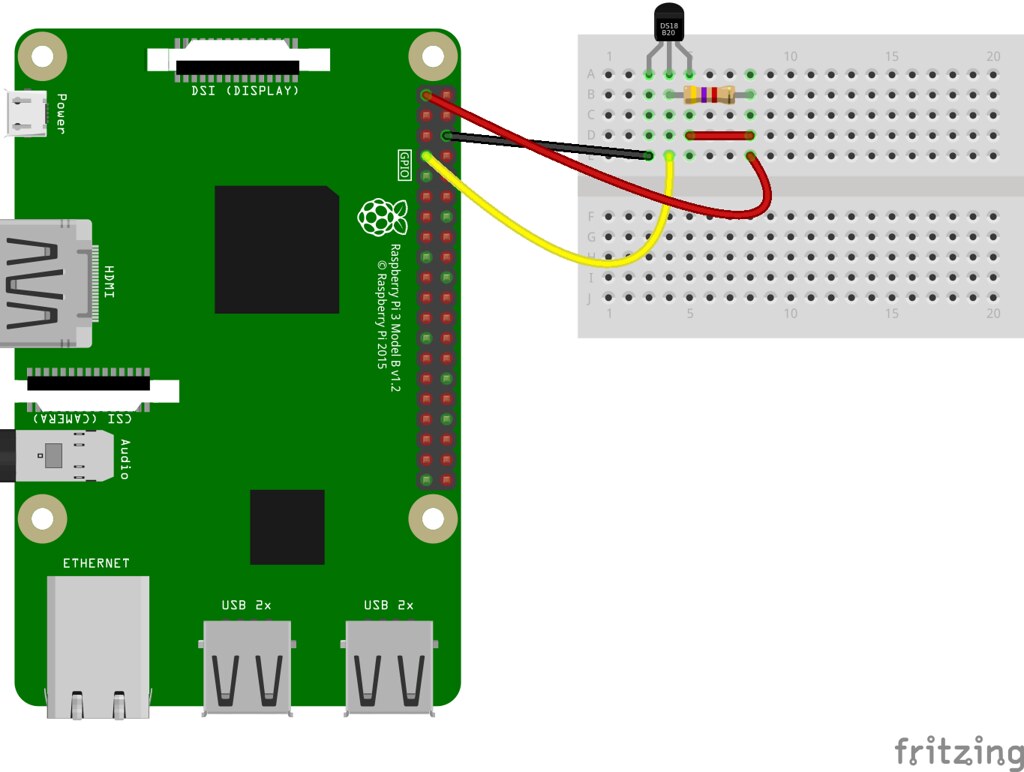
With your Raspberry Pi turned off, build the circuit as per this diagram.
The DS18B20 is placed into the breadboard so that the flat side faces you.
- The black jumper cable goes from GND, which is the third pin down on the right column to the first pin of the DS18B20.
- The yellow jumper cable goes from the fourth pin down on the left column and is connected to the middle pin of the DS18B20.
- The red jumper cable goes from the top left pin of the Raspberry Pi to the far right pin of the DS18B20.
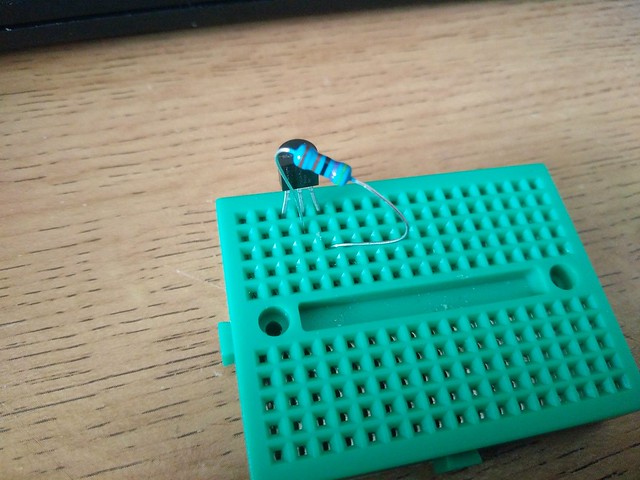
The Resistor connects the RIGHT pin to the MIDDLE pin. This is called a pull up resistor and is used to ensure that the middle pin is always on. In the diagram I had to use a spare red wire to show this connection. But in reality, using the resistor to make the connection, as per this photo is the best way.
Now attach your keyboard, mouse, HDMI and power to your Raspberry Pi and boot to the desktop.
Configuring the Raspberry Pi
We now need to take two steps to enable our DS18B20 for use.
Install the Python Library
Firstly we need to install a Python library, pre-written code that enables the Python code that we shall later write to talk to the sensor. The Python library is called w1thermsensor and to install it we need to use the Terminal. You can find the terminal icon in the top left of the screen. It looks like...

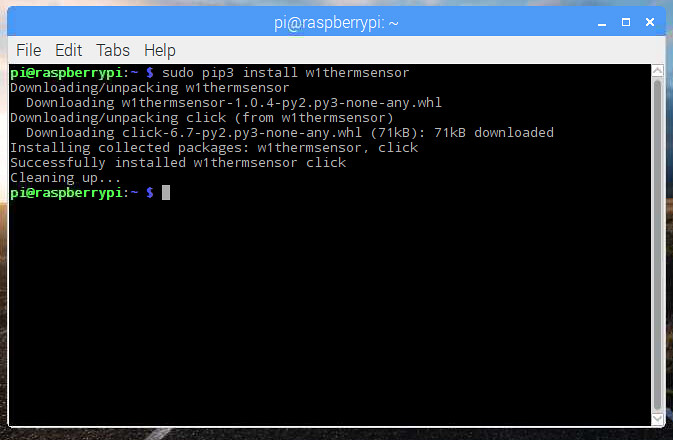
When the terminal opens, enter the following to install the library, just press ENTER to start.
sudo pip3 install w1thermsensor
That's it, now you can close the Terminal window.
Enable the Interface
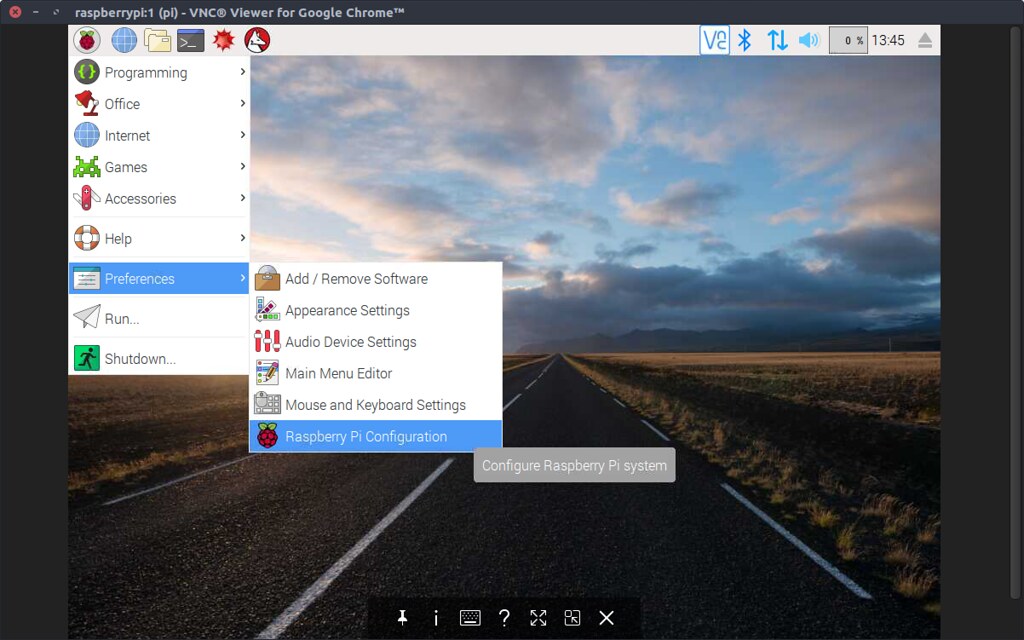
The DS18B20 uses a 1 wire serial interface, this is the middle pin of the sensor, that is connected to the Raspberry Pi via the yellow wire in the diagram. We need to tell our Raspberry Pi that we are using this pin and to do that we use the Raspberry Pi Configuration tool, found in the Preferences menu.
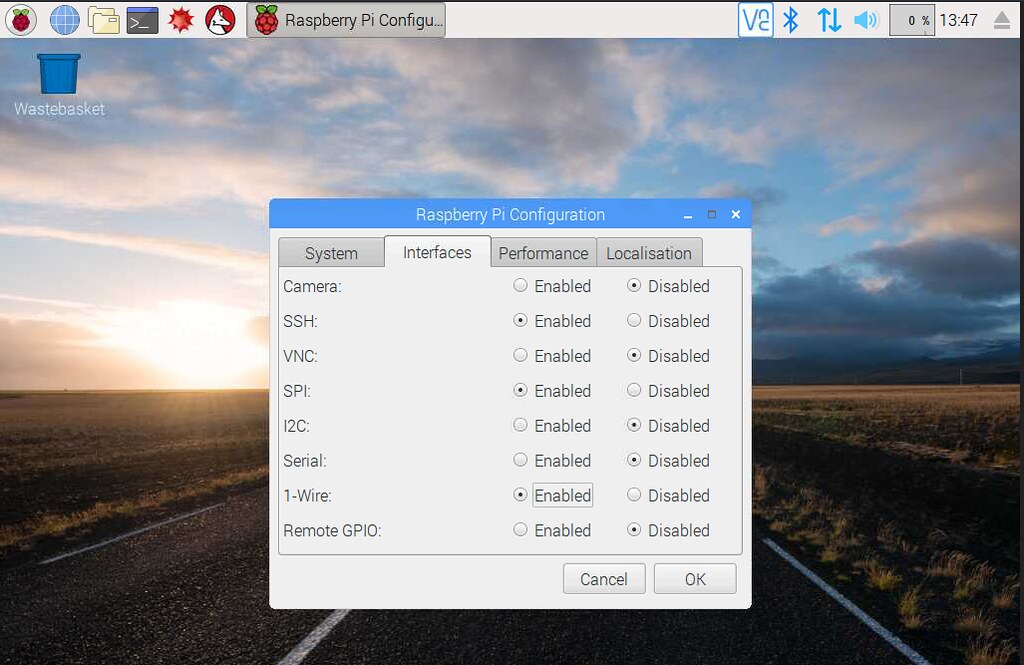
When it opens, click on the Interfaces tab and then click on Enable for the 1-Wire interface.
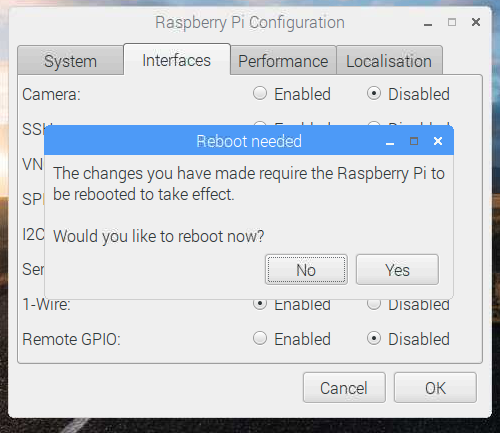
Now click on Ok and you will be asked to reboot, so go ahead and do that, and let the Raspberry Pi reboot to the desktop.
Writing the Python Code
Our project will gather the temperature from the DS18B20 sensor every one second and print it to the screen. The code will run forever.
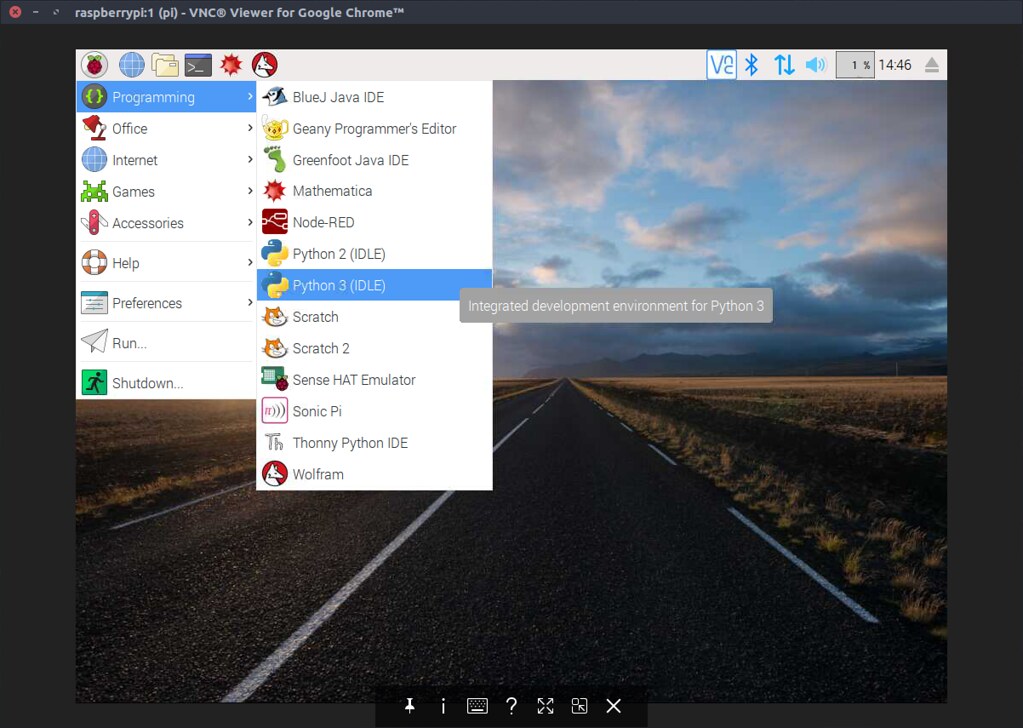
To write the code we shall use the Python 3 Editor found in the Programming menu.
When the application opens, click on File >> New to create a new blank document. In this new window, click on File >> Save and call the project temperature-sensor.py
Remember to save your work often!
Importing the libraries
The first step in any Python project that uses libraries is to import the libraries that we wish to use. In this case we import time to control how often the sensor data is collected, and we import w1thermsensor to enable our project to talk to the sensor.
So lets import the libraries.
import time
from w1thermsensor import W1ThermSensor
Sensor
Our next line is to create an object to store a connection the sensor. So rather than typing W1ThermSensor() everytime we want to use the sensor, we store the connection in an object called sensor.
sensor = W1ThermSensor()
Running in a loop
We'd like to get the temperature sensor data every second, and run forever. So let's use a while True loop to run the code inside of it forever.
while True:
Now the next lines of code are indented, this is how Python shows that this code belongs inside the loop that we have just created.
The first thing to do in our loop is to get the current temperature from the DS18B20 sensor, and then store it in a variable called temperature. Variables are boxes / containers into which we can store any data.
temperature = sensor.get_temperature()
Now that we have the data, lets print it to the screen using the print() function. But lets use the data in the form of a sentence that will tell the us what the temperature is in celsius. For this we use a little Python trick called string formatting, where we would like the temperature data to be printed in the sentence, we use an %s which will format the temperature data from an float (a number with a decimal place) to a string (text, characters that can be printed but not used in any mathematical equations)
print("The temperature is %s celsius" % temperature)
Our last line of Python code will tell the Raspberry Pi to wait for 1 second between taking a temperature reading.
time.sleep(1)
That's all of the code, so make sure that you save your work.
Complete Code Listing
Check that your code matches the code below before moving on.
import time
from w1thermsensor import W1ThermSensor
sensor = W1ThermSensor()

while True:
    temperature = sensor.get_temperature()
    print("The temperature is %s celsius" % temperature)
    time.sleep(1)
Run the Code!
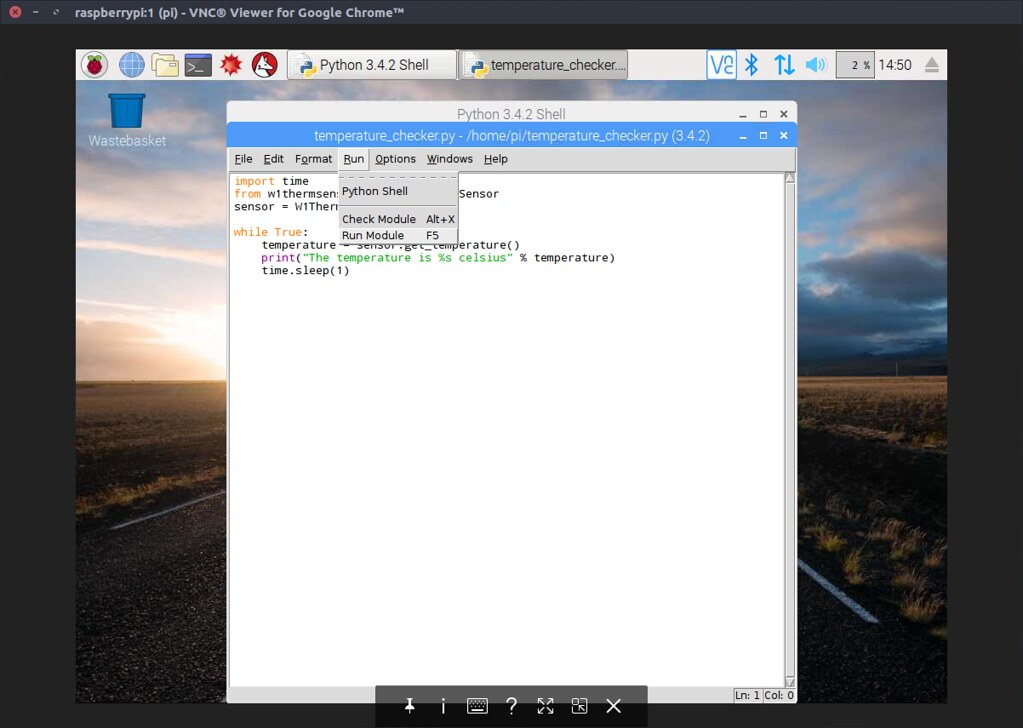
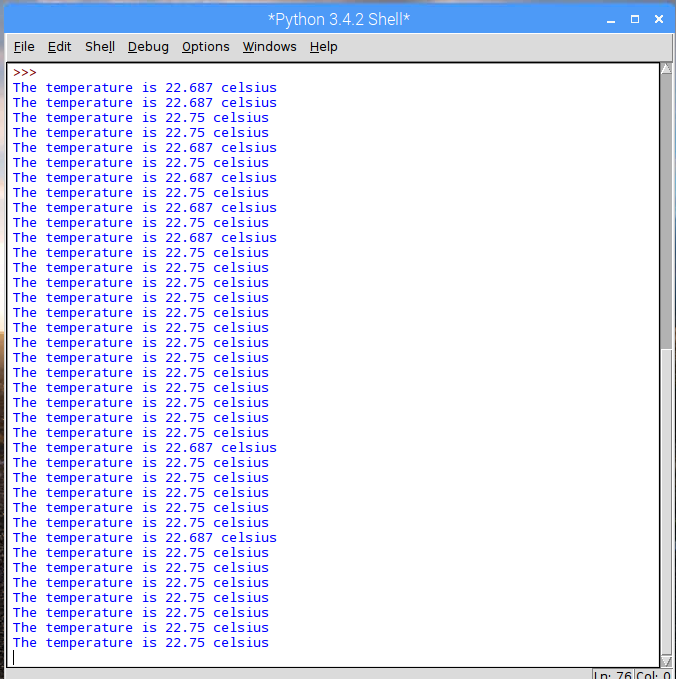
To run the code, click on Run >> Run Module and you will see the Python Shell window pop up and start displaying temperature data!