Friday Fun: MicroPython Weather Station
This week we build a weather station using the Wemos D1 Mini and MicroPython, but how do we show the weather? Well with neopixels of course!
Being British I have two go to conversations in taxis. The first is "Are you busy today?" and the second is "Well the weather is hot/cold/windy/wet/snowy isn't it?" < sarcasm >Both of these conversations taxi drivers love and my questions are totally unique.</ sarcasm >
So what are we building?
I wonder what the weather is like? pic.twitter.com/ZRnCcTNrbP
— biglesp (@biglesp) April 12, 2019
Our project is to build an Internet of Things (IoT) weather station which will get the local weather from an online service and display an icon on a screen to advise us on the weather. This is triggered by a capacitive touch button, and displayed on an 8x8 LED matrix.
So what equipment do we need?
- A Wemos D1 Mini (About £1.90 from Aliexpress)
- A Unicorn HAT from Pimoroni or an 8x8 WS2812 matrix
- Capacitive touch button
- Something to contain the project, I used a Poundland light up cloud
- 2 x Wago 221 connectors
- Micro USB breakout
- Micro USB lead to cut up
- Soldering equipment
- Hookup wire
- A Micro USB power supply, 5V 2A is best
- A computer
- All of the code, images and the spreadsheets used for the icons are available via my Github page
Getting our computer setup
Flashing the Wemos D1 Mini
The Wemos D1 Mini does not come with MicroPython pre-installed, so we need to use a tool to install it. In an earlier blog post I covered Vanguard created by Cefn Hoile. This tool makes flashing MicroPython on to an ESP8266 (which the Wemos D1 Mini is) really easy. Take a look at the blog post for full details, in this tutorial we shall do the bare minimum to get MicroPython installed.
To install Vanguard
Open a terminal / command prompt and type
Linux / Mac
pip3 install vgkits-vanguard
Windows
pip3.exe install vgkits-vanguard
To flash MicroPython on to the Wemos D1 Mini
Connect your Wemos D1 Mini to your computer using a known good quality USB cable.
In the terminal / command line type the following to flash MicroPython on to the board.
vanguard brainwash micropython
Wait for the brainwash to complete and when it does so, control will be returned to you. To test that it is working type the following to connect to an interactive console that will control your Wemos D1 Mini.
vanguard shell
In the console, you may need to press Enter to get a cursor. Then type in a little Python to check that it is working.
for i in range(10):
    print("Visit https://bigl.es for hacks")
If you can see it, then it is working!
To exit the console press CTRL + ] and you can now close the terminal / command prompt.
Mu
For this project we shall be using Mu, an easy to use Python editor created by my friend Nicholas Tollervey. In fact we need to use the very latest version of Mu, called an Alpha release in order to use it with our Wemos D1 Mini.

Download the latest Alpha release from the Mu website.
Install Mu and when ready open it.
Hey fellow Linux users! At the time of writing there is no easy download and install version of Mu Alpha. So we need to do a little more work.
Install the current stable version of Musudo pip3 install mu-editorNow download the latest Alpha of Mu from Github and extract the ZIP into a new folder in your home directory. But don't call it
muas you have that already. I call minemu-alpha
To run Mu Alpha we need to run the following command from the terminal./mu-alpha/mu/run.pyThis will load the alpha version of Mu with support for ESP devices.
Writing the code
With Mu open and our Wemos D1 Mini attached to the computer we should be prompted to change mode. Mu is a modal editor and that means it can switch modes depending on the device we are working on, or the choice of the user. If you are asked to confirm using ESP mode, hit Ok / Yes and you are good to carry on.
If you have not been asked to change mode, then you can do it yourself by clicking on Mode and selecting ESP MicroPython and clicking Ok.
In the bottom right of the screen you should now see Esp, this means we are in ESP MicroPython mode.
We start our code with a five imports. These enable us to use libraries of pre-written Python code in our project.
The first import is for the Pin class in the machine library, and this enables us to use the physical GPIO pins on the Wemos D1 Mini. The second import is for the sleep function found in the time library and this enables us to control the pace of our code. Next we import neopixel to work with the neopixel LEDs on our Unicorn HAT. Then we import network to enable our Wemos D1 Mini to connect to WiFi. Lastly we import urequests which is MicroPython's version of requests and that enables us to use and interact with websites and remote data.
from machine import Pin
from time import sleep
import neopixel
import network
import urequests
The next step is to create an object called pixels and in there we create a connection from the Wemos D1 Mini to the Unicorn HAT.
Here we tell the board that our Unicorn HAT will be connected to GPIO14, which is marked D5 on the board. It also instructs the board that GPIO14 is an output pin. Then we tell the neopixel library how many neopixels there are on the Unicorn HAT, which is 64 as it is an 8 x 8 grid.
pixels = neopixel.NeoPixel(Pin(14, Pin.OUT), 64)
To create the weather icons I had to be inventive and that meant I had to think about the problem. How could I work out which LED to light up to create a simple 8-bit icon?
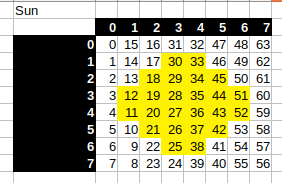
I started with an 8x8 grid drawn in a spreadsheet. Then I coloured in the sections the colour that I wished to see on the Unicorn HAT. So for the sun I used yellow. You will see the numbers inside each cell. These are the numbers from 0 to 63 and their direction around the Unicorn HAT. So I knew that by using these numbers I could make the icon for the Unicorn HAT.
So for each main weather condition available on open Weather Map, by main I mean the coarse weather type Rain, Snow, Clear, Cloudy, Thunderstorm. I created lists that would store the LEDs that I wish to light up.
Please note that each list is one really long line, despite what the code formatting looks like on this blog.
So for Sun
sun = [11,12,18,19,20,21,25,26,27,28,29,30,33,34,35,36,37,38,42,43,44,45,51,52]
For cloudy
cloudy = [4,5,6,9,10,11,12,19,20,21,22,25,26,27,28,29,30,33,34,35,36,37,38,41,42,43,44,52,53,54,57,58,59]
For rain there are two lists, for the rain cloud, and the rain itself.
rain_cloud = [4,5,6,10,11,12,19,20,22,26,27,28,29,30,33,34,35,36,38,42,43,44,52,54,57,58,59]
rain = [7,9,21,23,25,37,39,41,53]
For lightning / thunder there are two lists. For the cloud and the lightning.
lightning_cloud = [4,5,6,9,10,11,12,19,21,25,27,28,29,30,33,34,35,36,37,38,42,44,52,54,57,58,59]
lightning = [8,20,22,26,39,41,43,53]
For snow and ice
snow_ice = [1,4,7,9,11,13,19,20,21,24,25,26,27,28,29,30,31,32,33,34,35,36,37,38,39,42,43,44,50,52,54,56,59,62]
I also added three extra lists to create a pretty green grass, blue sky, and sun scene. The intention is to use that as an error alert. But not implemented in this project.
clear_sky = [2,3,4,5,10,11,12,13,16,17,18,19,20,21,26,27,28,29,30,31,32,33,34,35,36,37,42,43,44,45,46,47,48,49,50,51,52,53,58,59,60,61,62,63]
clear_sun = [0,1,14,15]
clear_gnd = [6,7,8,9,22,23,24,25,38,39,40,41,54,55,56,57]
Connecting to WiFi
What makes the Wemos D1 Mini so much fun is that we can connect it to WiFi really easily. Using the Network library we create an object called sta and use that to start a connection. We then turn on the WiFi chip. Then we connect to our WiFi using the SSID and Password for our network. Lastly we print the status of our connection.
#Setup WiFi
sta = network.WLAN(network.STA_IF)
sta.active(True)
sta.connect("YOUR WIFI SSID", "WiFi Password")
print(sta.isconnected())
Setting up the capacitive touch button
Our capacitive touch button is connected to GPIO12 which is D6 on the Wemos D1 Mini. We create an object called button and tell the board that it is on GPIO 12 and that it is an input.
#setup the button
button = Pin(12, Pin.IN)
Creating a delay
To give the user time to see the image on the Unicorn HAT we need to create a universal delay variable. This means if we need to tweak the timing we can do it from one place rather than edit the same line 6/7 times.
#Delay for showing image
delay = 10
Clearing the Unicorn HAT
Each time we light up the Unicorn HAT we need to ensure that the screen is cleared from the last icon otherwise the two mix up and it looks a bit ghastly. Using a function called clear() means we can just call the function and have it perform the task in less than a second. The function works in a for loop that will loop round 64 times, the same as the number of LEDs on the Unicorn HAT. Each time the for loop goes round the value of i increases by 1. So starting at 0 and ending at 63 each LED is set to 0x00, 0x00, 0x00 which means turn off that pixel. The we write the changes to the LED to trigger them to turn off.
#Clear the screen
def clear():
    for i in range(64):
        pixels[i] = (0x00, 0x00, 0x00)
        pixels.write()
The main body of code
In order to constantly run our code we need to start a loop and the best one for this task is a while True: loop. The first task that the loop has is to print the current status of the button. If it has not been pressed then it will print 0 to the shell.
while True:
    print(button.value())
But now we ask Python to check "Has the button been pressed?" This checks the status (value) and if it matches 1 then our code is triggered.
if button.value() == 1:
With the button pressed our code springs into action and the first task is to get the weather data from Open Weather Map. For this we create a dictionary called r and in there we get and store the weather data. But make sure to change << WHERE DO YOU LIVE>>> to match your town / city and country. For example I used Blackpool, UK for my test. You will also need to get an API KEY and change ``=API KEY``` to your private key.
r = urequests.get("http://api.openweathermap.org/data/2.5/weather?q=<<WHERE DO YOU LIVE?>>&appid=API KEY").json()
API Key?
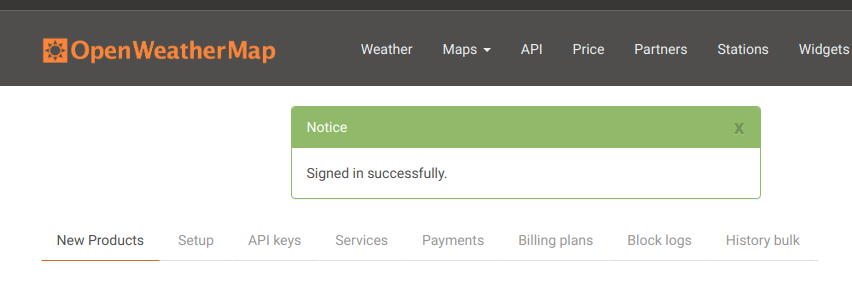
To use Open Weather Map you need an API key, which is basically a private key that enables you to use their services. Each key is unique and can be traced to the creator. To get an API key you will need to visit Open Weather Map and click on Sign Up and follow the account creation process.
Then you will need to sign in and click on API keys from the menu.
In the next screen give your key a name, something memorable that links to the project. Then click Generate to create the key. Copy the key into Mu.
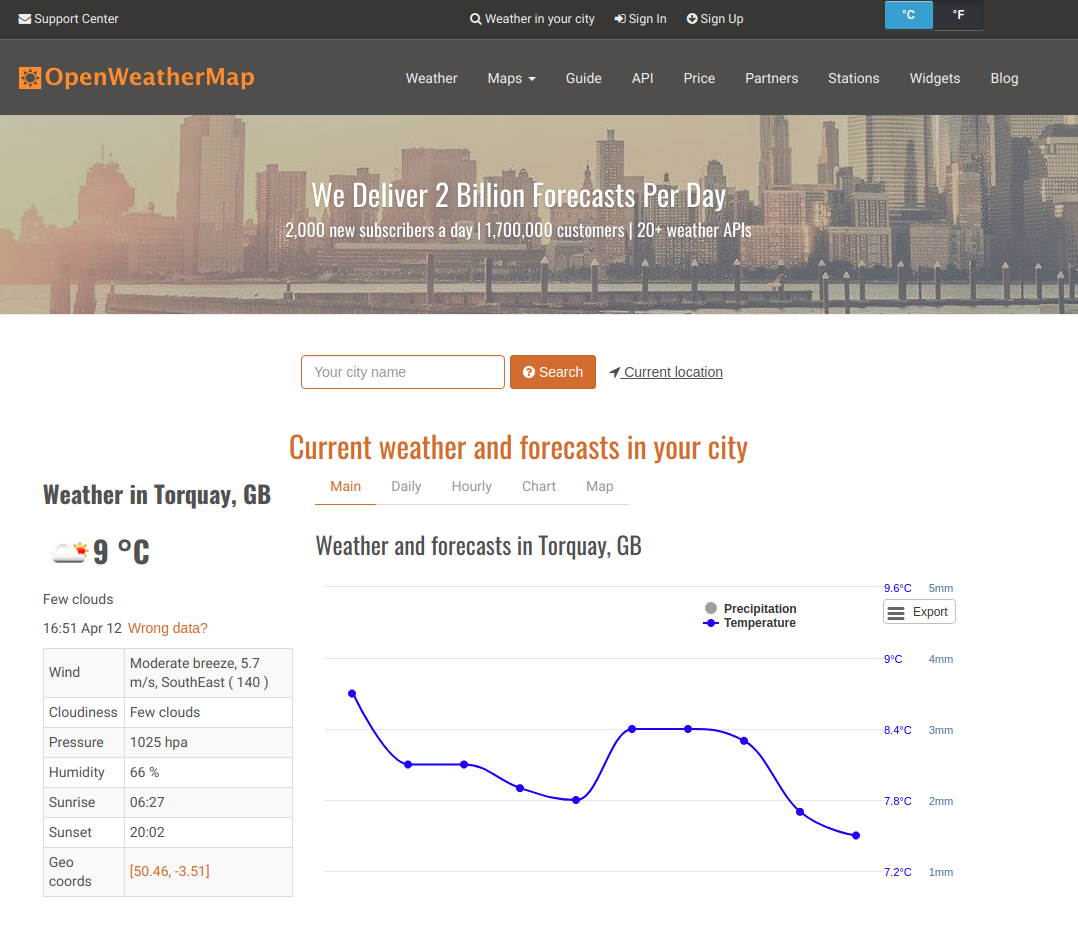

So now that we have the weather data, what do we do with it? Well the r dictionary contains lots of data. Temperatures, humidity, wind speed, visibility etc. But we are just interested in the main heading Sun, Rain, Snow etc. So we create a new variable called weather and in there we store the main heading from the returned data, which can be found using three keys to return the value of "main". These keys are ["weather"][0]["main"] and by using all three we return the specific data that we need. We then print it to the Python shell for debug.
        weather = r["weather"][0]["main"]
        print(weather)
Here start a series of conditional tests that will check the value stored in weather against the values Clear, Clouds, Rain, Thunderstorm, Snow Whenever a match is made, the corresponding code is activated. Lets use "Clear" as an example. If the weather is clear then we start a for loop that will iterate over the values in the sun list that we created earlier. This means that each LED (pixel) numbered will be set to a certain colour, 0x4c, 0x99, 0x00 which is yellow for the Unicorn HAT LEDs. We then write the changes to the Unicorn HAT in order for the LEDs to turn on with that colour. Then we sleep using the delay variable (set to 10 seconds by default) before we finally call the clear() function to turn off all the LEDs.
        if weather == "Clear":
            for values in sun:
                pixels[values] = (0x4c, 0x99, 0x00)
                pixels.write()
            sleep(delay)
            clear()
Where did I get the colour code info from?
When working with Neopixels we typically see(255,0,0)which are RGB (Red, Green, Blue) colour values and by mixing these values we can make any colour we wish. For the MicroPython Neopixels we use Hex values. So to recreate the previous value in hex we use0xff, 0x00, 0x00but how can we learn this? Well I use this reference to convert between the values and then I just need to remember to add0xbefore each value.
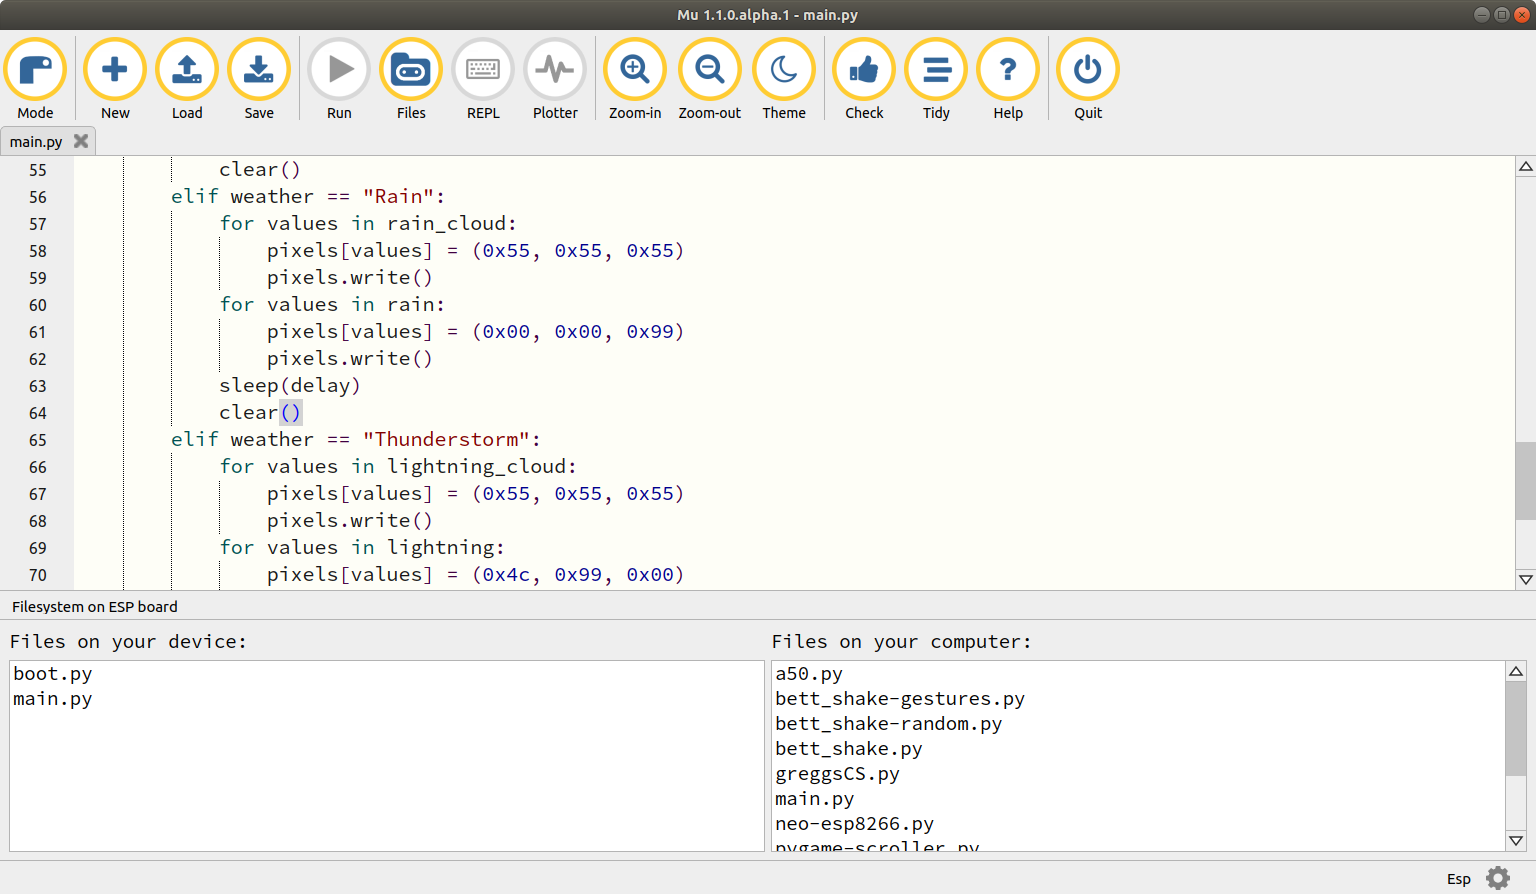
Here is the rest of the code for the other weather conditions. Note that for rain and thunderstorm there are two for loops, one after the other as we need to add rain / lightning to the cloud. The last line of code in the project tells the board to wait for one second before repeating the loop.
        elif weather == "Clouds":
            for values in cloudy:
                pixels[values] = (0x99, 0x99, 0x99)
                pixels.write()
            sleep(delay)
            clear()
        elif weather == "Rain":
            for values in rain_cloud:
                pixels[values] = (0x55, 0x55, 0x55)
                pixels.write()
            for values in rain:
                pixels[values] = (0x00, 0x00, 0x99)
                pixels.write()
            sleep(delay)
            clear()
        elif weather == "Thunderstorm":
            for values in lightning_cloud:
                pixels[values] = (0x55, 0x55, 0x55)
                pixels.write()
            for values in lightning:
                pixels[values] = (0x4c, 0x99, 0x00)
                pixels.write()
            sleep(delay)
            clear()
        elif weather == "Snow":
            for values in snow_ice:
                pixels[values] = (0x00, 0x00, 0x99)
                pixels.write()
            sleep(delay)
            clear()
    sleep(1)
With the code completed, click on Save and call the file main.py this is very important as that is what the Wemos will look for on boot.
Copy the code to your Wemos D1 Mini
Now this bit is something new for most Mu users. With the main.py code saved to our computer, we now need to flash it onto the Wemos. To do this click on Files. make sure that your Wemos D1 Mini is connected to your computer.
From the right hand side pane, find the main.py file and drag it to the left pane which represents your Wemos D1 Mini. Drop the file and it will copy across. That's it! Your code is on the Wemos D1 Mini and now we can build the circuit for the hardware!
The hardware build

For my build I provided power via a micro USB breakout.

This breakout enabled me to use standard micro USB power supplies, but breakout the 5V and GND connection to two Wago connectors which provided a common 5V and GND connection.

So then I could cut and strip the wires of a micro USB lead, and connect the 5V (RED) and GND (BLACK) to the Wago connectors, and then insert the Micro USB into the Wemos D1 Mini.

The Unicorn HAT has three pins marked VCC, DIN and GND. Solder wires from VCC to the 5V power supply (Wago connector for me) and GND to your common GND. The DIN pin connects to the Wemos D1 Mini GPIO05 pin.

To add a little mechanical strength I superglued the wires down and used a little tape.
The capacitive touch button is powered from the 3v3 pin of the Wemos D1 Mini, so solder wires from the buttons VCC and GND to 3v3 and GND accordingly. The output pin of the button goes to GPIO6 of the Wemos D1 Mini.

Here is a quick reference for the wiring.
Testing
Wemos D1 Mini retrieving weather day from @OpenWeatherMap and using @pimoroni Unicorn HAT to display icons for weather conditions. Created using #MicroPython #Mu and the new ESP mode.
— biglesp (@biglesp) April 12, 2019
Video contains a great fail too! #fridayfun pic.twitter.com/zw3pu2YRlb
Before stuffing it all in a box TEST IT!! Does it work? Are you happy?
Ok now stuff it in the box!
I made sure that my button worked through the plastic case, but I needed to press the button for 2 seconds to make it work. To hold the button in place I used blu tack. The Unicorn HAT is held in place by lots of wire!I wonder what the weather is like? pic.twitter.com/ZRnCcTNrbP
— biglesp (@biglesp) April 12, 2019
So there we have it!
We've built a weather station in less than 80 lines of code and managed to reuse some old boards along the way.
Happy Hacking!