Friday Fun: Python Pollen Projects
Since I wrote this post, I've written a new post that ditches GeoIP, as a few readers had issues. In the new post we use a proper location tool based on Open Street Map.
Itchy eyes, runny nose, feel like a snot monster? Ahhh you must have pollen allergies! Pollen is an allergen, an irritant that gets up our nose and our body reacts in many different ways. What if we could create our own pollen early warning system, say with some Python 3 code and oh lets have the code work out where we are in the world using our IP address? Fear not! We can do this!
Creating our own desktop pollen notification app

For this project you will need
- A computer running Ubuntu or another Linux distro
- Windows users, I've got your back! I've added a basic Windows 10 version. Instructions at the bottom of the post.
- Python 3 installed
- pip for Python 3 installed
- Mu installed on your machine
- In a terminal type
sudo pip3 install mu-editorto install Mu.
- In a terminal type
Install the Python libraries
Open a terminal and using pip install the libraries for
- pypollen - A library that will find the pollen levels for a specific location.
- notify2 - A library that is used on Linux machines to create pop up notifications with Python.
To install type the following in to the terminal and press ENTER.
sudo pip3 install pypollen notify2
In a few moments the libraries will be installed and ready for use.
So now let us open Mu and start writing some Python code.
Coding the project
As ever, we start the Python code by importing a series of libraries, pre-written modules of code to enable us to use extra functionality, such as pollen data in our project.
The imports we need to make are
requests = To use data from the web.
json = (JavaScript Object Notation) is a lightweight data-interchange format.
os = To work with the underlying operating system.
pypollen = Specifically the Pollen function used to get pollen count data.
notify2 = To create pop up messages in the operating system.
time = To control the pace of the code
Add the following code into Mu.
import requests,
import json
import os
from pypollen import Pollen
import notify2
import time
The next step to take is to create a variable called cwd which will store the Current Working Directory in other words, where we are running this code from. For this we use the getcwd() function from the os library. But why? Well we come to that in a moment.
Add the following code to Mu.
cwd = os.getcwd()
On to the images that we shall use to decorate the pop up box. All of these images were found from openclipart.org and they are free of any copyright so can be used in any project. According to the UK Met Office there are four reportable pollen count levels. Very High, High, Moderate and Low. So we shall create four variables named as so, and for each variable we shall use the cwd and attach it to path for our images, which are stored in a directory called Images. This means we have a full absolute file path that Python can easily follow to grab the images.
Add the following code to Mu.
VeryHigh = cwd+"/Images/VeryHighPollen.png"
High = cwd+"/Images/HighPollen.png"
Moderate = cwd+"/Images/ModeratePollen.png"
Low = cwd+"/Images/LowPollen.png"
Now lets go get some data! For this we shall use a while True loop to constantly check for pollen data. But first we need to know where we are! For this we shall use a little Geo IP, working out our location based on our IP address. So lets start by setting up the URL that will tell us where we are.
In Mu enter the following code.
while True:
    send_url = "http://ipinfo.io/json"
Next we create an object that will store the response and data from the URL that we contact.
r = requests.get(send_url)
Now we have a three step process, sure we could reduce the number of steps, but then we would lose some of the clarity that each step deserves. So use these as learning steps.
We create an object called location and in there we store the retrieved data from the ipinfo.io website which provides our location based on IP. This data is in json format, so we use the json.loads function to read and interpret the information.
location = json.loads(r.text)
The next step with location is to extract the latitude and longitude data from the data we have downloaded. So for that we need to look in location which is now a dictionary (data storage that uses a key to retrieve a value) and in the dictionary we shall look for the key loc which will then return the location data we need.
location = location["loc"]
Final step in this three step process with location we have the location data, saved as a long string separated by a single comma. But we need to extract the longitude and latitude into separate items. So we shall split the string using the comma as the point at which the split occurs. This will then convert the object location into a list containing two items.
location = location.split(",")
So we have the location data, lets use the data from location and create two variables called lat and lon and inside each variable we shall store the value that we retrieve from the location list. To retrieve an item from the list, we first need to know it's index number. In this case we know that that latitude data is in position 0 (first item in the list) and the longitude data is in position 2 (second item in the list.)
    lat = location[0]
    lon = location[1]
How do we know this? Well the GeoIP data we obtained is formatted so that the latitude is the first piece of data stored in the
locportion of the dictionary. So when we split this into a list, the latitude data was placed into position 0 of the list.
So why did we go through all this GeoIP stuff? Well the pypollen API needs our latitude and longitude to search for the pollen levels in our area and so now we create a variable called pollen_status and in there we store the output of checking the pollen level at our location.
pollen_status = Pollen(lat, lon).pollencount
Now we have the data, lets start building the way in which we shall be notified. For this we use notify2 and first we need to initialise it and give our "application" a name.
notify2.init("Pollen Count Data")
Now we enter a conditional test, to check the pollen_status variable against the four different states it can be in. If the pollen level is "Very High" then we create an object called n and using that we create a notification that will appear on screen. The notification will have some introductory text to advise the user on the data, then it will tell us the pollen level using the pollen_status variable. Lastly we use the relevant flower image to visually depict the pollen level. With VeryHigh having a red flower. Then we show the notification, prompting it to appear on screen.
    if pollen_status == "Very High":
        n = notify2.Notification("The pollen level at your location is ",pollen_status,icon=VeryHigh)
        n.show()
But what happens if the pollen is High, Moderate or Low? Well we use three more conditional tests called elif which is Python for Else If and they work by checking each condition one after the other. So If the first is False, we check the next Else If, if that is True then the code inside it is run. If False then we move on to the next condition, testing each time to see which is True. If no condition is True, then nothing will happen.
The code for the next three conditions is almost the same as the first condition, except that we change the pollen_status test to match the other Met Office standard levels, and change the icon to match the colour of flower we wish to see.
    elif pollen_status == "High":
        n = notify2.Notification("The pollen level at your location is ",pollen_status,icon=High)
        n.show()
    elif pollen_status == "Moderate":
        n = notify2.Notification("The pollen level at your location is ",pollen_status,icon=Moderate)
        n.show()
    elif pollen_status == "Low":
        n = notify2.Notification("The pollen level at your location is ",pollen_status,icon=Low)
        n.show()
Now we break out of the conditional test, and stay inside the main while True loop. The last line of code will be force the code to wait for 15 seconds before repeating the loop. Obviously in a real world scenario we would have a much longer wait time. But for test 15 seconds is ok.
time.sleep(15)
Save your code! Call it something cool obviously, I chose Pollen-Checker.py as I have no imagination.
Complete Code Listing
Check your code, does it look like this?
import requests
import json
import os
from pypollen import Pollen
import notify2
import time
#Images
cwd = os.getcwd()
VeryHigh = cwd+"/Images/VeryHighPollen.png"
High = cwd+"/Images/HighPollen.png"
Moderate = cwd+"/Images/ModeratePollen.png"
Low = cwd+"/Images/LowPollen.png"
while True:
    send_url = "http://ipinfo.io/json"
    r = requests.get(send_url)
    location = json.loads(r.text)
    location = location["loc"]
    location = location.split(",")
    lat = location[0]
    lon = location[1]
    pollen_status = Pollen(lat, lon).pollencount
    notify2.init("Pollen Count Data")
    if pollen_status == "Very High":
        n = notify2.Notification("The pollen level at your location is ",pollen_status,icon=VeryHigh)
        n.show()
    elif pollen_status == "High":
        n = notify2.Notification("The pollen level at your location is ",pollen_status,icon=High)
        n.show()
    elif pollen_status == "Moderate":
        n = notify2.Notification("The pollen level at your location is ",pollen_status,icon=Moderate)
        n.show()
    elif pollen_status == "Low":
        n = notify2.Notification("The pollen level at your location is ",pollen_status,icon=Low)
        n.show()
    time.sleep(15)
So go ahead run the code, and marvel as the pollen count is displayed via a pop up on your screen!
Bonus Content - The simple project that kicked this off!

The original "test" code for this project was only 9 lines of Python (sadly it used an API that is going out of date in July 2018, so I had to ditch it and use another way to get the GeoIP data.
So here for your amusement, are 12 lines of Python that will print the pollen levels and your location, with no bells or whistles.
import requests
import json
from pypollen import Pollen
send_url = "http://ipinfo.io/json"
r = requests.get(send_url)
location = json.loads(r.text)
location = location["loc"]
location = location.split(",")
lat = location[0]
lon = location[1]
pollen_status = Pollen(lat, lon).pollencount
print("The pollen levels in your area are "+pollen_status)

Run the code and you should see the Python shell report the pollen levels.
Even more bonus content - We demand blinkies!

Pop ups are great, but what is better? Well how about controllable bright LEDs? Yeah they are much better.
For this project you will need any 40 pin Raspberry Pi (B+, A+ 2,3, 0, 0 W, 3B+) and a Pimoroni Blinkt for only £5! Bargain.

The Blinkt has 8 individually controllable LEDs (APA102 for those playing along at home (c) EEVBlog) and fits on top of all 40 GPIO pins. Attach you Blinkt to your Pi, then connect your keyboard mouse etc and power up!
Once booted, open a Terminal, the icon for which is in the top left of the screen and type the following command to install the Blinkt software.
curl https://get.pimoroni.com/blinkt | bash
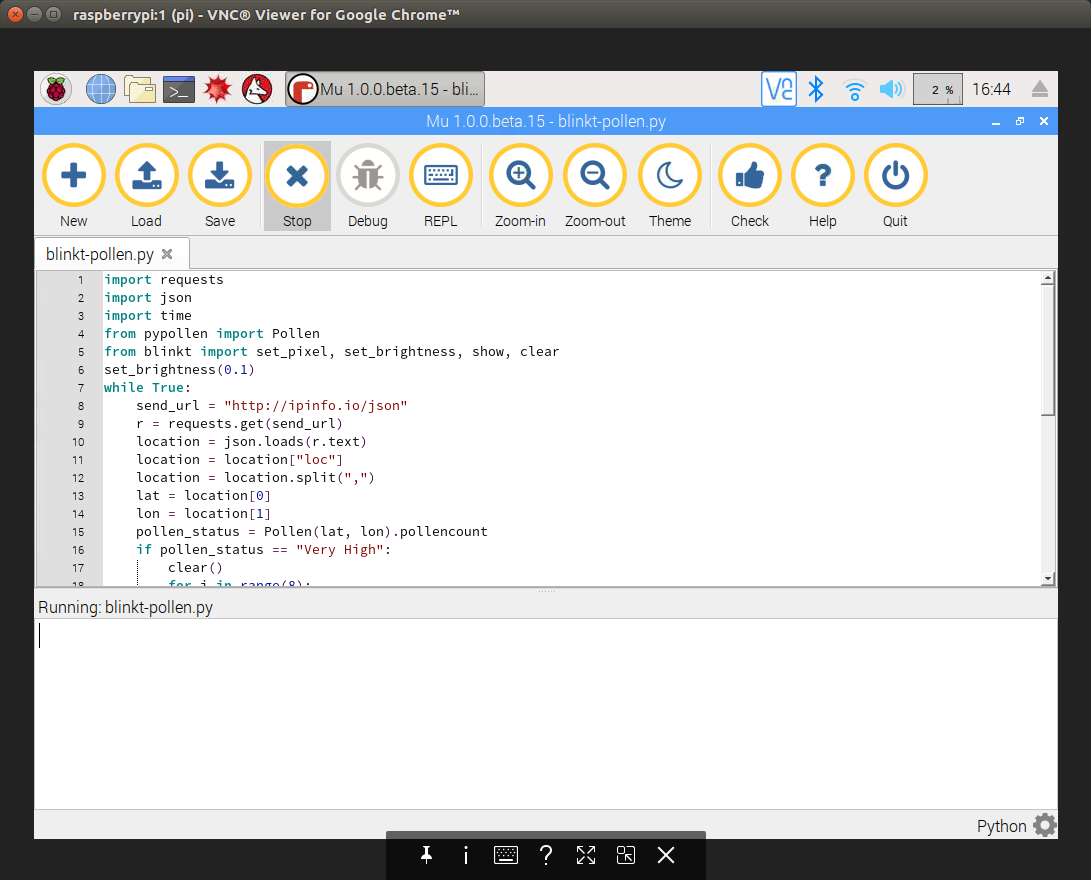
Once installed, open up your favourite Python editor (Thonny and IDLE3 are pre-installed.) We chose to install Mu on the Pi, as it is a really good editor.
sudo apt update
sudo apt install mu

You can now find Mu in the Programming menu.
The code for this project is very similar to the notifications, but in the imports we need to import four functions from the blinkt library. They are
set_pixel = To control each of the LEDs.
set_brightness = Sets the brightness of the LEDs (they get REALLY bright.)
show = To show the changes we make to the LEDs.
clear = To clear the colour from the LEDs, effectively turning them off.
import requests
import json
import time
from pypollen import Pollen
from blinkt import set_pixel, set_brightness, show, clear
Then we set the brightness of the LEDs, 0.1 is still quite bright.
set_brightness(0.1)
We then repeat the GeoIP process and then get the pollen count for our location.
while True:
    send_url = "http://ipinfo.io/json"
    r = requests.get(send_url)
    location = json.loads(r.text)
    location = location["loc"]
    location = location.split(",")
    lat = location[0]
    lon = location[1]
    pollen_status = Pollen(lat, lon).pollencount
Now we start a conditional test, the same as in the main project. If the pollen_status variable is Very High, then we first ensure the Blinkt LEDs are clear. Then we use a for loop to iterate over every LED on the Blinkt (8) and turn each one red (255,0,0). You will notice the letter "i", this is a variable that we create with the for loop. The value of "i" starts at 0, and each time the for loop goes round, the value of "i" is increased by 1, until we reach 8 and then the for loop stops. Lastly we call show() in order for use to see the change of colour on the Blinkt.
    if pollen_status == "Very High":
        clear()
        for i in range(8):
            set_pixel(i,255,0,0)
            show()
We also repeat the process for the other pollen count levels High, Moderate and Low.
    elif pollen_status == "High":
        clear()
        for i in range(8):
            set_pixel(i,255,153,51)
            show()
    elif pollen_status == "Moderate":
        clear()
        for i in range(8):
            set_pixel(i,250,250,102)
            show()
    elif pollen_status == "Low":
        clear()
        for i in range(8):
            set_pixel(i,0,255,0)
            show()
And once again we add a 15 second delay before the loop goes back round. Of course change this to meet your needs.
time.sleep(15)
Complete Blinkt Code Listing
import requests
import json
import time
from pypollen import Pollen
from blinkt import set_pixel, set_brightness, show, clear
set_brightness(0.1)
while True:
    send_url = "http://ipinfo.io/json"
    r = requests.get(send_url)
    location = json.loads(r.text)
    location = location["loc"]
    location = location.split(",")
    lat = location[0]
    lon = location[1]
    pollen_status = Pollen(lat, lon).pollencount
    pollen_status = "Moderate"
    if pollen_status == "Very High":
        clear()
        for i in range(8):
            set_pixel(i,255,0,0)
            show()
    elif pollen_status == "High":
        clear()
        for i in range(8):
            set_pixel(i,255,153,51)
            show()
    elif pollen_status == "Moderate":
        clear()
        for i in range(8):
            set_pixel(i,250,250,102)
            show()
    elif pollen_status == "Low":
        clear()
        for i in range(8):
            set_pixel(i,0,255,0)
            show()
    time.sleep(15)
Save the code and when ready run it! your Blinkt should light up according to the pollen levels in your area.
Conclusions
So there we have it, what started as a simple 9 - 12 lines of Python project, has morphed into a desktop application and a physical project with LEDs. Have fun with it and let me know how you go on!
Bonus Windows Version!
BOOM! Win 10 notifications using Python 3! Now Windows users can keep an eye on the pollen! pic.twitter.com/gNJSyXH8oV
— biglesp (@biglesp) June 14, 2018
So last night, after creating this blog post (which took 7 hours by the way) I thought...
It's a bit tight on the Windows users, they can't do the notification project!
So to Google I went and found Win10Toaster which is a super simple library of Python code to generate notifications in Windows 10.
To install
Open the command prompt and using pip install as so.
pip.exe install win10toaster
Once installed, open your favourite Python editor for Windows and start building the code.
The first part as always as the libraries that we import for use. Here we can see that we import the ToastNotifier function from win10toast, and then create an object called toaster to directly reference the function.
import requests
import json
from pypollen import Pollen
from win10toast import ToastNotifier
toaster = ToastNotifier()
Then we perform the same GeoIp lookup, and split out the latitude / longitude to a list. Then use that location data to find the pollen count for that area.
while True:
    send_url = "http://ipinfo.io/json"
    r = requests.get(send_url)
    location = json.loads(r.text)
    location = location["loc"]
    location = location.split(",")
    lat = location[0]
    lon = location[1]
    pollen_status = Pollen(lat, lon).pollencount
Then we call the toaster function and pass it the information that we wish to appear on screen. In this case a short introduction as to what the data is, before we show the data stored in the variable pollen_status then we pass a duration, used to control how long the notification will stay on screen.
    toaster.show_toast("The pollen level at your location is ",pollen_status,duration=10)
    time.sleep(15)

Save the code and give it a go!
Windows users, enjoy!