Friday Fun: TinyGo on Arduino
So what we doing this time?
I've read and heard a little about Golang, the Go programming language, and I wanted to have a play with it.

After a short while messing around with it on my laptop I saw this tweet from my good friend Thierry.
I tried tinygo on a Arduino BLE 33 at Europython and it was a lot of fun
— Thierry (@titimoby) March 5, 2020
So TinyGo is...?
![]()
TinyGo is a project to bring the Go programming language to microcontrollers and modern web browsers by creating a new compiler based on LLVM.
Yup I can run Go on a microcontroller, in this blog post I use an Arduino Uno compatible, but you can other boards such as a micro:bit!
To follow this blog post to you will need an Arduino Uno / Compatible.
Your help makes this blog possible!
Sorry to interrupt! It would be great if you could buy me a cup of coffee / make a donation via Ko-Fi. It helps me to pay for hosting this blog, and to buy stuff to hack from Poundshops / Dollar Stores / Aliexpress which are used in free projects on this blog. Thanks!

So how do we install it?
These instructions are for Ubuntu, but for other platforms the TinyGo website has all the information that we require.
First install Go!
To use TinyGo we first need to install the main Go language. Go to the Golang website download page and download the go1.13.8 archive for x86 or x86-64(bit) that matches your Linux machine. Extract the downloaded file to your /usr/local/ directory.
sudo tar -C /usr/local -xzf go1.13.8.linux-amd64.tar.gz
Then I edited a hidden profile file in my home directory. At the last line I added.
export PATH=$PATH:/usr/local/go/bin
I then saved the file and rebooted.
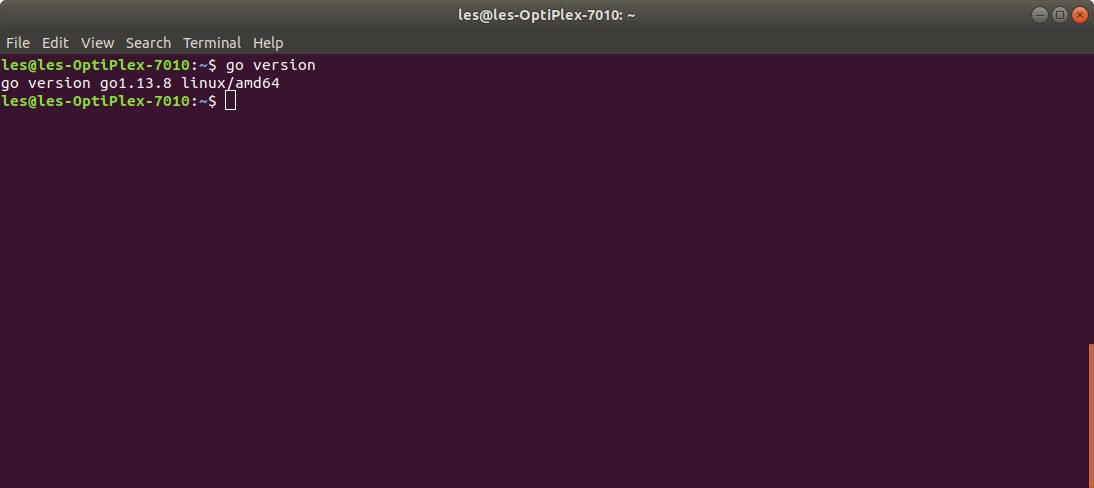
When the system rebooted I opened a terminal and entered a command to check that go was installed correctly.
go version
Then a quick "Hello World" to check that I was able to create working code. This was saved as hello.go to my home directory.
package main

import "fmt"

func main() {
        fmt.Printf("@biglesp woz ere\n")
}
Then I built the code into an executable.
go build hello.go
And then ran the code.
./hello

On Windows the executable is an
.exefile which is handy!
With Go working we can now install TinyGo
Now install TinyGo!
Remember I am installing this on Ubuntu
I download the .deb file from the TinyGo github page.
wget https://github.com/tinygo-org/tinygo/releases/download/v0.12.0/tinygo_0.12.0_amd64.deb
And then use dpkg to install.
sudo dpkg -i tinygo_0.12.0_amd64.deb
Then edit the .profile file in your home directory (just like we dod before) and add this as the last line.
export PATH=$PATH:/usr/local/tinygo/bin
The next bit I thought I would not have to do as I already had the Arduino IDE installed, and that comes with libraries for AVR based processors. But I was wrong so I had to install these libraries too, and you will most likely have to as well.
sudo apt-get install gcc-avr
sudo apt-get install avr-libc
sudo apt-get install avrdude
>>>>R E B O O T<<<<
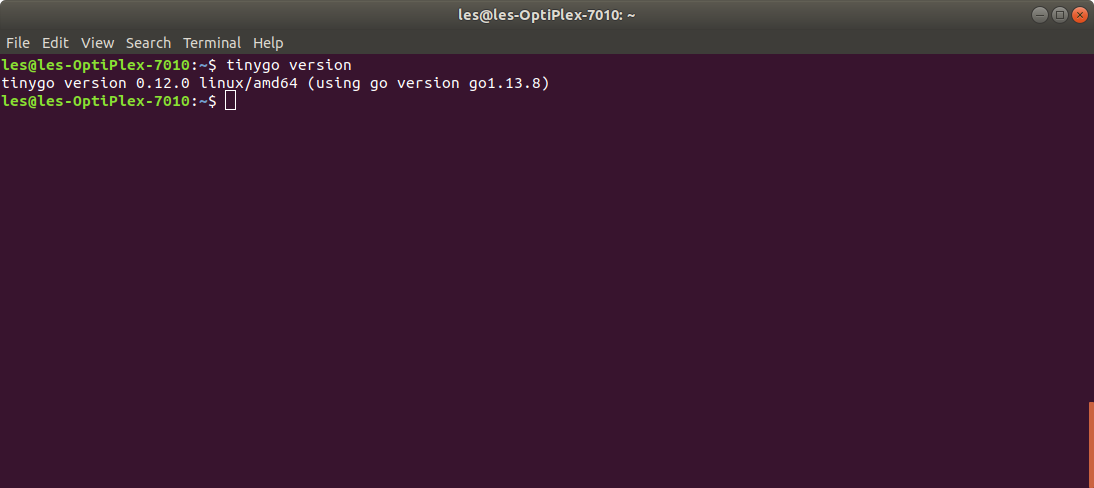
A quick test to make sure that TinyGo is correctly installed.
tinygo version
All done! We can now do something with it!
Flashing the example code
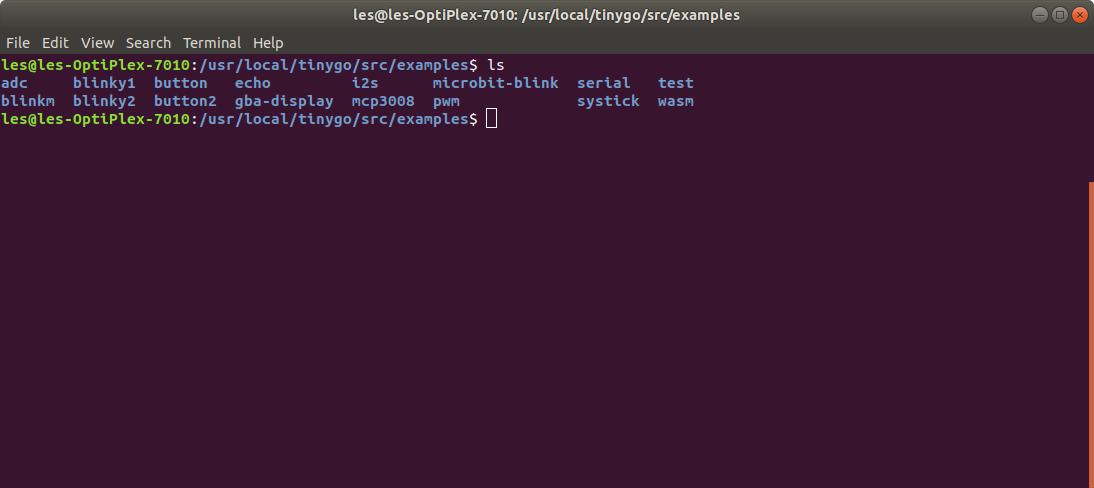
TinyGo comes with a few examples, hidden in /usr/local/tinygo/src/examples that we can use to test that our Arduino will work.
In the terminal type the following command to wait for our Arduino to be connected, and tell us which port is being used.
udevadm monitor --udev

Now plug in your Arduino Uno and watch as the terminal fills with information, just like the image above. In my case my Arduino was on port devttyUSB0 and so this is what I shall use later.
Keep the Arduino connected, and in the terminal type the following command to flash blinky1 a simple blinking LED on the Arduino.
tinygo flash -target=arduino -port=/dev/[YOUR PORT HERE] examples/blinky1
Press ENTER and the code will be flashed to the Arduino.
Tinygo, flashing an LED on an @arduino -- The Movie :) pic.twitter.com/pVLaRnRomQ
— biglesp (@biglesp) March 6, 2020
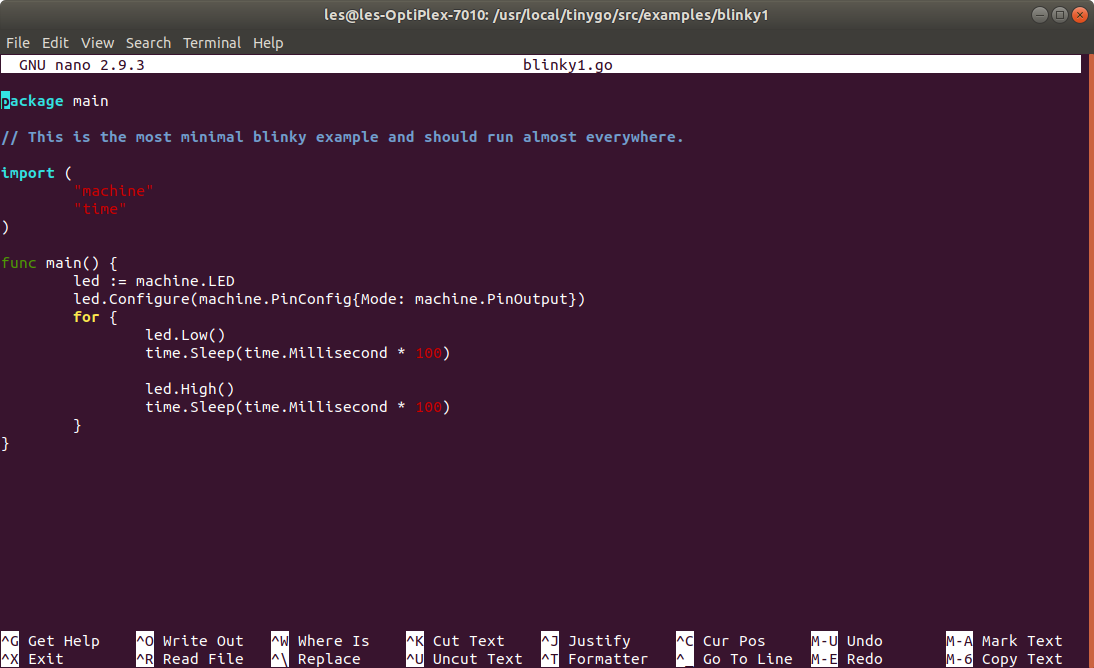
To edit the example, as root, or using sudo we need to edit the following file.
sudo nano /usr/local/tinygo/src/examples/blinky1/blinky1.go
I would suggest that to start with we change the delays that cause the LED to turn on and off rapidly.
Go structure
The structure of the code looks like this.
Go projects are made up of packages, and the first is this.
package main
Then we use two more packages, to use the GPIO pins on the Arduino (machine) and to control delays, pause the code (time). In Python these would be libraries / modules.
// This is the most minimal blinky example and should run almost everywhere.

import (
        "machine"
        "time"
)
Next a function, called main is created. If you are an experienced Arduino coder then this will look similar to C syntax.
func main() {
Inside the function we create an object called led and use that to make a connection to the built in LED of the Arduino. Then we configure the LED as an output.
        led := machine.LED
        led.Configure(machine.PinConfig{Mode: machine.PinOutput})
A loop is now used to turn the LED off (led.Low) and then to sleep for 100ms, then the LED is turned on (led.High) before finally sleeping for a further 100ms.
        for {
                led.Low()
                time.Sleep(time.Millisecond * 100)

                led.High()
                time.Sleep(time.Millisecond * 100)
        }
}
Another example - For Loop
In this example a for loop is used again, but this time it has a limit placed upon it. If the value of i, which starts at 0, reaches 10, then the code will stop. In other words this loop will iterate 10 times.
package main

// This is the most minimal blinky example and should run almost everywhere.

import (
        "machine"
        "time"
)

func main() {
        led := machine.LED
        led.Configure(machine.PinConfig{Mode: machine.PinOutput})
        for i := 0; i < 10; i++ {
                led.Low()
                time.Sleep(time.Millisecond * 100)

                led.High()
                time.Sleep(time.Millisecond * 100)
        }
}
I saved this code as for-loop.go in my home directory and then flashed the code to the Arduino.
tinygo flash -target=arduino -port=/dev/ttyUSB0 for-blink.go
Early Days
This is still early days for me with TinyGo and Go. But I am enjoying learning this language, and seeing how I can use it in a project.