Tooling Tuesday: Raspberry Pi Imager
Need to make SD cards for your fleet of Raspberry Pis? Then this might just do the job.
So what is it?

I tested the application on my Ubuntu and Windows machine.
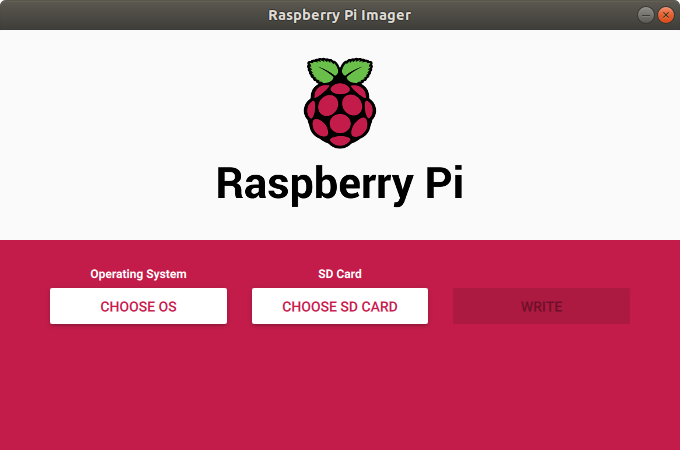
A simple to use application to write Raspbian / LibreELEC images to SD cards with little hassle.
So who is this aimed at?
The Raspberry Pi Imager application is aimed at those unfamiliar with the process of writing operating system images to SD cards.

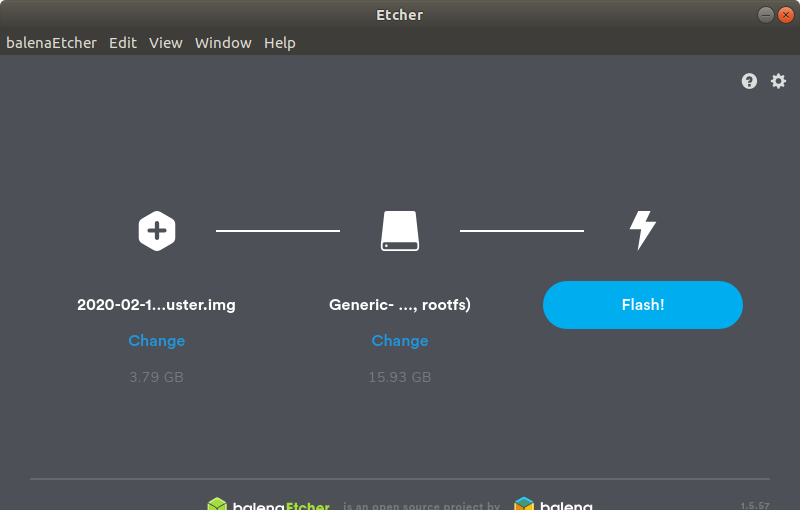
If you are a keen Raspberry Pi enthusiast then perhaps Etcher will suit you more. It works really well on Windows, Mac and Linux.
Your help makes this blog possible!
Sorry to interrupt! It would be great if you could buy me a cup of coffee / make a donation via Ko-Fi. It helps me to pay for hosting this blog, and to buy stuff to hack from Poundshops / Dollar Stores / Aliexpress which are used in free projects on this blog. Thanks!

So what can I write to my SD cards?
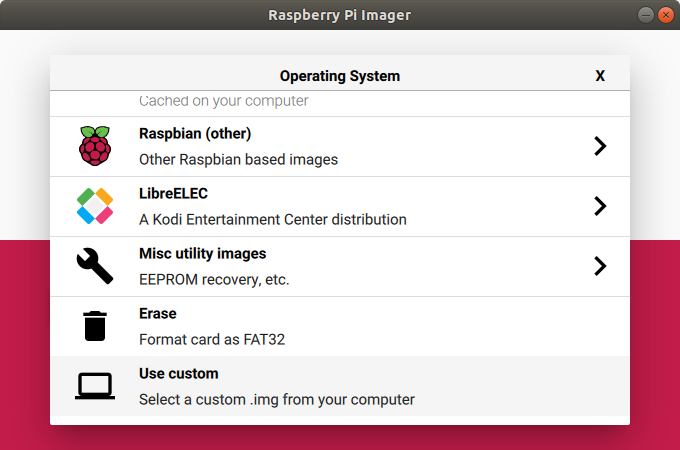
The easy to use menu is clear and friendly, just make sure that you scroll to see all the options.
By default it will write the standard Raspbian desktop operating system, but we can also write a lite version, which has no desktop environment, and a full version which is much larger and contains recommended applications.
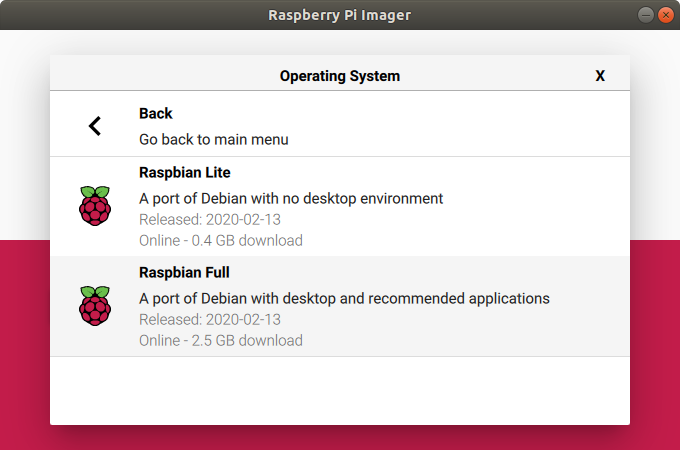
Raspbian comes in many different sizes, the default release and a lighter version, and a full fat version.
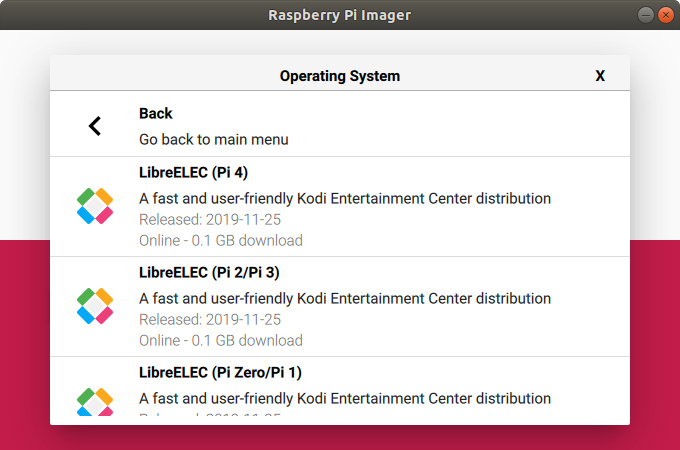
LibreELEC, one of many media centre options
We can also write LibreELEC a media centre operating system to our SD card, handy for watching a movie.
Oooh Misc utility images looks fun!
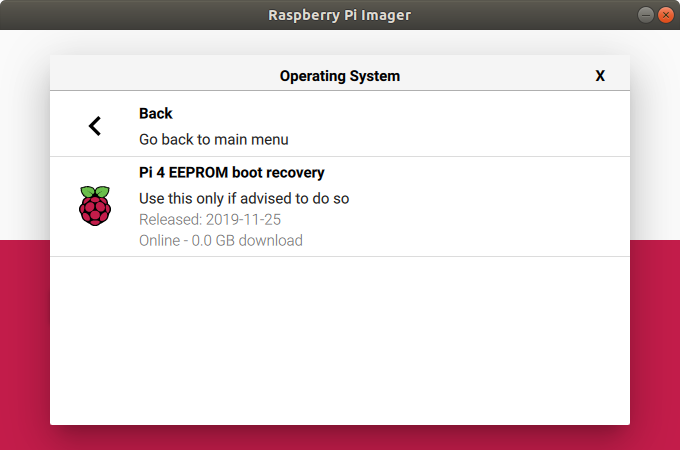
The latest Raspberry Pi 4 has an EEPROM which is used to boot the Raspberry Pi 4. If this gets damaged then this tool can repair it. But if used incorrectly, then it can damage the EEPROM so only use if you really need to.
"The Raspberry Pi 4 has an SPI-attached EEPROM (4MBits/512KB), which contains code to boot up the system and replaces bootcode.bin previously found in the boot partition of the SD card. Note that if a bootcode.bin is present in the boot partition of the SD card in a Pi 4, it is ignored."
Source Raspberry Pi Foundation Documentation
Format your SD card

Erase will format your SD card, so make sure to backup any important files
If you need to format the SD card, then Erase is the tool to use. It will format the SD card as FAT32, a universally compatible format for Windows, Mac, Linux.
What does "Use custom" do?
This will enable the user to write an *.img file to an SD card. So if you have an older Raspbian release or an alternative operating system then this tool will do the job.
Woah hang on there!
I tested a few custom images and found that there were a few issues. Some images failed to be verified, which means the image was written to the card, but it could not be checked to ensure it was correct. I also tinkered and tried to write the latest Ubuntu 20.04 image to a USB drive. It was written successfully, but could not be verified. I was writing an.isoimage which is not the expected format, but it did write. The USB however would not successfully boot.
Selecting the correct drive
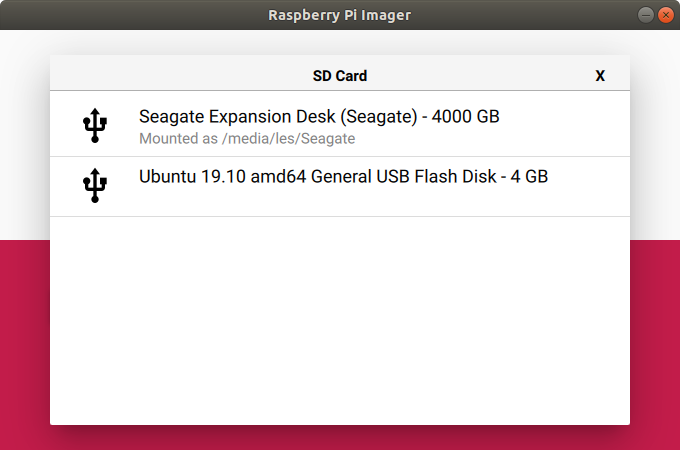
Take great care to identify the SD card before writing the images to it, if you get it wrong then you will lose data
Just like Etcher, we need to select a drive which represents our SD card. But unlike Etcher it does not alert us that the drive is large and could be a USB hard drive. It detected my external 4TB drive as a possible drive, which would be bad! So take care!
How long does it take to write an SD card?
I chose the default Raspbian image, and I am using a USB 3 SD card writer, and a Sandisk 16GB Class 10 micro SD card.
The first time that I wrote an SD card it took 10 minutes, 06 seconds to write an image. I factored downloading the image into this time, and the image was cached to my computer. I thought that a second attempt would yield a faster time, but alas no. Again I saw 10m 06s. This felt a little slow so I ran the same test with the same equipment using Etcher and this time I scored 7m 26s, 2m 40s quicker.
So should we just stick to Etcher?
No. If I am a user who has never used a Raspberry Pi before and I want to write a new Raspbian image to an SD card, then the Raspberry Pi Imager is the tool to use. It provides an easy method to download, flash and maintain our SD cards. Sure it is slow, but it is dependable.
If I am an experienced Raspberry Pi user, and I am happy to download my own images for flashing, then Etcher is the tool to use.
It can also write to multiple devices at once...and it can even write to a Raspberry Pi Zero and Compute Module via a micro USB lead.Doing a little light work while we try and sort out Dexter.
— biglesp (@biglesp) February 8, 2019
Really nice that the @Raspberry_Pi Compute module 3+ is supported by @balena_io I tried to flash the original CM3 module with Etcher about 12 months ago and it worked, but reported it as a Pi Zero :) pic.twitter.com/OT4nP778iV
The Raspberry Pi Imager application is great and easy to use. For the majority of users it will get the job done with very little fuss.