Friday Fun - Adafruit Chainsaw

Halloween is nearly upon us, but there is still time to build a project that is sure to scare more candy / sweets from members of the public!
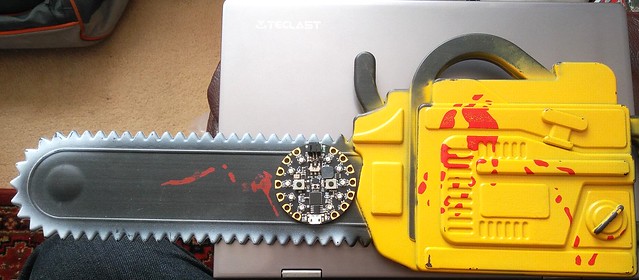
In this project we shall turn a simple Poundland (UK Dollar Store type shop) plastic chainsaw, which is a simple plastic hollow prop with no electronics into a roaring sound effect chainsaw! Press the trigger and listen to the sound of a real chainsaw but we remain perfectly safe as there is no moving chainsaw blade.
We shall be using Adafruit's Circuit Playground Express, which we shall shorten to CPX in this tutorial. But why are we using this board? Well because it is awesome, and it can play audio WAV (Wave) files via the built in speaker...or to an external speaker, but we need an amplifier!
What equipment do I need?
- A £ / $ store chainsaw
- An Adafruit Circuit Playground Express
- Micro USB lead
- An OEP3W amplifier
- A speaker
- A USB battery (Poundland £1 battery works
- Length of wire
- A pushbutton
- Crimp terminals (M3 screw size)
- Crimping tool
- 4 x M3 6mm machine screws
- 4 x M3 nuts
- Soldering tools
- Heatshrink tubing (optional)
All of the code for this project can be found on Github
Audio Files

The CPX can play 16-bit PCM WAV (Wave files) at 22050Hz, so our audio files need to be in that format. Finding scary sound effects on the Internet is easy, but you may have to convert them for use. The best tool for this job is Audacity a free open source audio editor. Download your audio file, and then open it in Audacity, change the Format to 16-Bit PCM and the Rate to 22050Hz. Then click on File >> Export and save the audio as a wav file called sound.wav to your computer. We shall copy it to the CPX later!
Building the hardware
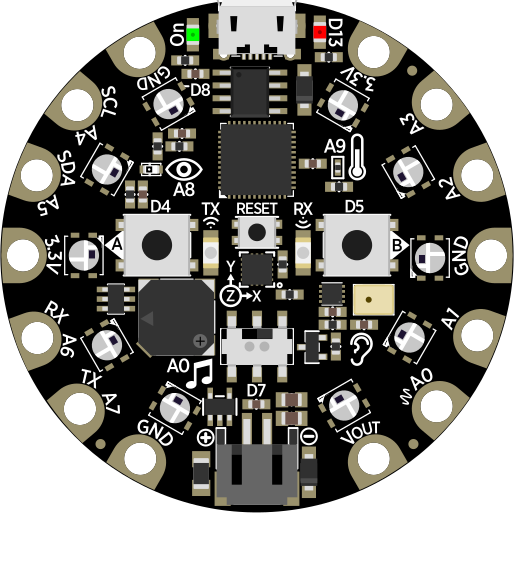
The CPX has a series of GPIO pins around the board, but instead of "pins" they are "holes" just like we have on the micro:bit. To make connections to these pins we normally use crocodile clips...but that would get messy.
So instead we shall make connections using crimped terminals, specifically ring shaped terminals into which we can insert a M3 6mm screw which will then go through the CPX GPIO pin, and secured on the underside using an M3 nut.
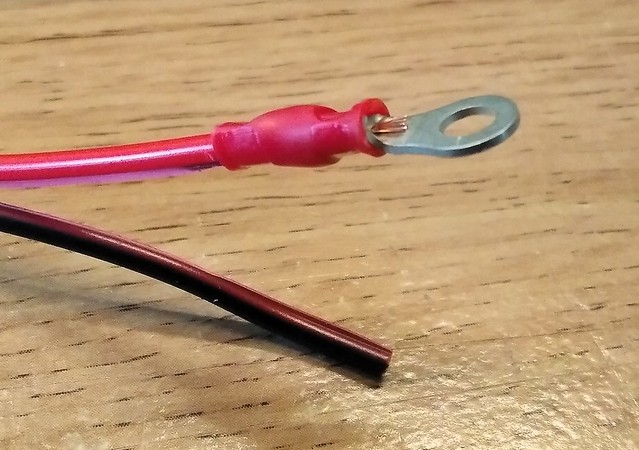
But how can we secure the wire to the crimp terminal? Well crimp terminals use a physical / mechanical connection to secure the wire. Using a crimping tool we squeeze the terminal around the wire and the internal metal frame grips the wire and holds it in place. Most of the time this is sufficient to hold the wire, but you can also solder the wire to the terminal for extra strength, just be careful as the shroud around the terminal is plastic.

Crimping tools come in all shapes and sizes, from the simple crimper / cutter / stripper that is cheap and does a fair job...
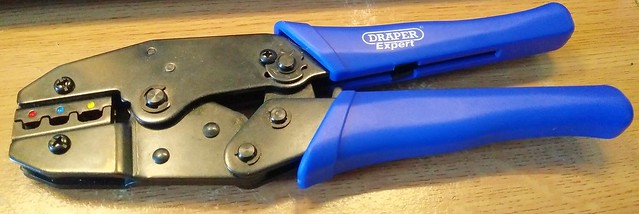
To the ratcheting crimper that provides a nice even crimp, without breaking your wrist.
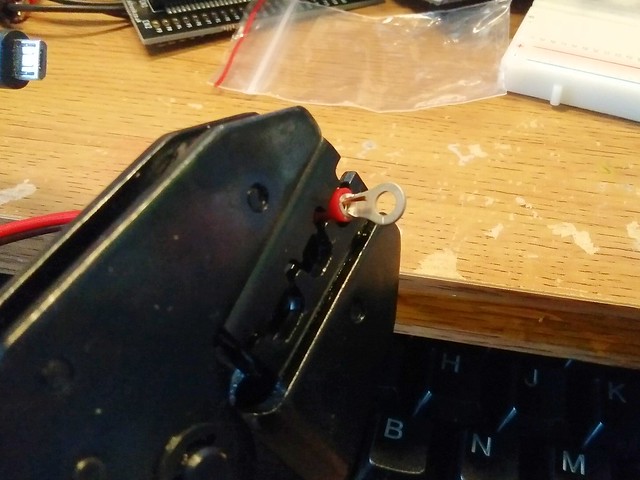
We are going to need six crimp terminals connected to lengths of wire.
Soldering the wires to components
So now we have six lengths of wire with crimps on the end, but now we need to connect these wires to the components of the build.
We shall start by soldering two wires to the terminals of a simple pushbutton.
The pushbutton has two terminals, and before we connect the wires, we need to add a little solder to the terminals, this will ensure a good contact. Then we need to cut the wires we have selected for the pushbutton, give yourself plenty of slack, but obviously not too much as it might not fit in the chainsaw. Using wire strippers, strip about 10 millimetres (1 cm) of the sleeve to expose the wires inside. Now using your fingers, twist the wires so that they are neat (if you are using single core wire, skip this bit) and then using flow a little solder on to the wires so that they are solid, but not too much solder! This is called tinning and it helps makes good connections when soldering to wires. I usually use a piece of modelling clay / blutack to hold the wires while I tin them.
Heatshrink FTW!
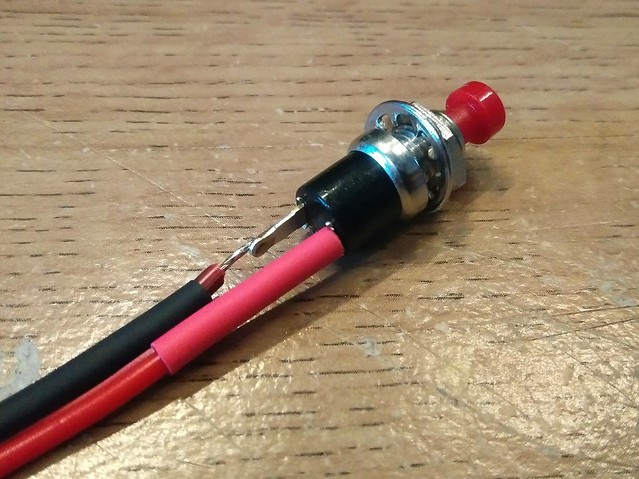
Before we solder the wires to the pushbutton, this optional step will ensure that your project looks professional! Heatshrink, as the name suggests, is a sleeving that when heated shrinks to half the original diameter. Using two 20 mm lengths of heatshrink, slide each over the pushbutton wires. But Do Not shrink them just yet! Before we do that we need to solder the wires to the terminals of the pushbutton. It does not matter which wire connects to which terminal, as the pushbutton is not polarised. When the wires are soldered, gently slip the heatshrink over the soldered join, and then using a lighter, hot air gun or hair dryer apply heat to the heatshrink and watch it shrink. Careful!!! It stays hot for a few moments after shrinking. With that completed, we move on to the amplifier!
OEP3W Amplifier
The audio output from the CPX is rather weak, and in testing the chainsaw noise on the built in, we heard more of a "bee trapped in a coke can" than a "nerve shreading, fear inducing roar" so an amplifier was needed. There are hundreds of amplifiers on the market, but I wanted one that could be powered from the 3V pin of the CPX. So after a quick look on ABX Labs eBay store, I found the OEP3W.
The OEP3W is tiny, but it packs enough punch! It can provide 3W of output from a 3V source, in fact it can be run from 2.5V to 5V, all for £2.19 delivered! Bargain!

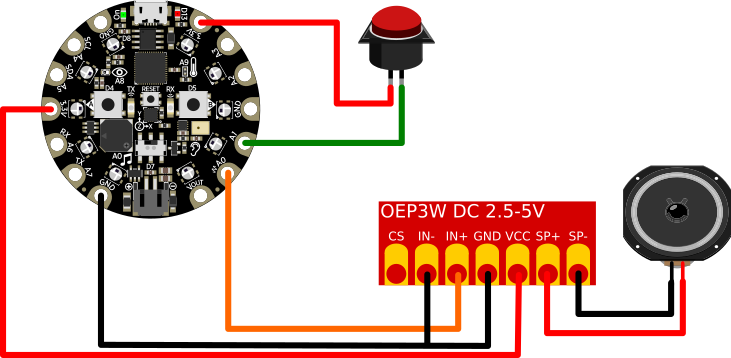
The pinout for the OEP3W is fairly simple.
- CS If this is connected to GND via a switch, we can turn the amplifier off.
- IN - Connects to GND on the CPX.
- IN + Connects to A0 on the CPX.
- GND Connects to GND on the CPX
- VCC Connects to 3.3V on the CPX
- SP + Connects to the + (typically red wire) terminal of the speaker.
- SP - Connects to the - (typically black wire) terminal of the speaker.
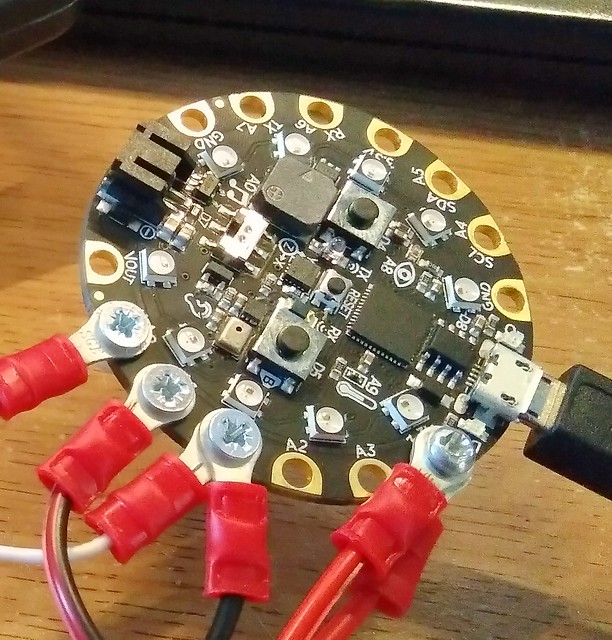
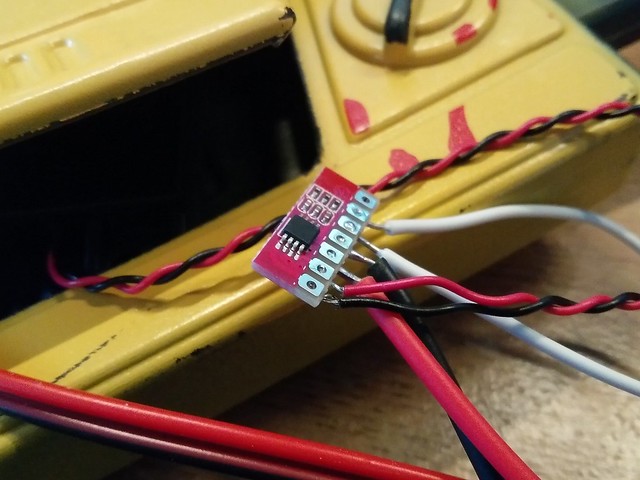
To make connections to the OEP3W we will need to solder our crimped wires to the terminals. Again repeat the tinning process that we did for the pushbutton step, flow a little solder on to the pads of the OEP3W and then tin the wires. Then solder the wires to the pads. You can skip CS as we shall not be using that pad.
Ensure all of the connections are made as per this illustration.
Writing the code
For this project we shall be using Mu an easy to use Python editor created by my friend Nicholas Tollervey.
Install Mu as per the instructions on the website, and then connect your CPX to the computer using the micro USB cable. Your CPX will appear as a flash drive.
Now start Mu and it will detect that we have the CPX connected and it will ask us if we would like to run in "Adafruit" mode. Of course we do!
We shall start our code with three libraries specific for the CPX board.
- audioio is the audio library for CPX.
- board is the library for working with the GPIO.
- digitalio enables us to control the GPIO and turn pins into inputs / outputs and control the state of a pin.
import audioio
import board
from digitalio import DigitalInOut, Direction, Pull
Next we need to tell CPX that we shall be using the speaker, and that it is an output device. In this section of code we enable the internal speaker on the CPX. But as we have connected our amplifier to A0, the speaker output is routed via that pin and not sent to the internal CPX speaker. You can change SPEAKER_ENABLE to SPEAKER_DISABLE and this will force audio output via A0, even if there is no speaker connected.
# enable the speaker
spkrenable = DigitalInOut(board.SPEAKER_ENABLE)
spkrenable.direction = Direction.OUTPUT
spkrenable.value = True
Next we need a trigger / button to start the audio, and this trigger is connected to A1 on the CPX. So we need to tell the CPX that A1 has a button attached, and that A1 is an input. We also set the resting state of pin A1 to DOWN, which means that the pin is turned off. But why? Well the other wire we connected to the pushbutton is connected to the 3.3V pin of the CPX. So when the pushbutton is pressed, it connects the 3.3V pin to A1 which forces A1 to go HIGH (power flows to it) and this change in state triggers our code!
# make the input trigger
trigger = DigitalInOut(board.A1)
trigger.direction = Direction.INPUT
trigger.pull = Pull.DOWN
The next step is to create a function called play_file() and this is used to play any WAV file that we pass to it as an argument, the text inside the ( ). The function will first print that it is playing the audio file, and give the name. This is only visible in the Python Shell (Serial Console) in Mu. Then it will create an object called wave_file and use that to store the audio file, which is opened in read only mode.
def play_file(filename):
    print("Playing file: " + filename)
    wave_file = open(filename, "rb")
Still inside the function and we next instruct the CPX to play the audio file and output the audio to pin A0, which is connected to our amplifier.
    with audioio.WaveFile(wave_file) as wave:
        with audioio.AudioOut(board.A0) as audio:
            audio.play(wave)
Lastly for the function we run a check to see if the audio is still playing. If this is True, then we pass, but if it is False, then we print "Finsihed" to the Python Shell.
            while audio.playing:
                pass
    print("Finished")
In the last section of code, we create an infinite loop, while True: and in there we have two lines of code. The first checks for a change in the state of our trigger / pushbutton connected to A1. If the button is pressed, then the second line triggers our function to play the file called "sound.wav" which is our chainsaw noise.
#Main Loop, press a button...make noise!
while True:
    if trigger.value:
        play_file("sound.wav")
Complete Code Listing
import audioio
import board
from digitalio import DigitalInOut, Direction, Pull
# enable the speaker
spkrenable = DigitalInOut(board.SPEAKER_ENABLE)
spkrenable.direction = Direction.OUTPUT
spkrenable.value = True
# make the input trigger
trigger = DigitalInOut(board.A1)
trigger.direction = Direction.INPUT
trigger.pull = Pull.DOWN
#Create a function to play audio files.
def play_file(filename):
    print("Playing file: " + filename)
    wave_file = open(filename, "rb")
    with audioio.WaveFile(wave_file) as wave:
        with audioio.AudioOut(board.A0) as audio:
            audio.play(wave)
            while audio.playing:
                pass
    print("Finished")
#Main Loop, press a button...make noise!
while True:
    if trigger.value:
        play_file("sound.wav")
With the code complete we now need to save the code as main.py on the CPX. Also using your operating system's file manager, copy the sound effect we created earlier to the CPX. Save it in the same place as the main.py code!
Test the chainsaw before installation!
I know you are eager to chop logs / timber / college students in the woods but before you install this inside the chainsaw, make sure that it works! Press the button and do you hear a roar of chainsaw? If not check your connections, and code.
Installation
This section will depend on your prop chainsaw, and how you wish to install.
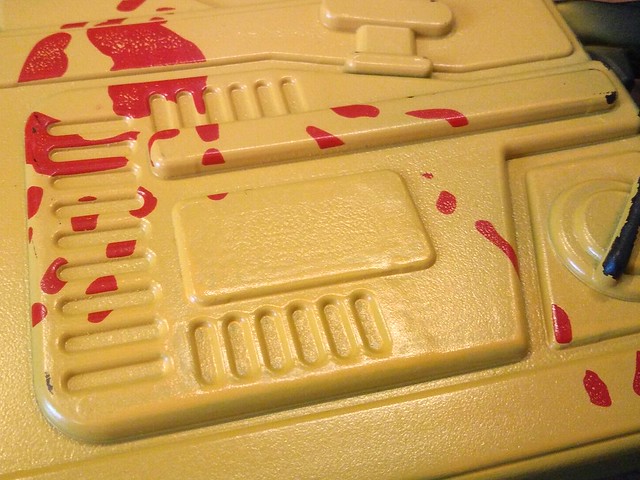
I cut out this section to act as a flap. It gave me lots of space, and a natural shape to cut around.

I also made a hole for my button to be inserted, right next to where the fake trigger was.
But for me I carefully stuffed the electronics inside, and using duct tape I secured my USB battery on the outside!
Happy Hacking!