Friday Fun: Directly Connecting to your Raspberry Pi
How can I connect to a Raspberry Pi?
SSH - A Secure connection between computers over a local or world wide network. Typically in the form of a command line interface (shell)
VNC - An insecure connection between computers over a local or world wide network. Used to "see" the screen of a remote computer by sending the desktop over a network. The user can then use their keyboard and mouse to control the remote desktop.
So what is the goal of this blog post?

To show how a Windows 10 computer can be directly connected to a Raspberry Pi 3 using SSH and VNC over a direct Ethernet connection
This approach requires no router or WiFi as the only connection is between the Pi and your Windows 10 device.
For this project we will need
- A Raspberry Pi with Ethernet (Pi B, Pi 2, Pi 3)
- The latest Raspbian operating system flashed on to a micro SD card (official instructions)
- An Ethernet cable
- A USB to micro USB lead
- A Windows 10 laptop
On your Windows 10 laptop
Lets download the tools that we shall use.
SSH
We shall use Putty, an SSH client for Windows. So head over to the putty website and download the version for Windows
Now install Putty by double clicking on the file that you have downloaded.
You will now be able to find Putty in the menu.
VNC Viewer
We shall use RealVNC Viewer to view the desktop of our Raspberry Pi, so head over to the RealVNC Viewer website and download the version for Windows. This will not need any installation, it is a single file that can be double clicked to run.
Your Raspberry Pi micro SD card
Take the micro SD card out of your Pi, and using an SD card adapter insert the card into your laptop.
The drive will open, it is called BOOT and it contains the file necessary to boot your Raspberry Pi, just like the BIOS of your laptop.
There is one file that we are interested in, and this is cmdline.txt (which might look like cmdline on Windows.)
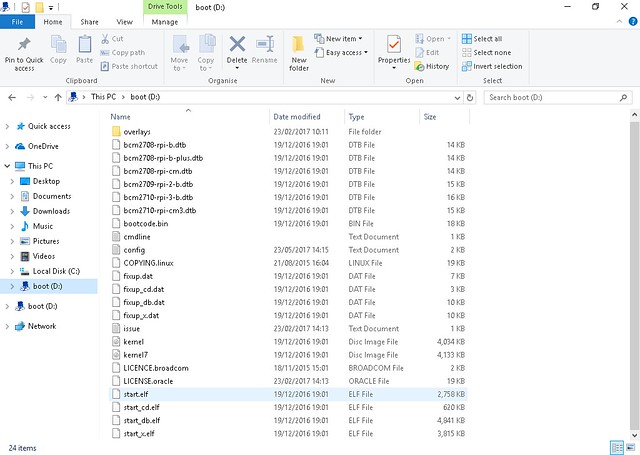
Open the file with notepad, you will see that it is one long line...do not change that! The cmdline file has to be one long line.
dwc_otg.lpm_enable=0 console=serial0,115200 console=tty1 root=/dev/mmcblk0p2 rootfstype=ext4 elevator=deadline fsck.repair=yes rootwait
Yes this line has been wrapped, but it was once a long line
We are going to add a configuration step that will set the IP address of the Pi to a hard coded value. We need to hard code the IP address so that we can guarantee that we can connect. So at the end of the line add the following.
ip=10.0.0.1
So now cmdline.txt looks like this
dwc_otg.lpm_enable=0 console=serial0,115200 console=tty1 root=/dev/mmcblk0p2 rootfstype=ext4 elevator=deadline fsck.repair=yes rootwait ip=10.0.0.1
Write down this IP address
Save the file!
Now to ensure that we can SSH into the Pi, create a new file in BOOT called sshand then eject the card from your Windows 10 device.
Set the Ethernet Connection on your Windows 10 machine.
Our Pi has an IP address of 10.0.0.1 so we need to set our Windows 10 laptop's Ethernet connection to the same IP range.
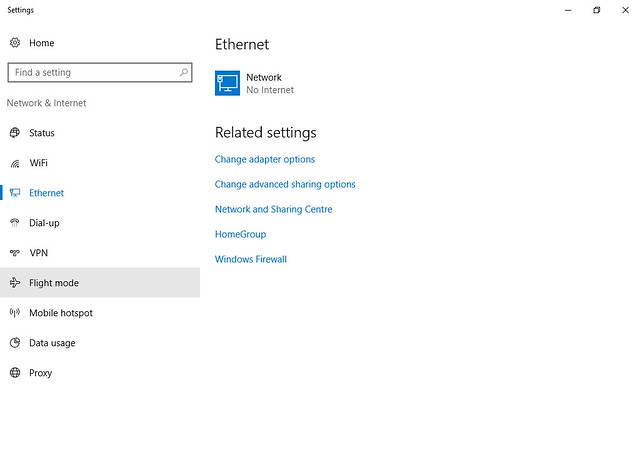
So we start by clicking on the Network / WiFi icon in the bottom right of the screen, and selecting Network Settings

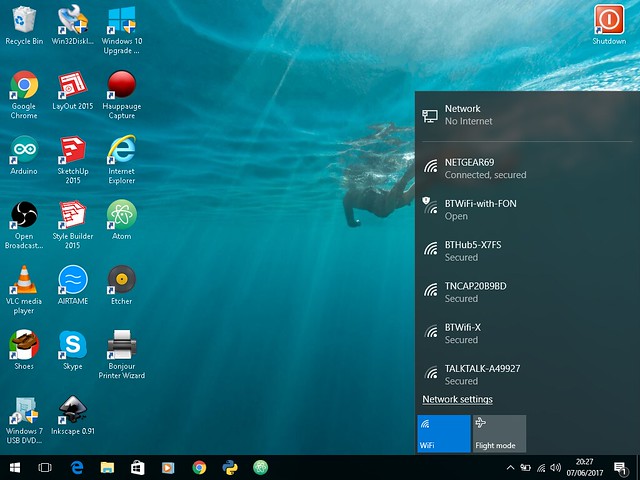
Then Click on Ethernet and then Change Adapter Settings.
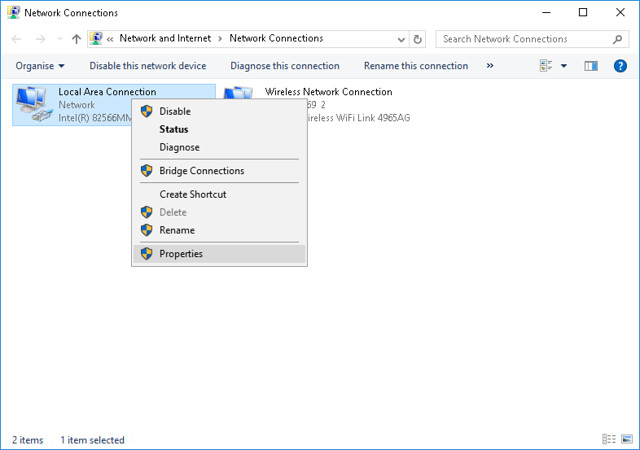
Now right click on Local Area Connection and select Properties
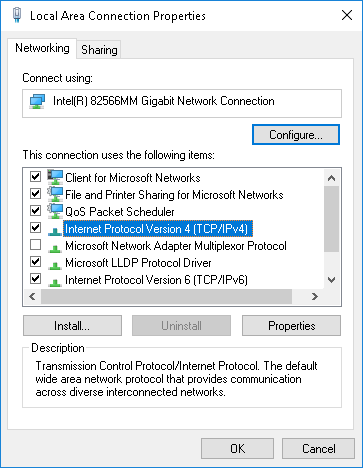
In the Properties window, double click on Internet Protocol Version 4 (TCP/IPv4)
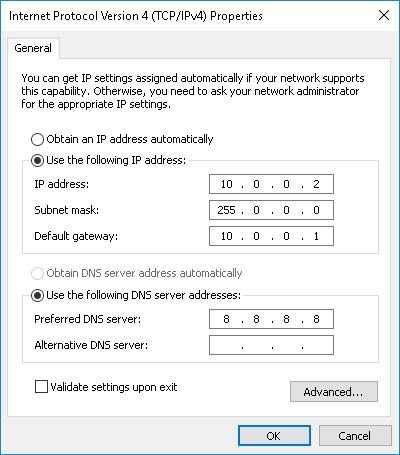
Now set your Ethernet interface to the following settings. Remember to click OK!
IP: 10.0.0.2
Subnet Mask: 255.0.0.0
Default Gateway: 10.0.0.1
DNS Server: 8.8.8.8
So our Windows 10 machine is set to use the Ethernet connection to talk to our Raspberry Pi.
Connect your Pi
Make sure the micro SD card is inserted into your Raspberry Pi, then connect the Ethernet cable from the Pi to your Windows 10 device. Then power your Raspberry Pi from the Windows 10 device USB port. Your Raspberry Pi will boot.
SSH to our Pi
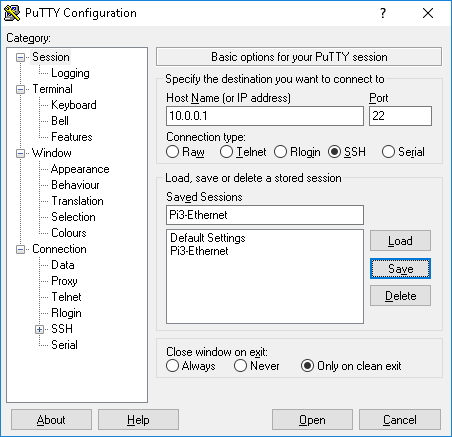
Open up the Putty application and set the Host Name (or IP Address) to the IP address of our Pi, remember it is 10.0.0.1 You can also Save Sessions by naming the Session, I called it Pi3-Ethernet then clicked Save when ready click on Open to start the connection.
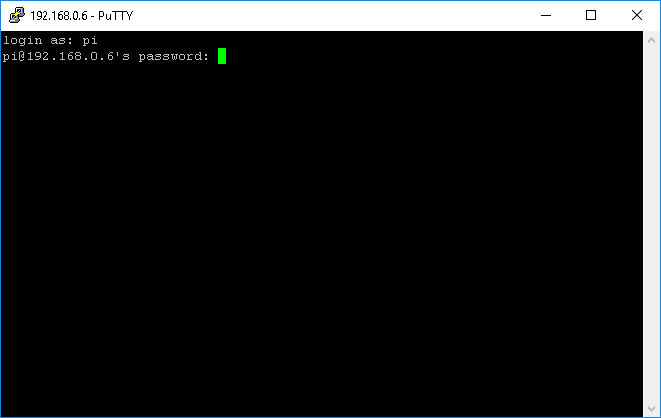
You will be prompted for your username and password, which the default for the Pi is
Username: pi
Password: raspberry
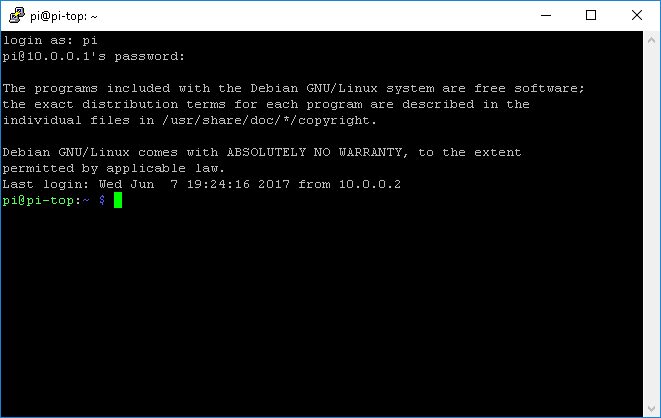
You will then be in control of your Raspberry Pi using the secure shell terminal!
Just in case our Pi is also connected to the WiFi, lets turn it off as this might cause an issue later on, in the terminal type sudo ifconfig wlan0 down to turn it off.
So now lets start the VNC connection. In the terminal type the following and press Enter.
vncserver
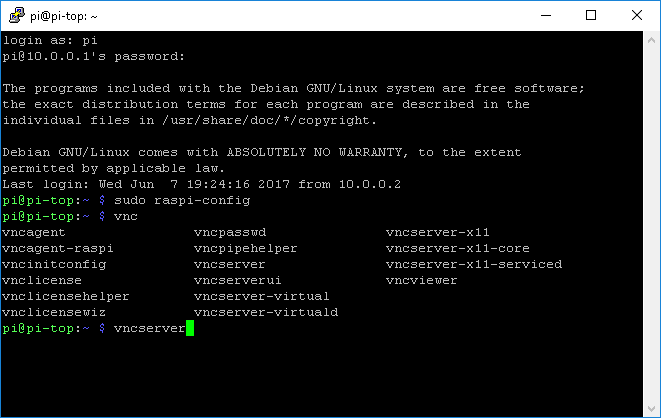
You'll see lots of text whizz along the screen, have a read, but don't worry too much about it.
VNC Viewer
Go to where you downloaded the VNC Viewer and double click on the file to launch.
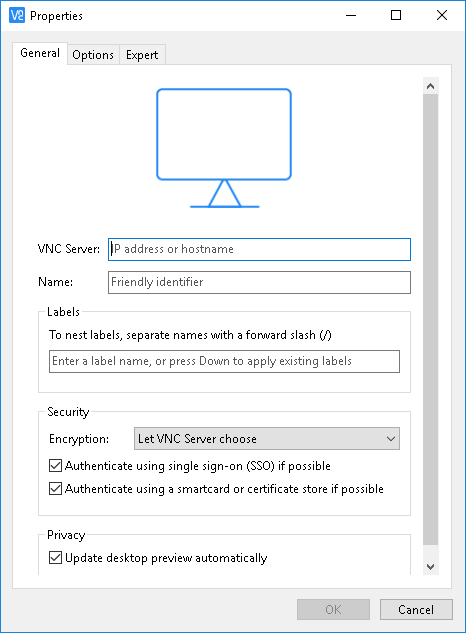
Click on File >> New Connection

Setup your connection details and then click Ok
VNC Server: IP ADDRESS OF PI
Name: Pi-Ethernet
Labels: Pi
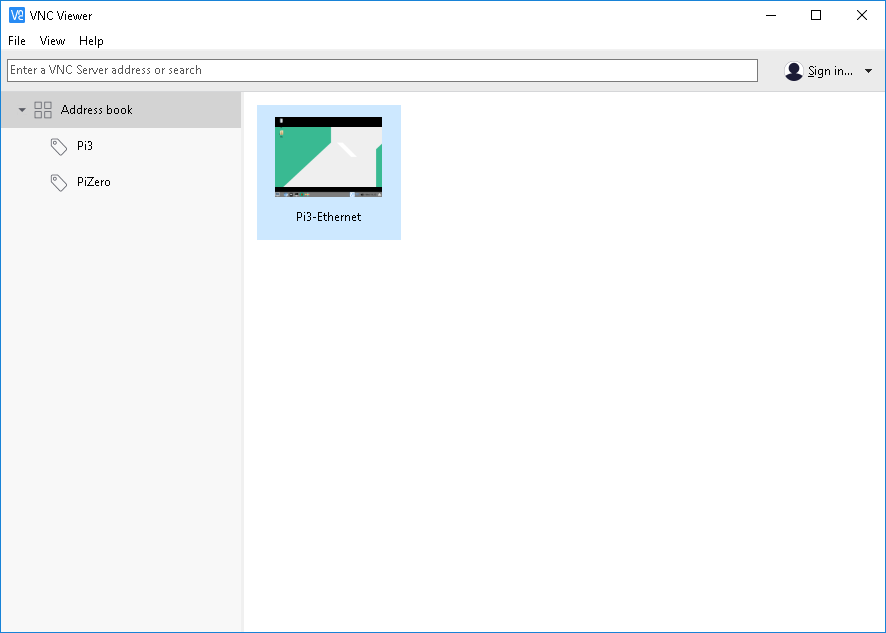
Then double click on the connection that you have just created to trigger the VNC Viewer to connect to our Raspberry Pi.
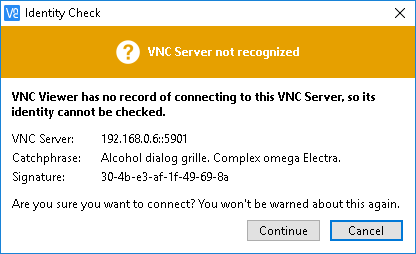
You will be asked for your username and password, these are the same as SSH

Then you are asked to confirm that you would like to continue. Click on Continue its safe.
After a few seconds...
BINGO!!!
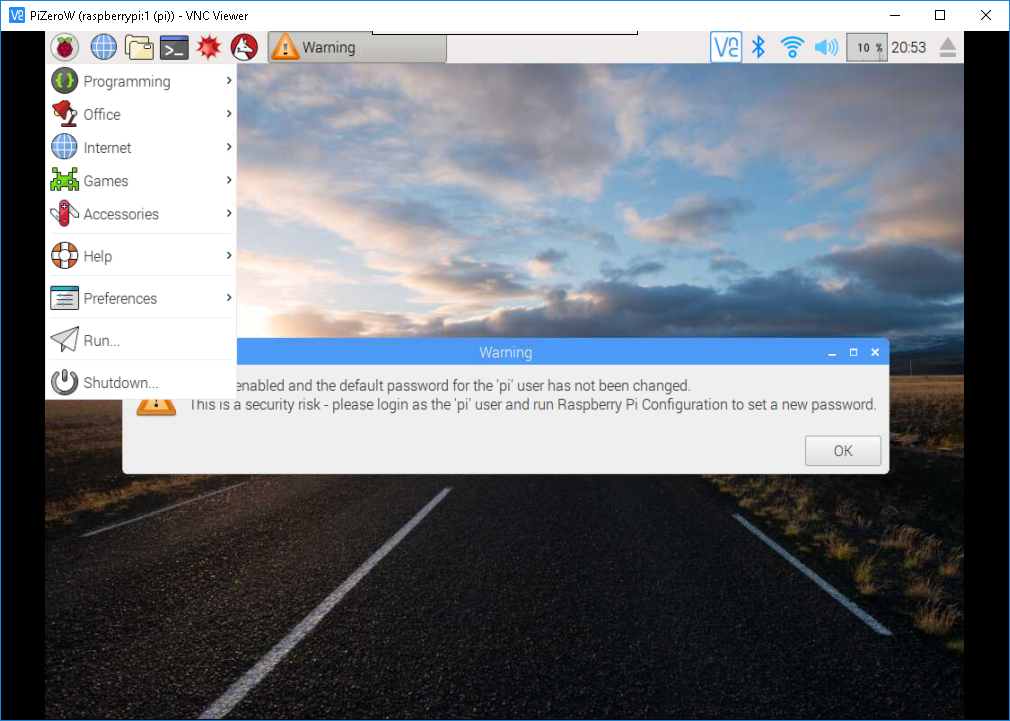
We can now control our Pi, from our laptop!
Automatically start VNC on boot

On your Raspberry Pi you can go to Preferences and then Raspberry Pi Configuration in there you can set VNC to Enable in Interfaces, so then all you need to do to use your Pi over the Ethernet connection is to boot the Pi and then launch the VNC Viewer on your Windows 10 device.