NeoPixel Beautification Experiment
Turning a Primark beauty light into a "beautiful" light.
For the first time since the pandemic started, MrsP and I went shopping in our town centre. We popped into Primark, a discount clothes and home furnishings retailer. In its beauty section I found four LED bulbs, similar to the lights used by make up artists. The size and shape, oh and the cost caught my eye. So for £4.50 I picked one up for a hack. Looking back at the hack, this would make a great sensory toy or just something to add a little fun lighting to your room. The biggest cost in the project are the NeoPixels, but these can be bought quite cheaply from Aliexpress. I used some leftover NeoPixels from my Christmas 2019 hack and a spare Adafruit QTPy board.
So What's in the Box?
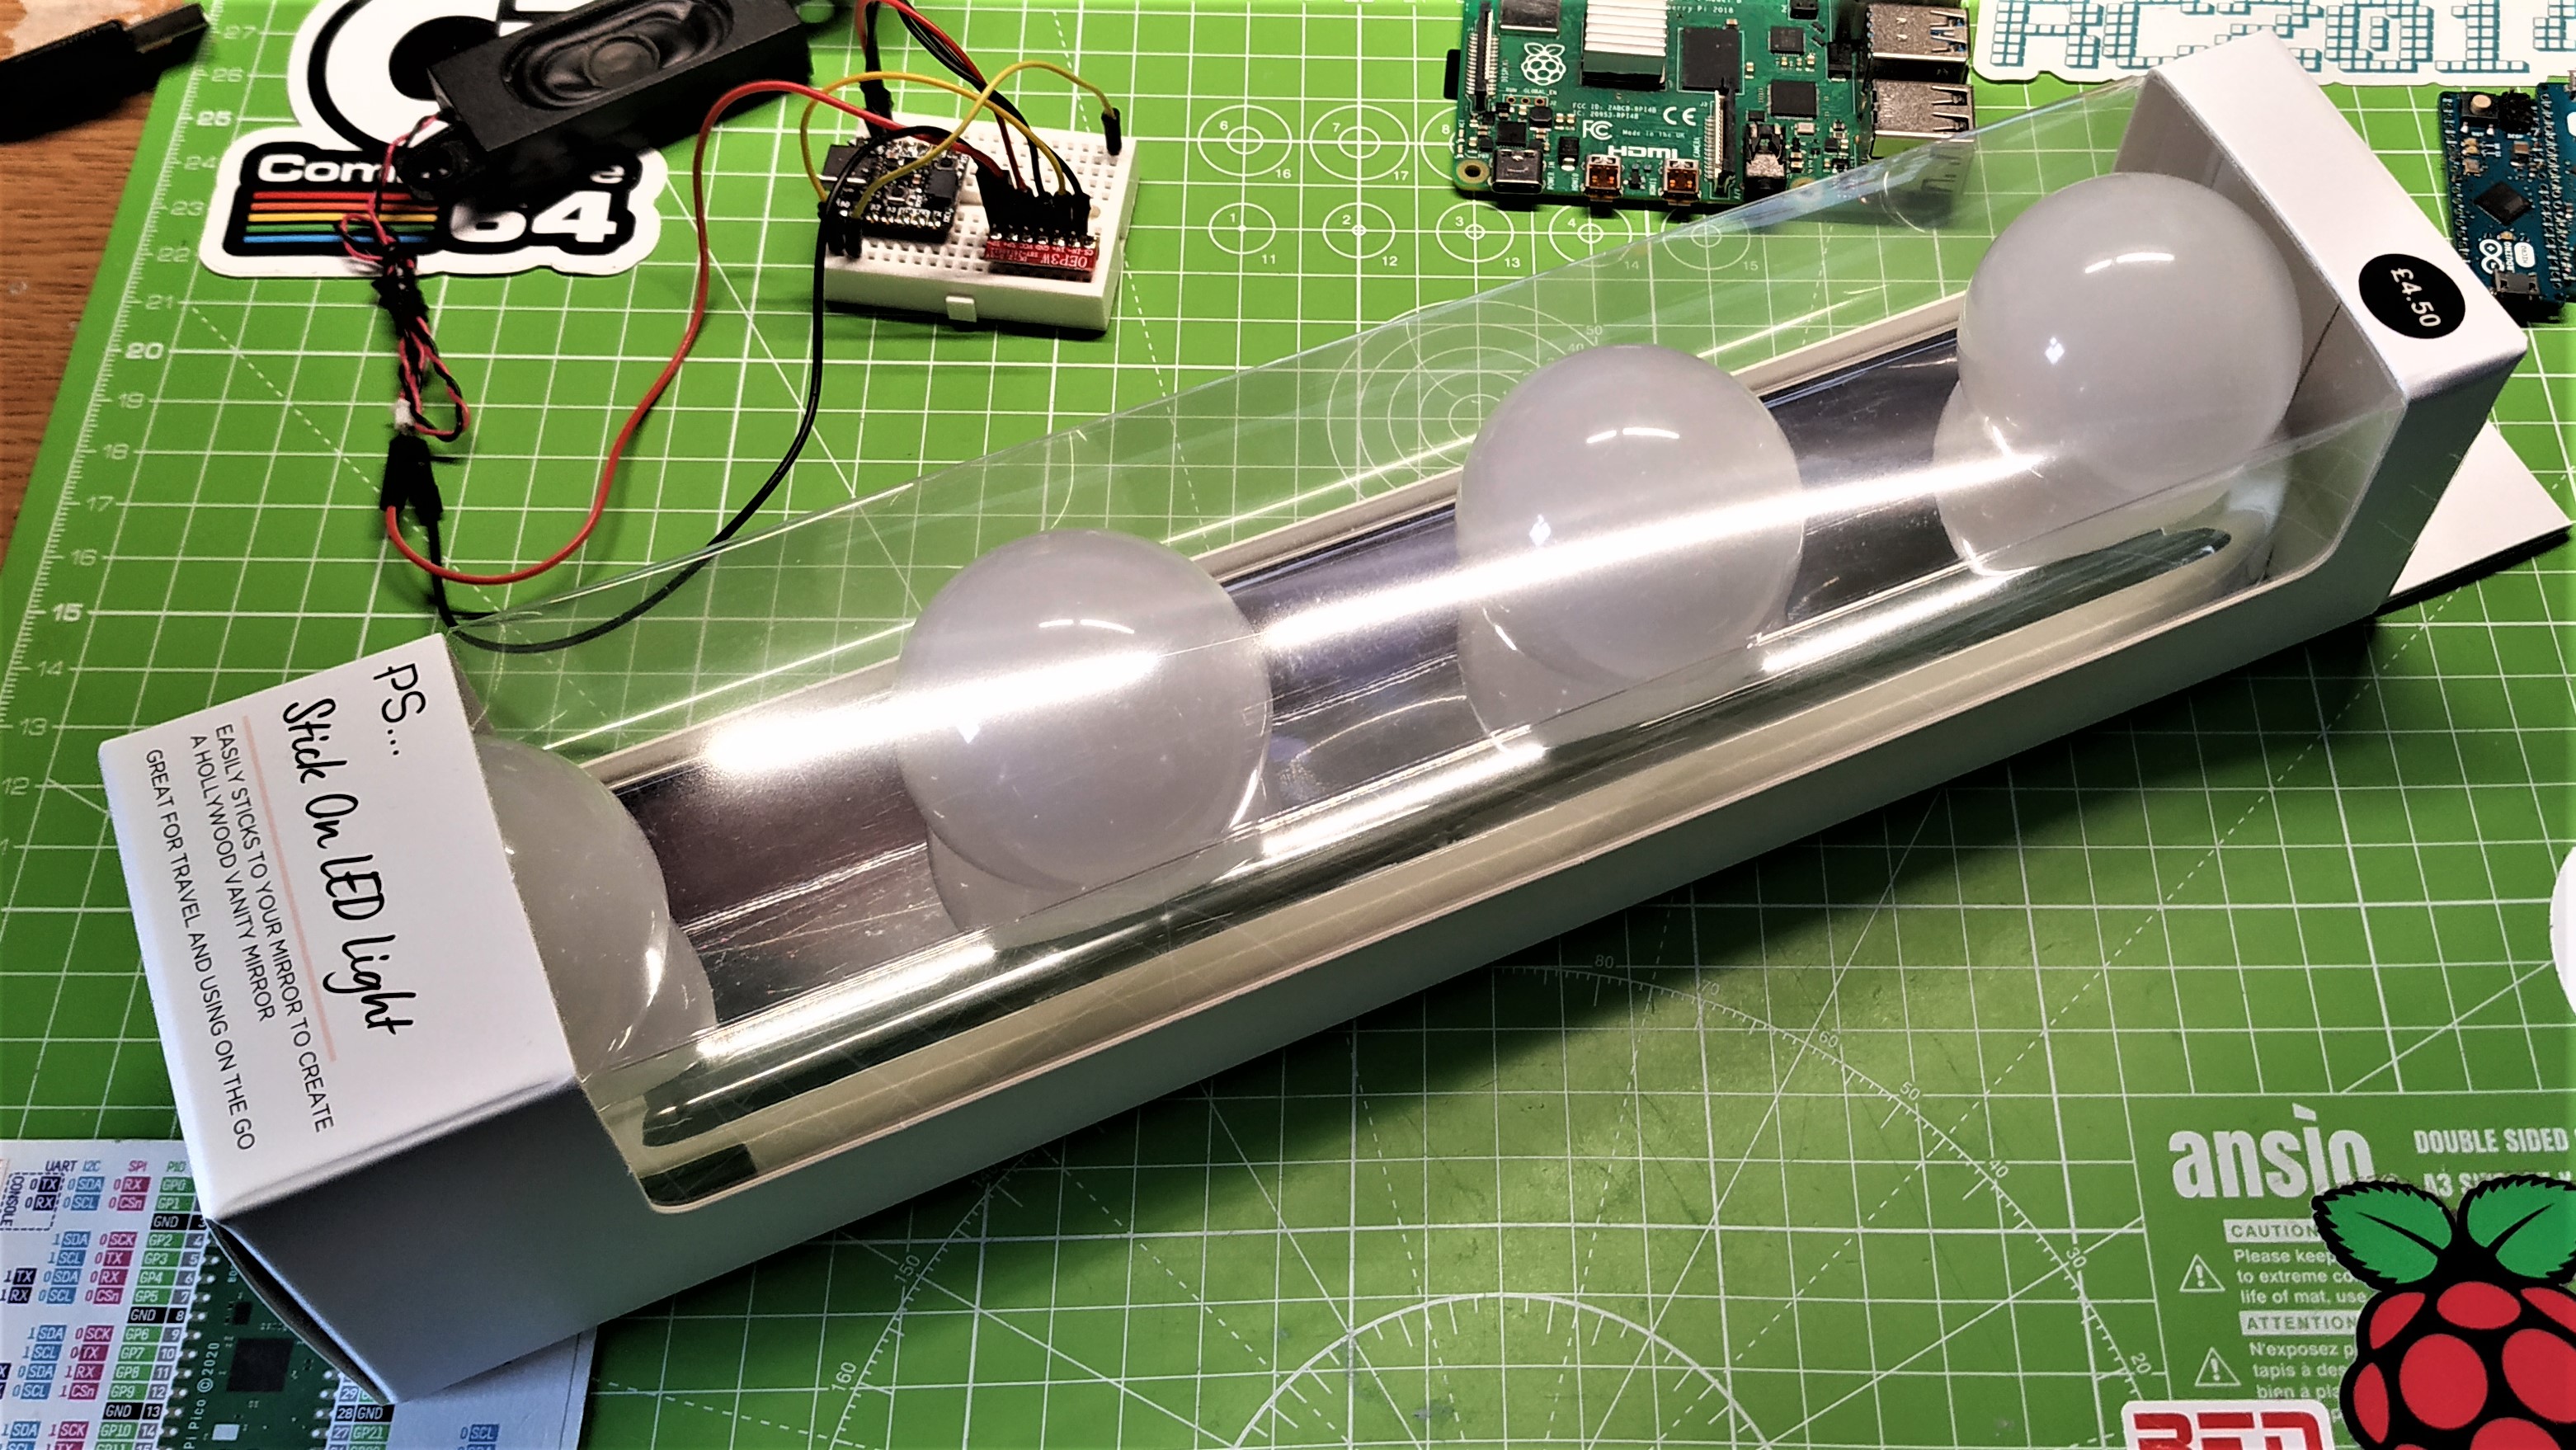
A single 30.5 x 6 x 6cm light bar which has four "bulbs". The bulbs are really diffusers for the LEDs. Power is provided via 4 x AA batteries (6V). Pop in some batteries and press the switch, and we get a bright, harsh white light.
Teardown
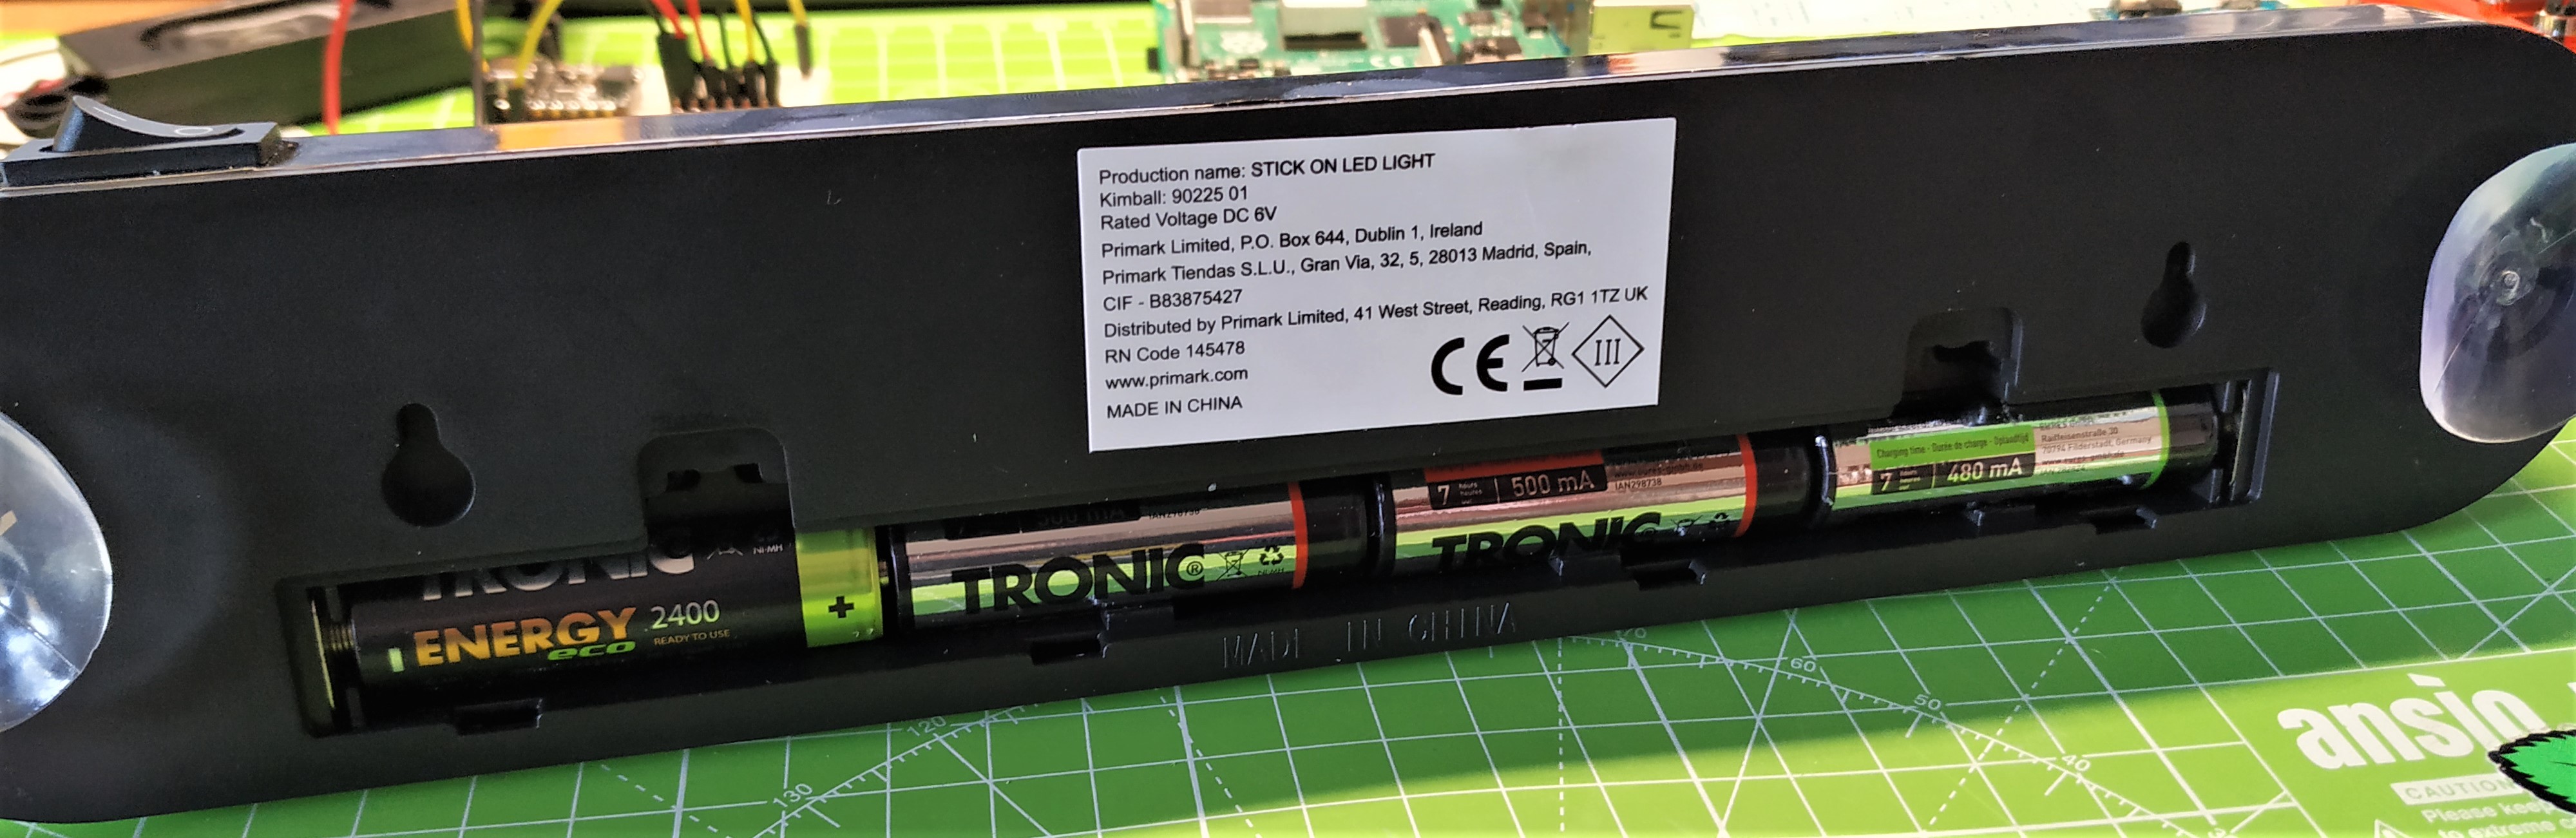
Access to innards is via the rear panel. There are no screws, rather we need to use a spudgers / pry tool to carefully work our way around the perimeter. Take care as the silver / chrome colour is easy to chip. So place a little more stress on the black plastic if you need to.
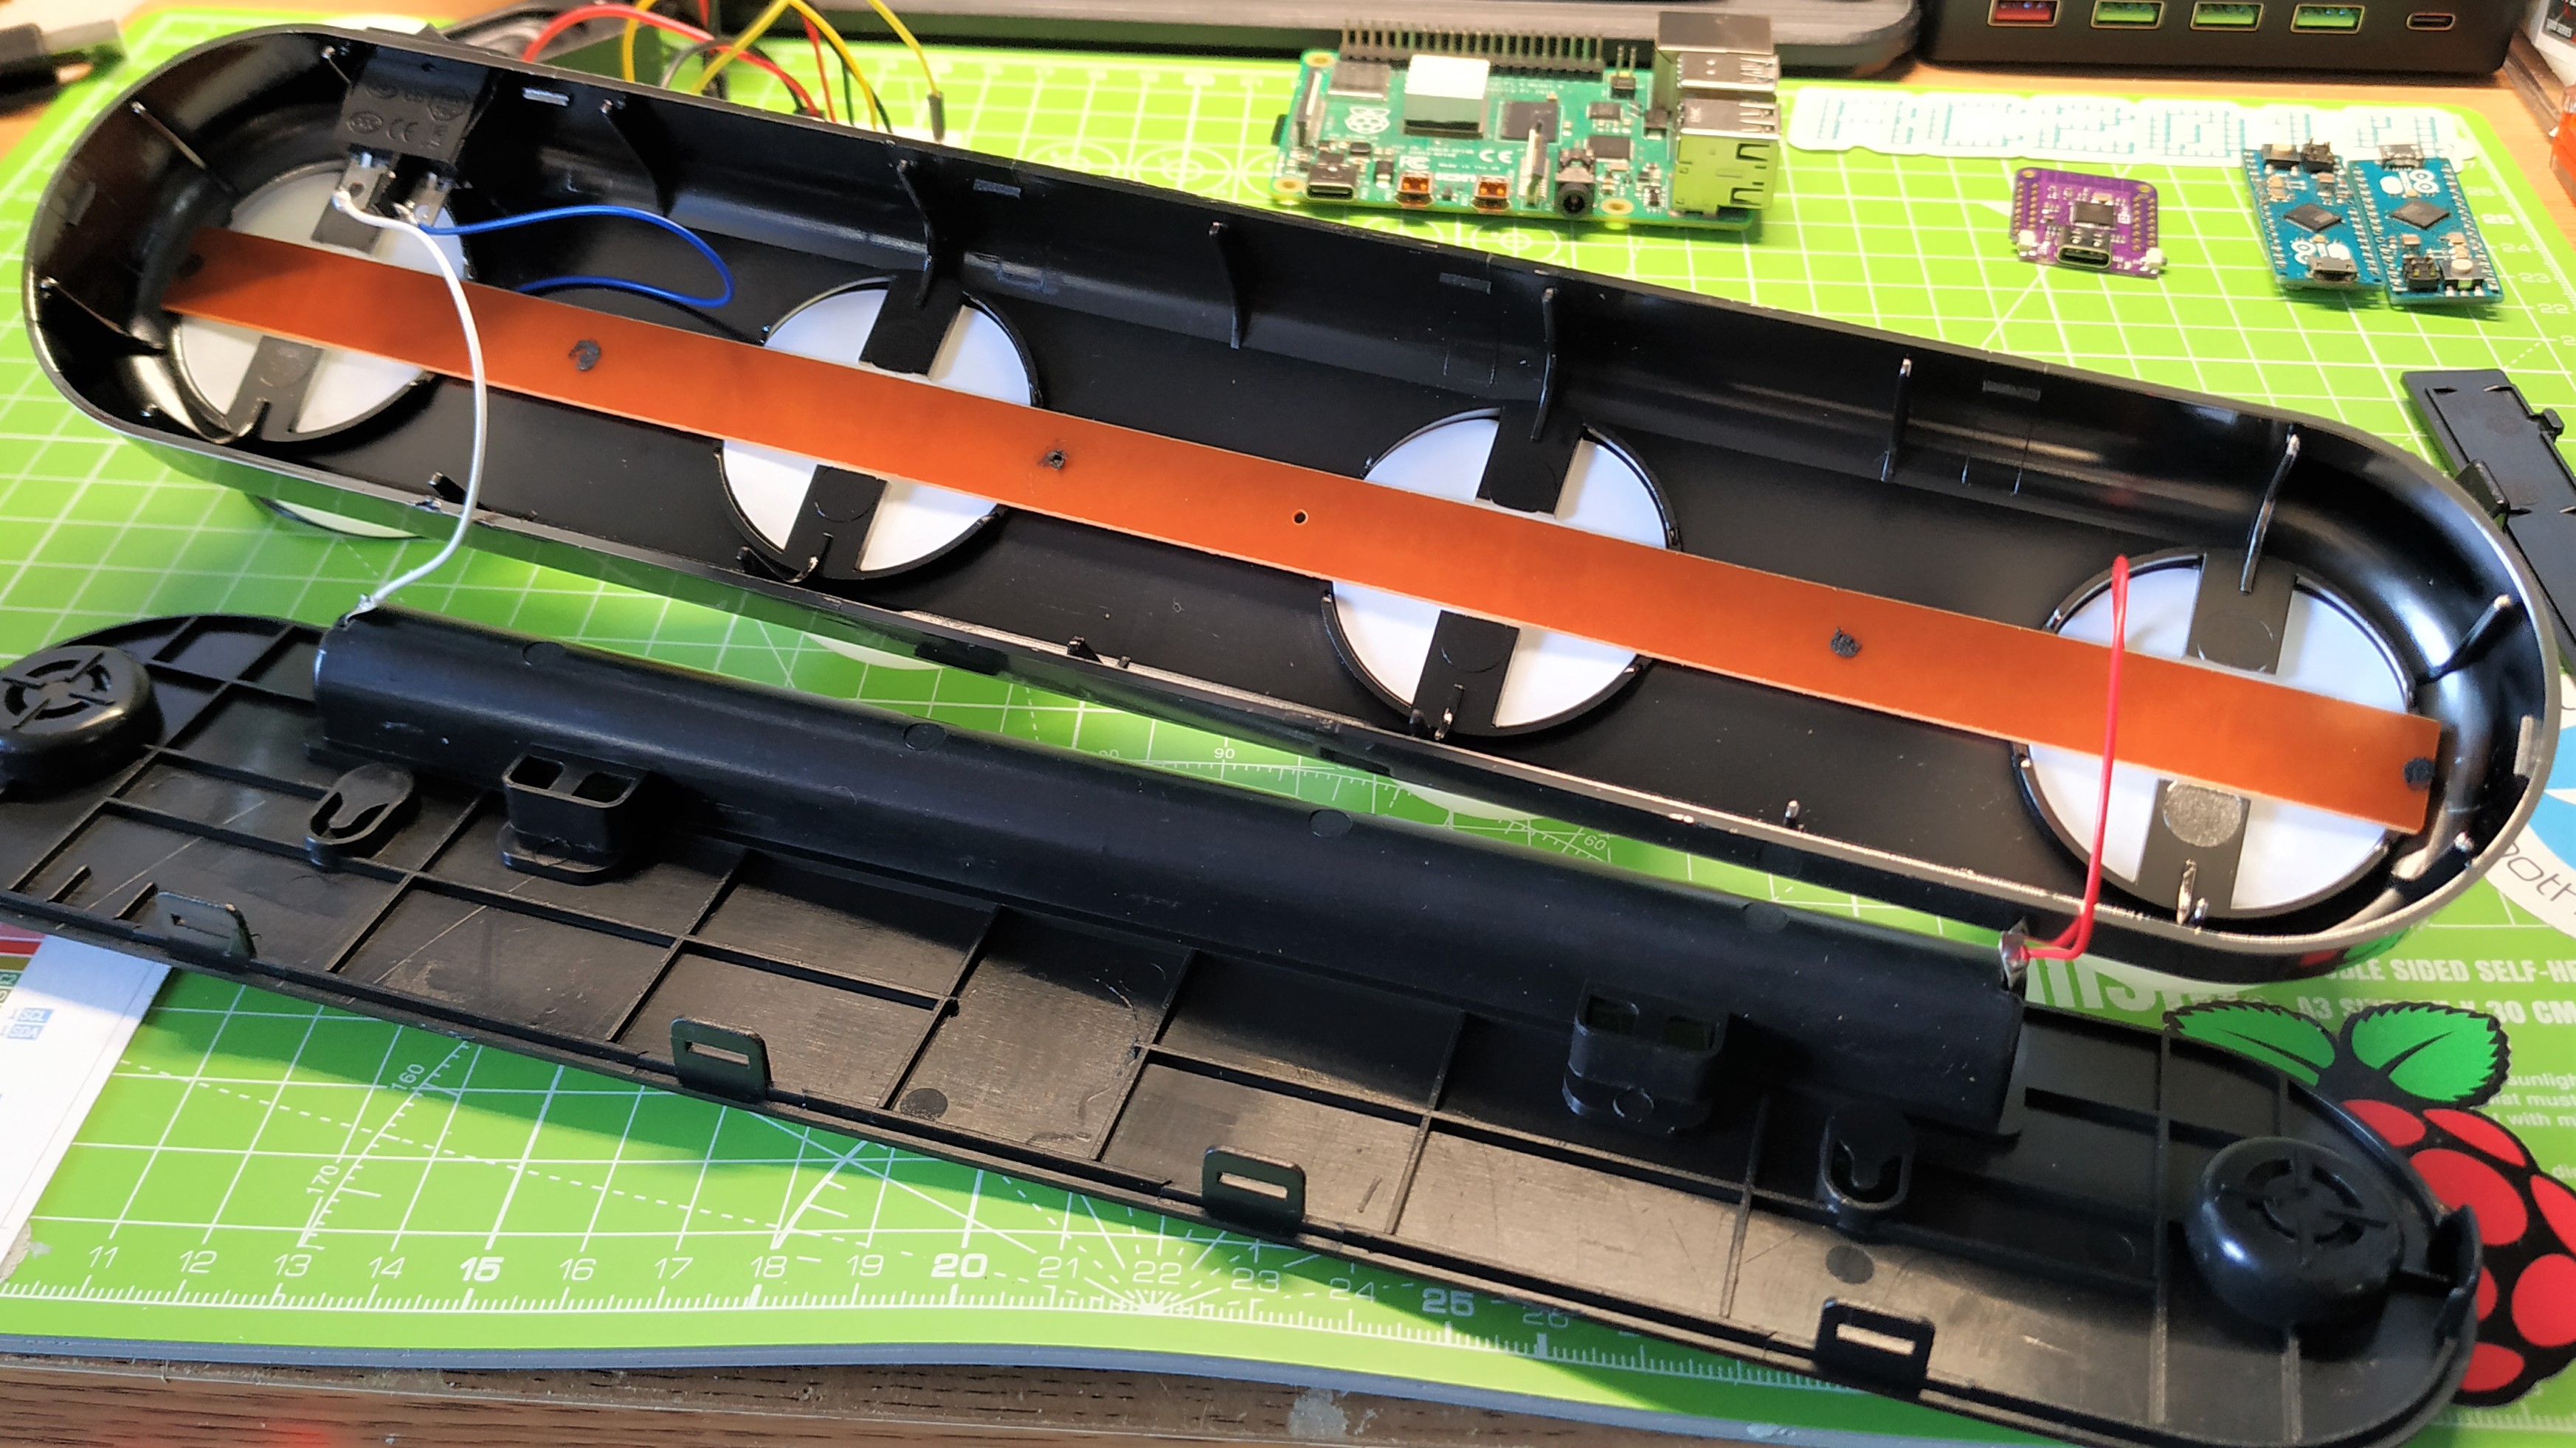
Inside the case and we see two wires from the batteries, Vcc (+) and GND (-). The GND wire connects via the switch, when turned off the switch breaks the circuit. Removing the circuit board requires snipping / squeezing the black plastic pegs on the back of the board. These have been "heat staked" on to hold the board. I used some flush cutters to remove them.
The circuit board is simple. Power goes through three 4.7 Ohm resistors which is then shared with four clusters of six LEDs. Four matching the number of "bulbs" on the unit. Six LEDs per bulb is quite a lot but then we do get a really bright light from them all. The LEDs are crudely placed into the centre of holes, cut into thin plastic spacers. The bulbs diffuse the light from the six LEDs.
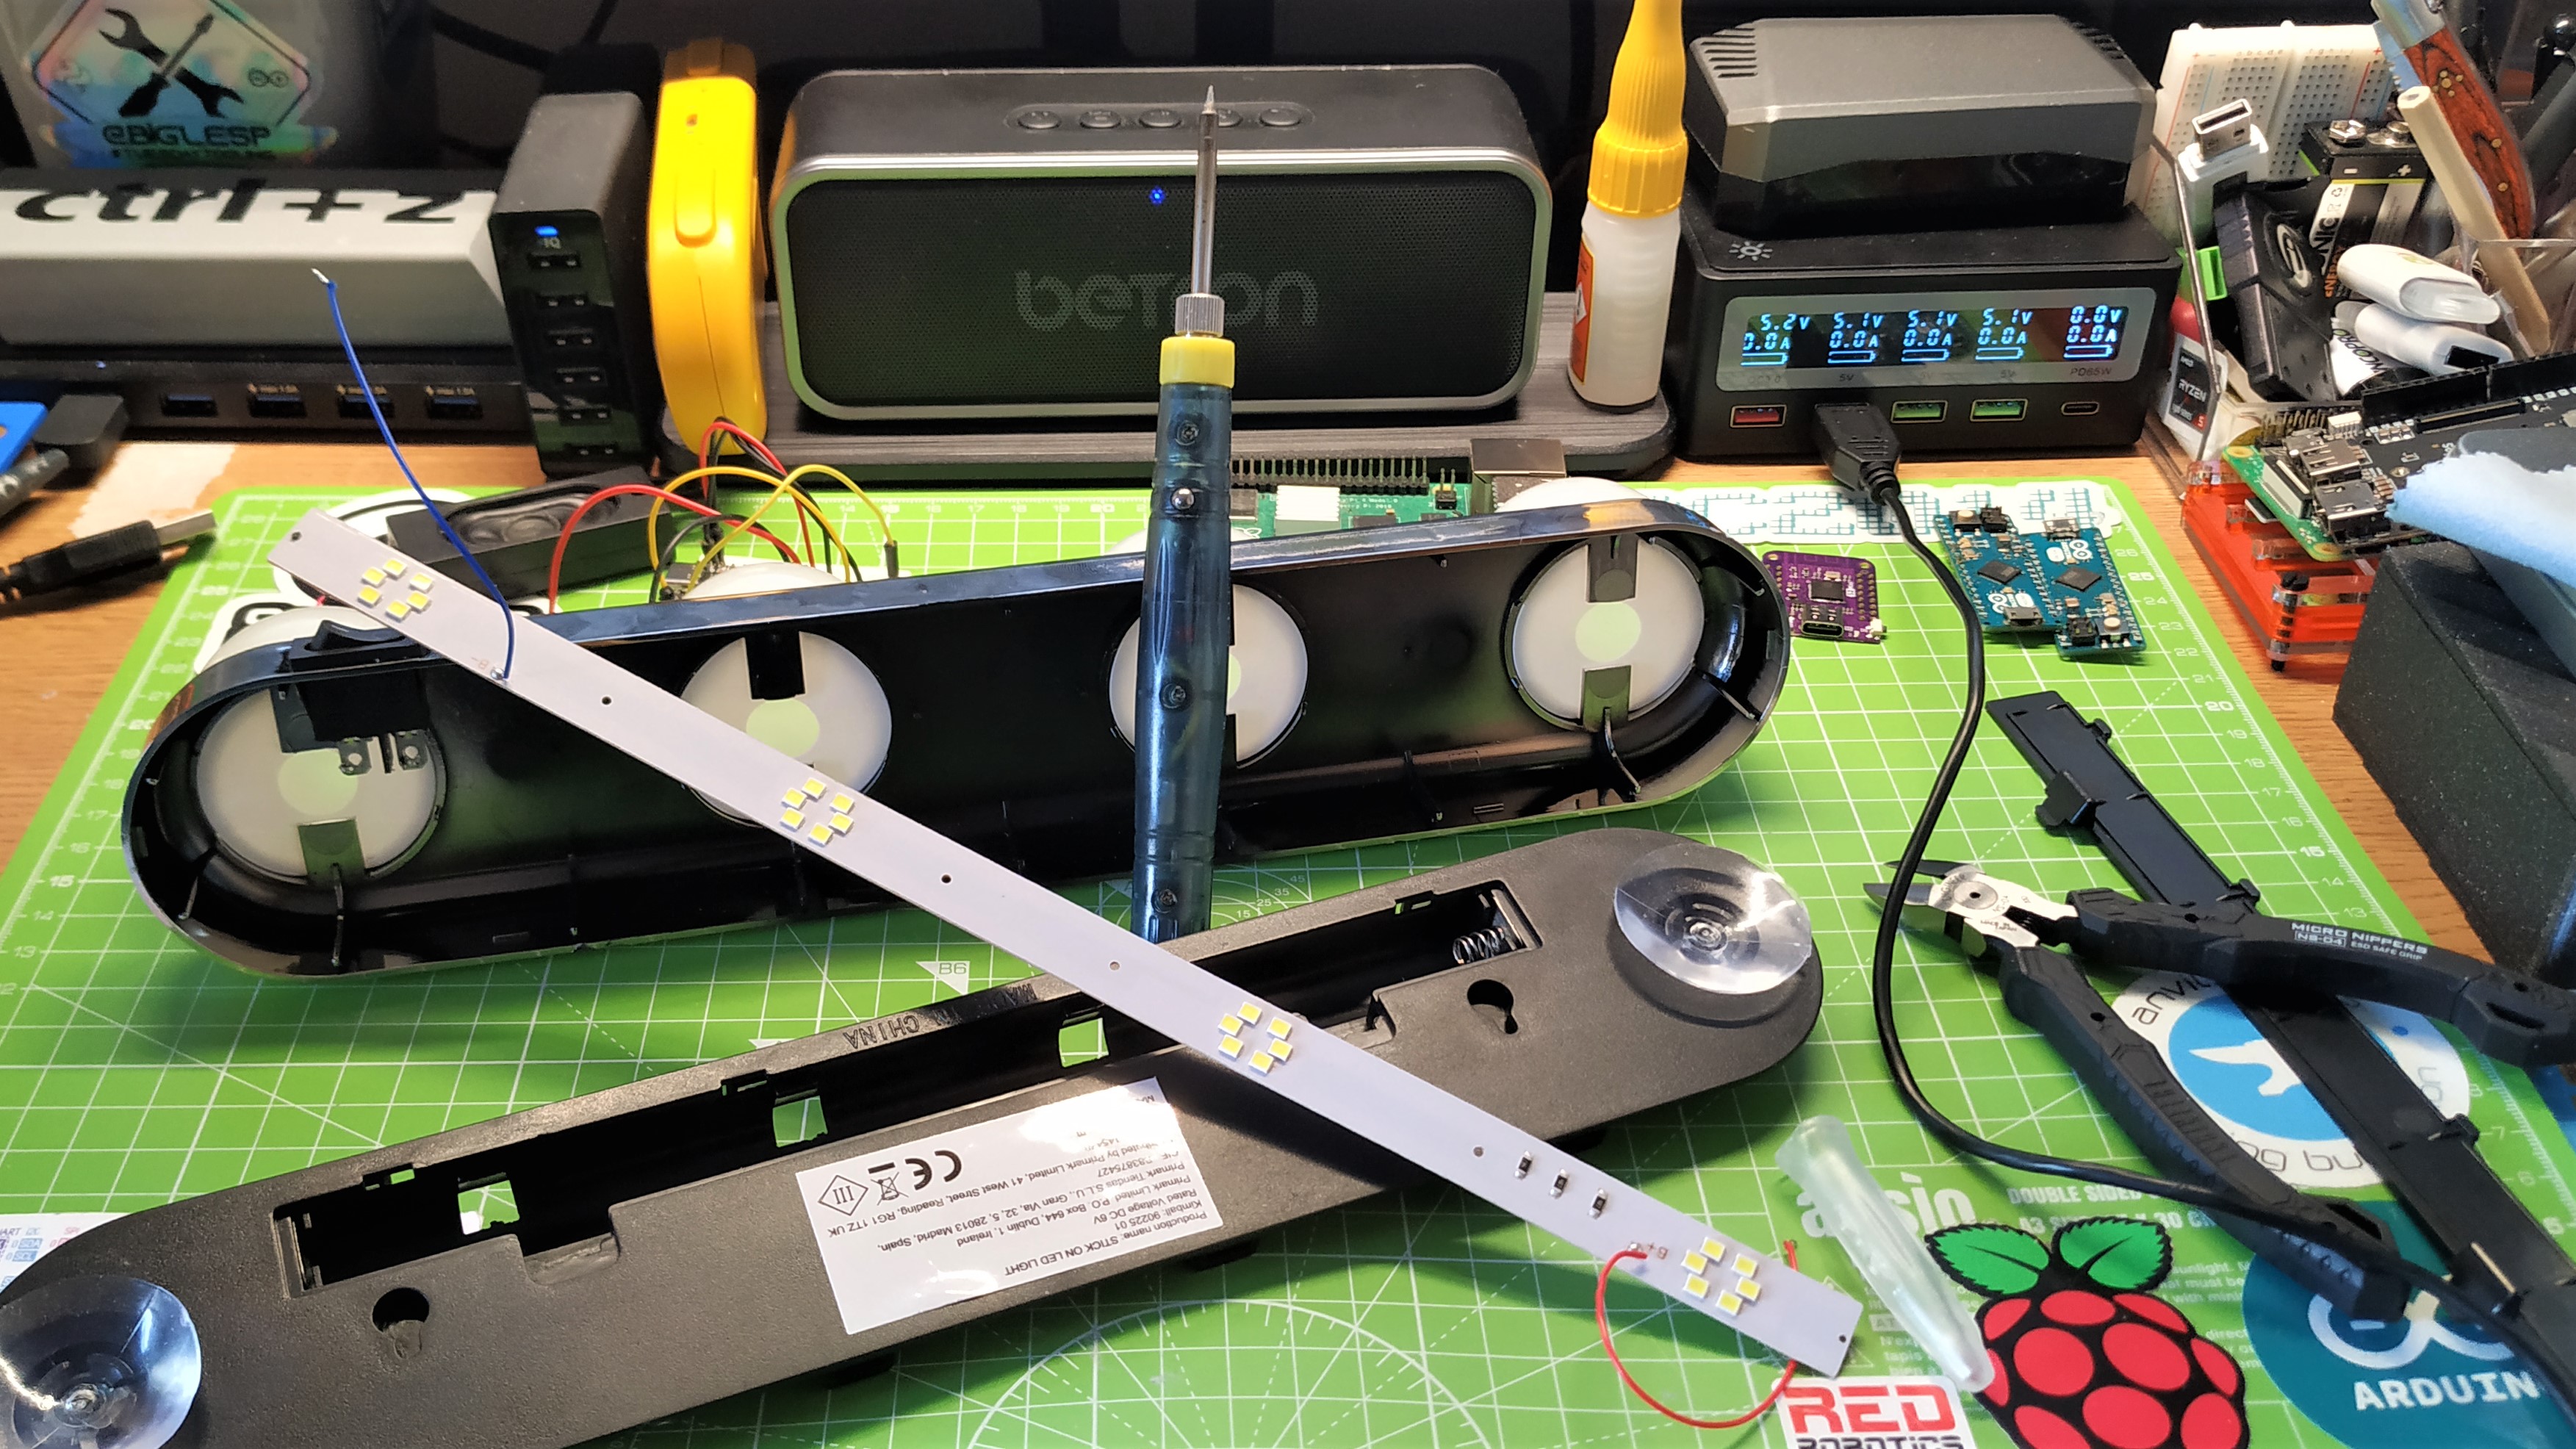
I desoldered the connections to the battery and from the switch to the circuit board, leaving me with the bulbs and the case pieces. I removed the switch, as I can use the hole it leaves for USB access. The circuit board I've kept handy for a future project.

Hi reader!
Just Add NeoPixels
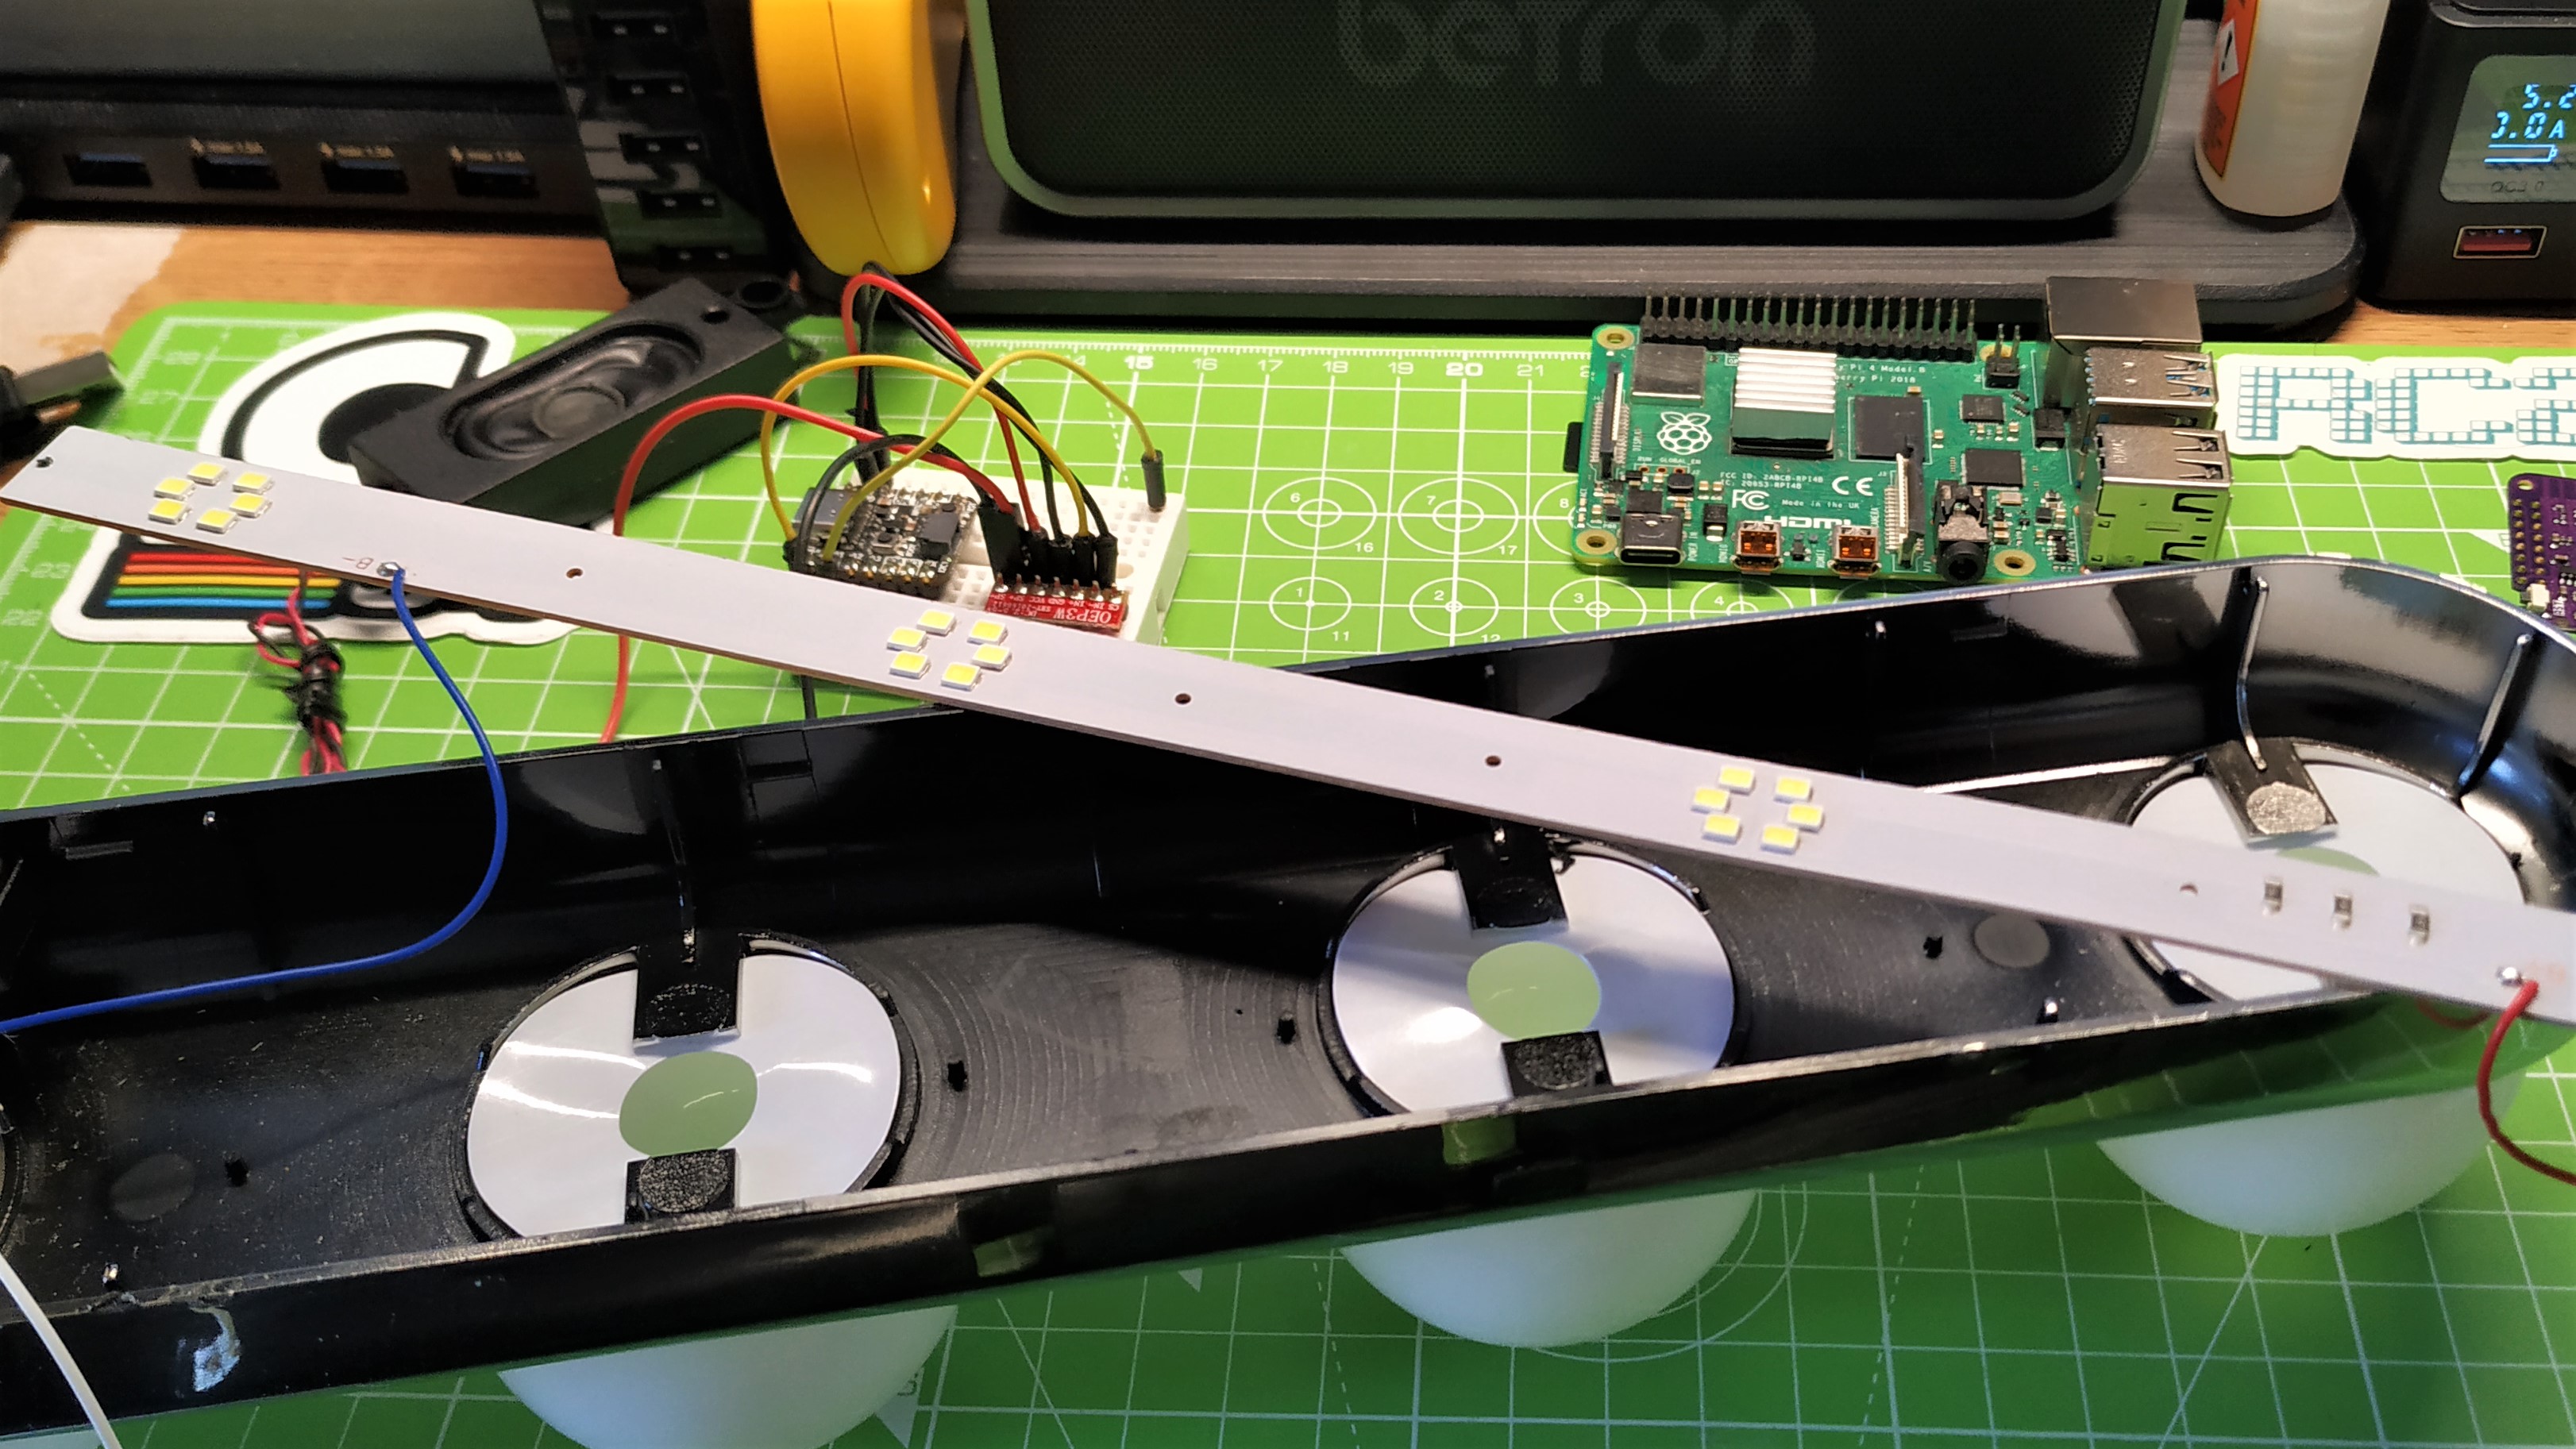
My first task was to find some suitable NeoPixels. My first test was with some surface mounted pixels, held on a small breakout board. These worked, but had very little impact when diffused. So I dug around and found some spare "fairy light" NeoPixels which fit into the bulbs...just!
Further adventures with blinky LEDs pic.twitter.com/EhD55trGgP
— biglesp (@biglesp) September 8, 2021
I did a test fit and everything seemed to work, if a little tight. I then soldered up the connections. As I was using Adafruit's QTPy, a $7.50 SAMD21 based microcontroller, the code which I used for this project is essentially Adafruit's CircuitPython example, something that I have referred to many times. I downloaded the example project bundle, which contained the code and the neoPixel.mpy library. Placed them on the QTPy and then edited the code a little, as I just wanted a rainbow effect, so here is my version of the code.
"""CircuitPython Essentials NeoPixel example"""
import time
import board
import neopixel

pixel_pin = board.A1
num_pixels = 8

pixels = neopixel.NeoPixel(pixel_pin, num_pixels, brightness=1, auto_write=False)


def wheel(pos):
    # Input a value 0 to 255 to get a color value.
    # The colours are a transition r - g - b - back to r.
    if pos < 0 or pos > 255:
        return (0, 0, 0)
    if pos < 85:
        return (255 - pos * 3, pos * 3, 0)
    if pos < 170:
        pos -= 85
        return (0, 255 - pos * 3, pos * 3)
    pos -= 170
    return (pos * 3, 0, 255 - pos * 3)


def color_chase(color, wait):
    for i in range(num_pixels):
        pixels[i] = color
        time.sleep(wait)
        pixels.show()
    time.sleep(0.5)


def rainbow_cycle(wait):
    for j in range(255):
        for i in range(num_pixels):
            rc_index = (i * 256 // num_pixels) + j
            pixels[i] = wheel(rc_index & 255)
        pixels.show()
        time.sleep(wait)


RED = (255, 0, 0)
YELLOW = (255, 150, 0)
GREEN = (0, 255, 0)
CYAN = (0, 255, 255)
BLUE = (0, 0, 255)
PURPLE = (180, 0, 255)

while True:
    rainbow_cycle(0)  # Increase the number to slow down the rainbow
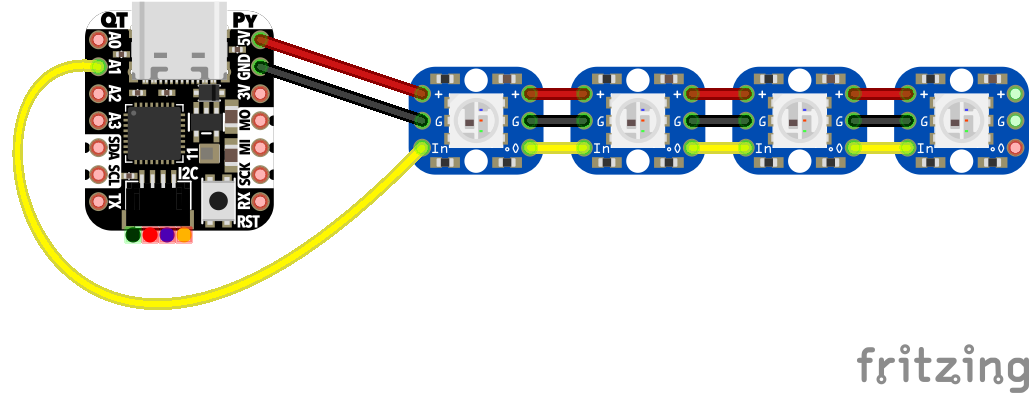
This is the circuit, except my NeoPixels came prewired. The 5V and GND are taken directly from the QTPy, and the data pin (DIN) is pin A1 on QTPy. That is all the wiring! Super simple. I connected the pixels to QTPy by soldering the wires to jumper wires, snipped and tinned so that I could solder them directly to the pins on QTPy.
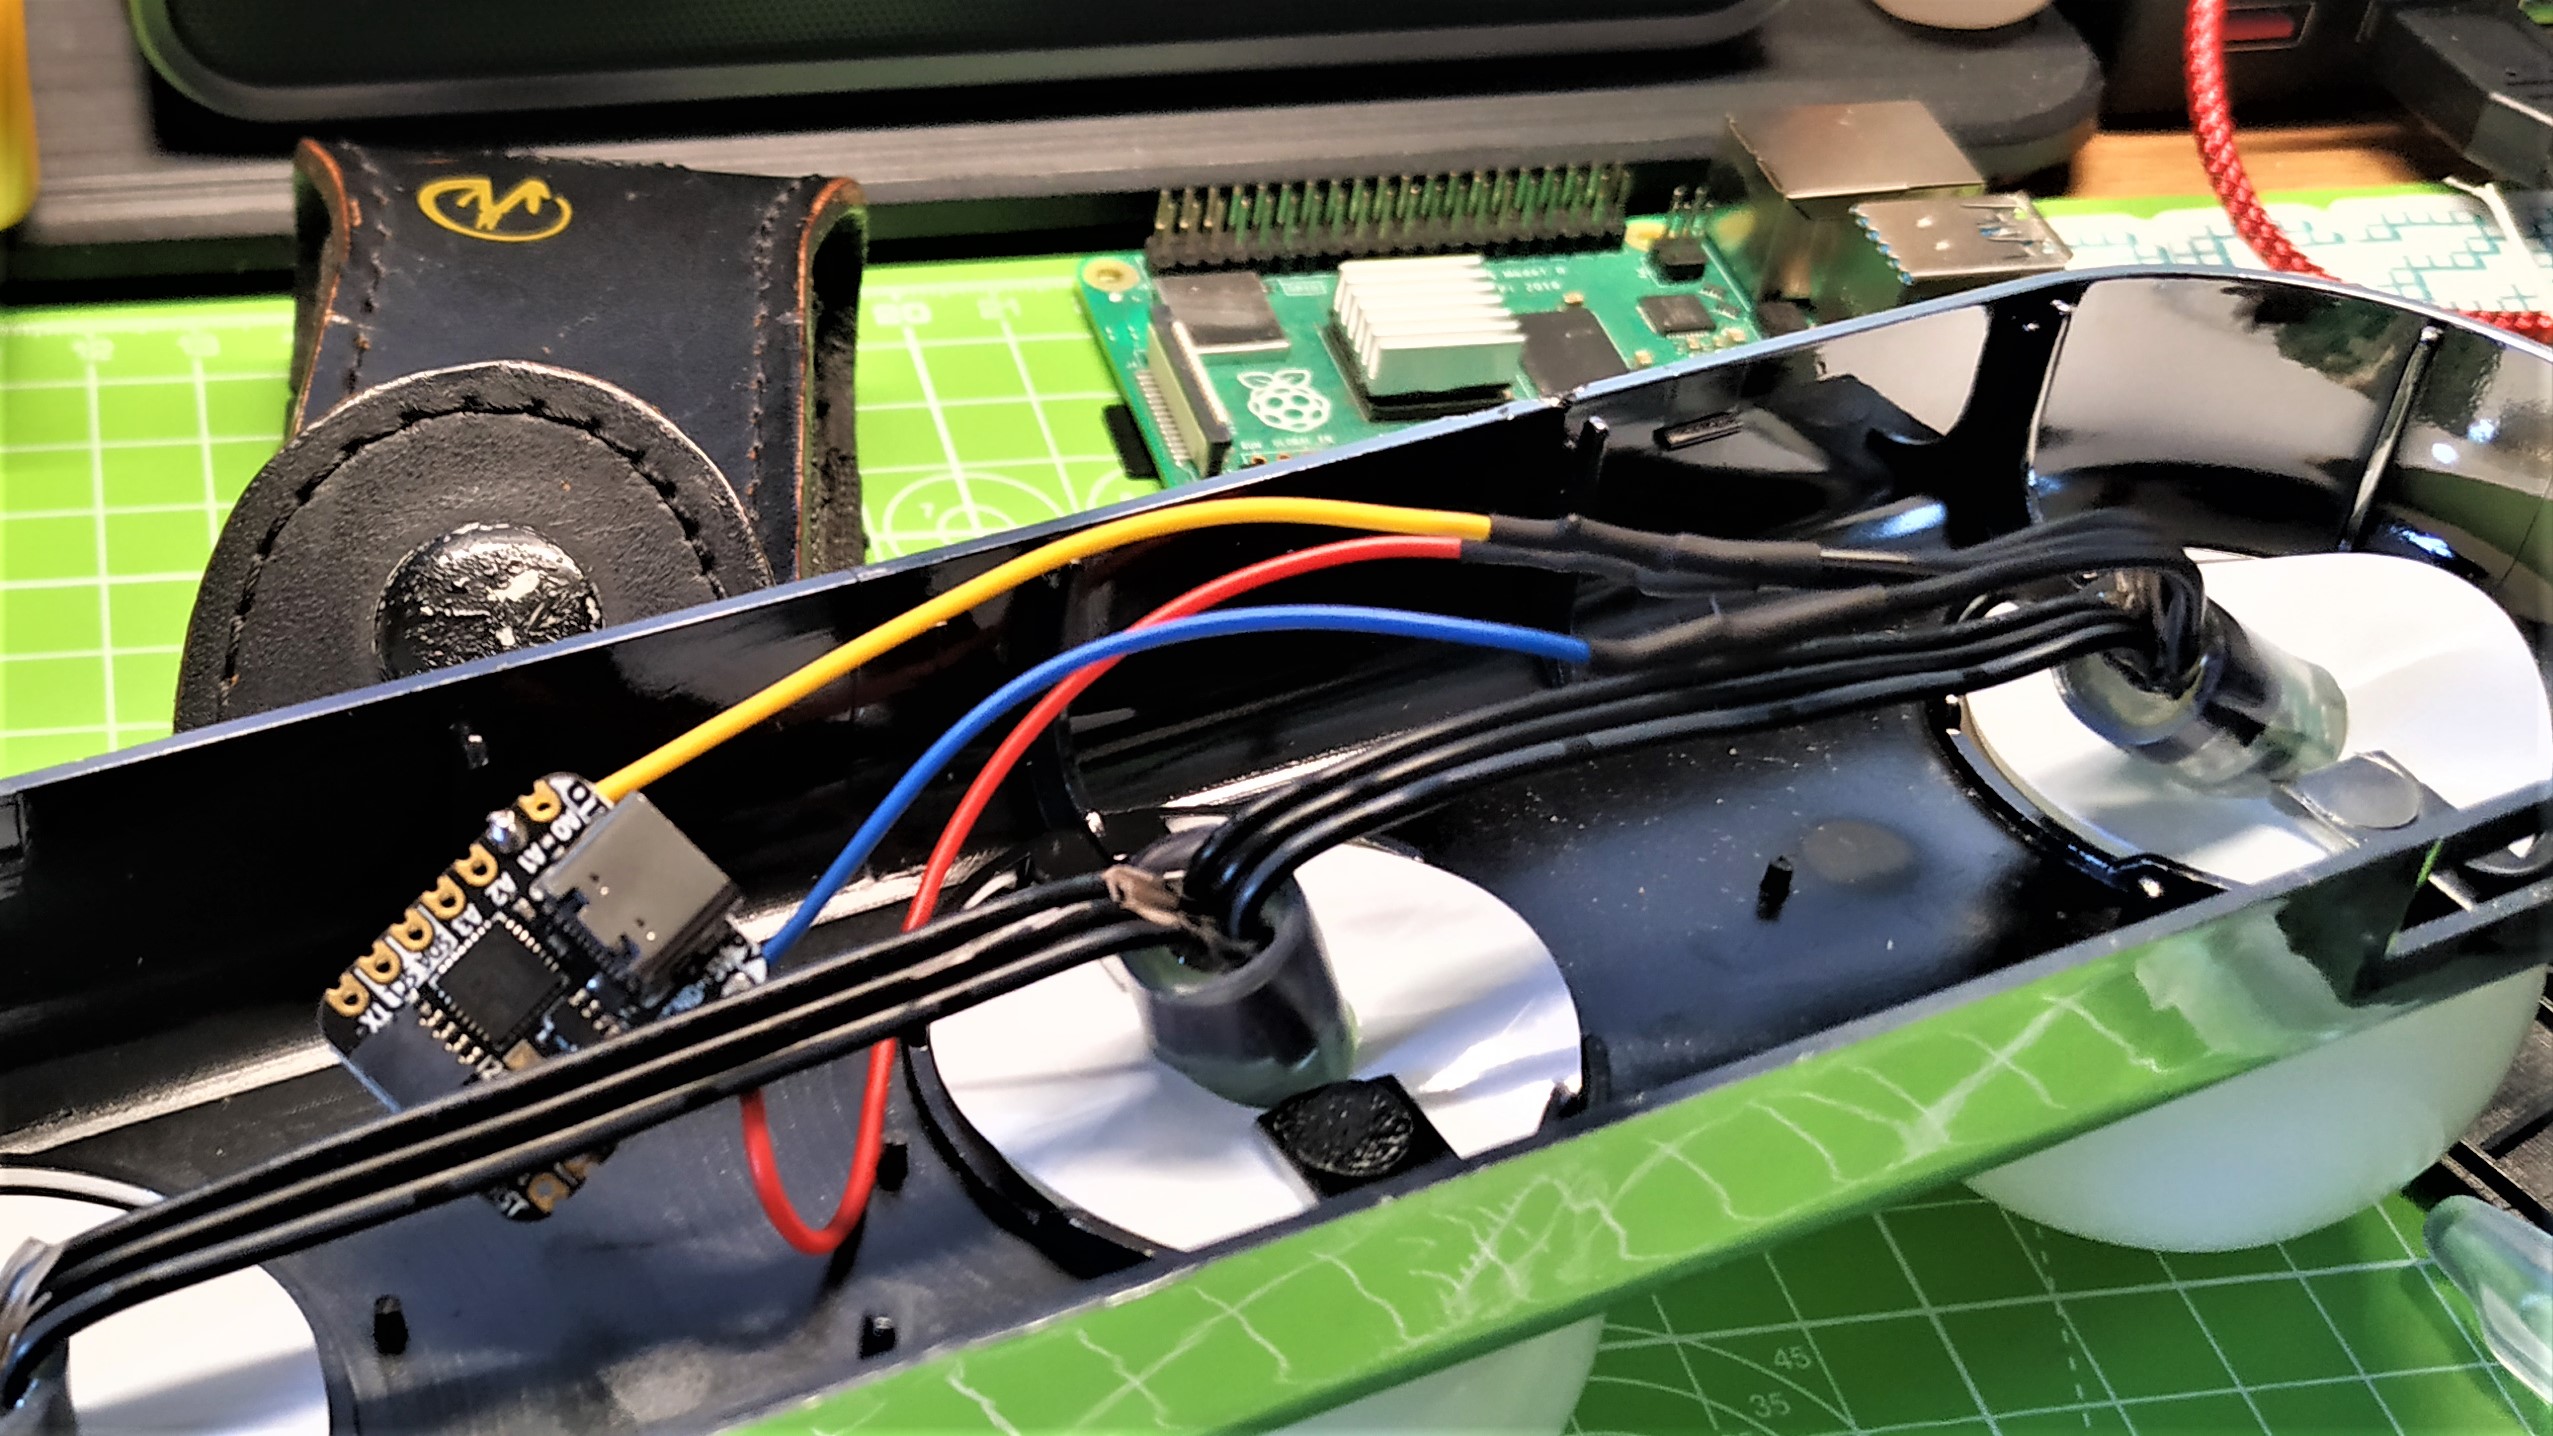
A little heat-shrink makes sure that my soldering crimes are concealed, and prevent accidental shorts.
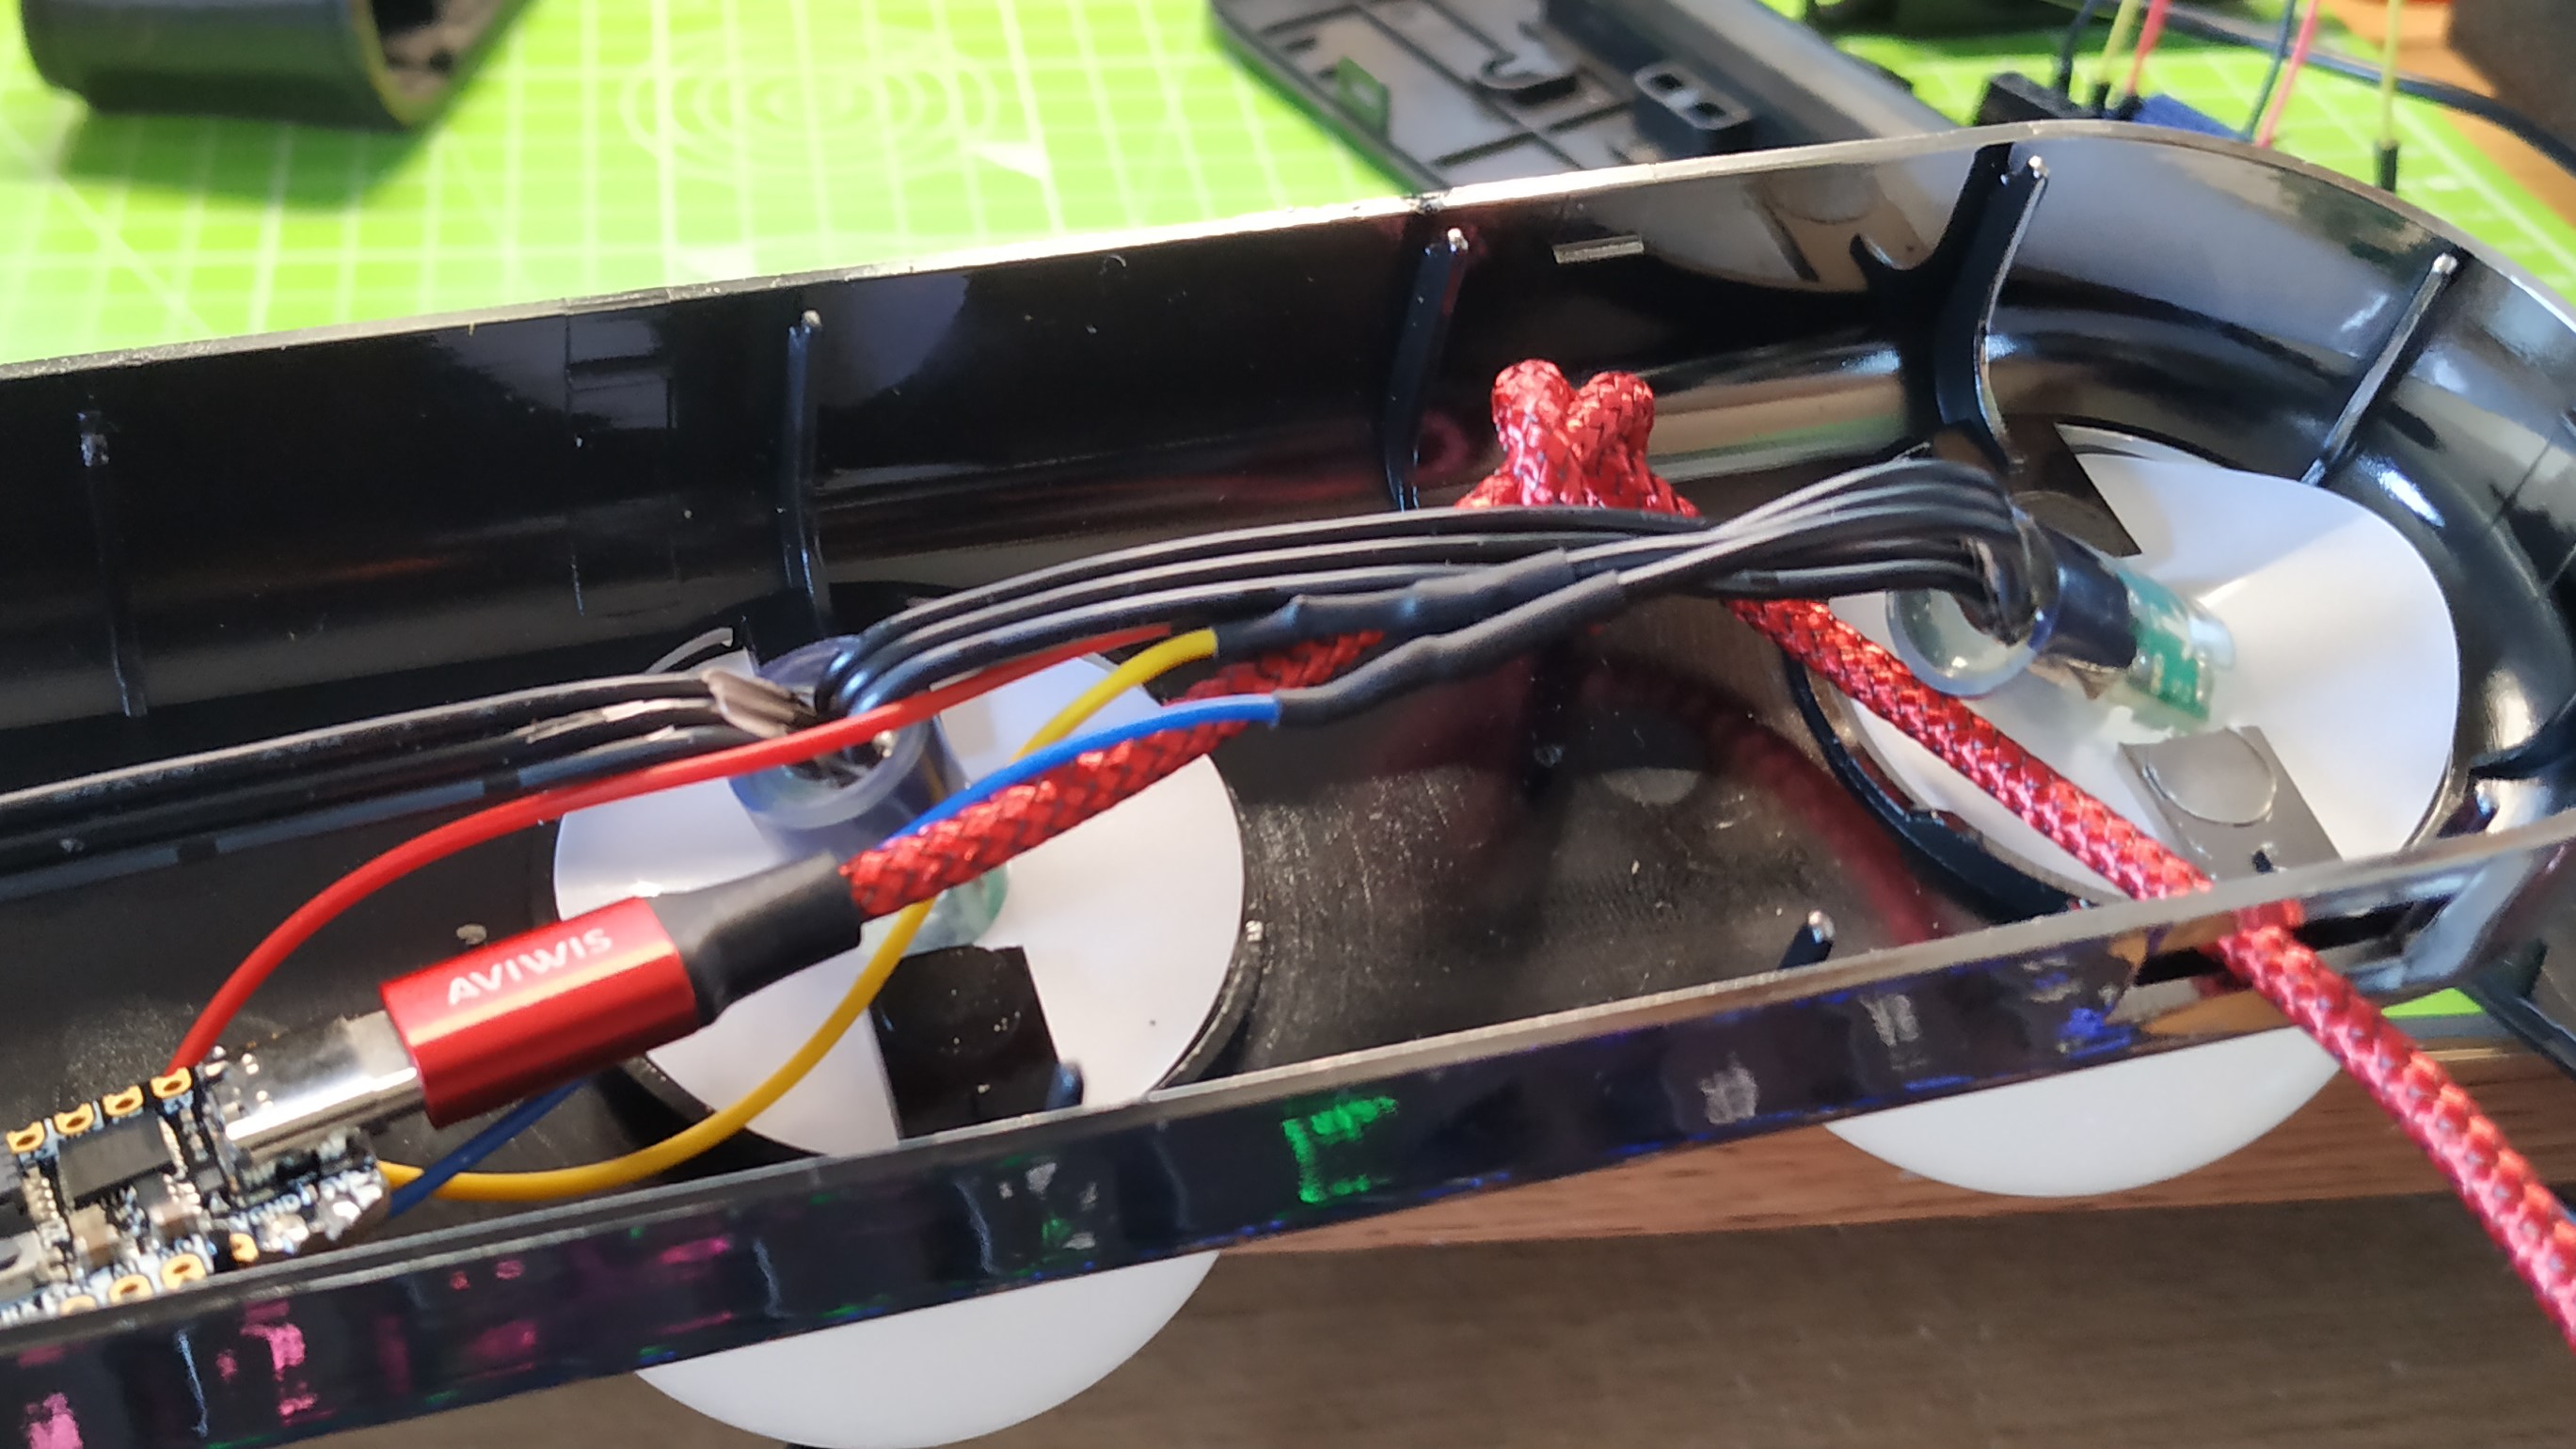
Using the hole left by the power switch I threaded a USB C cable into the case and then tied a knot in it, to act as strain relief should the cable get snagged.
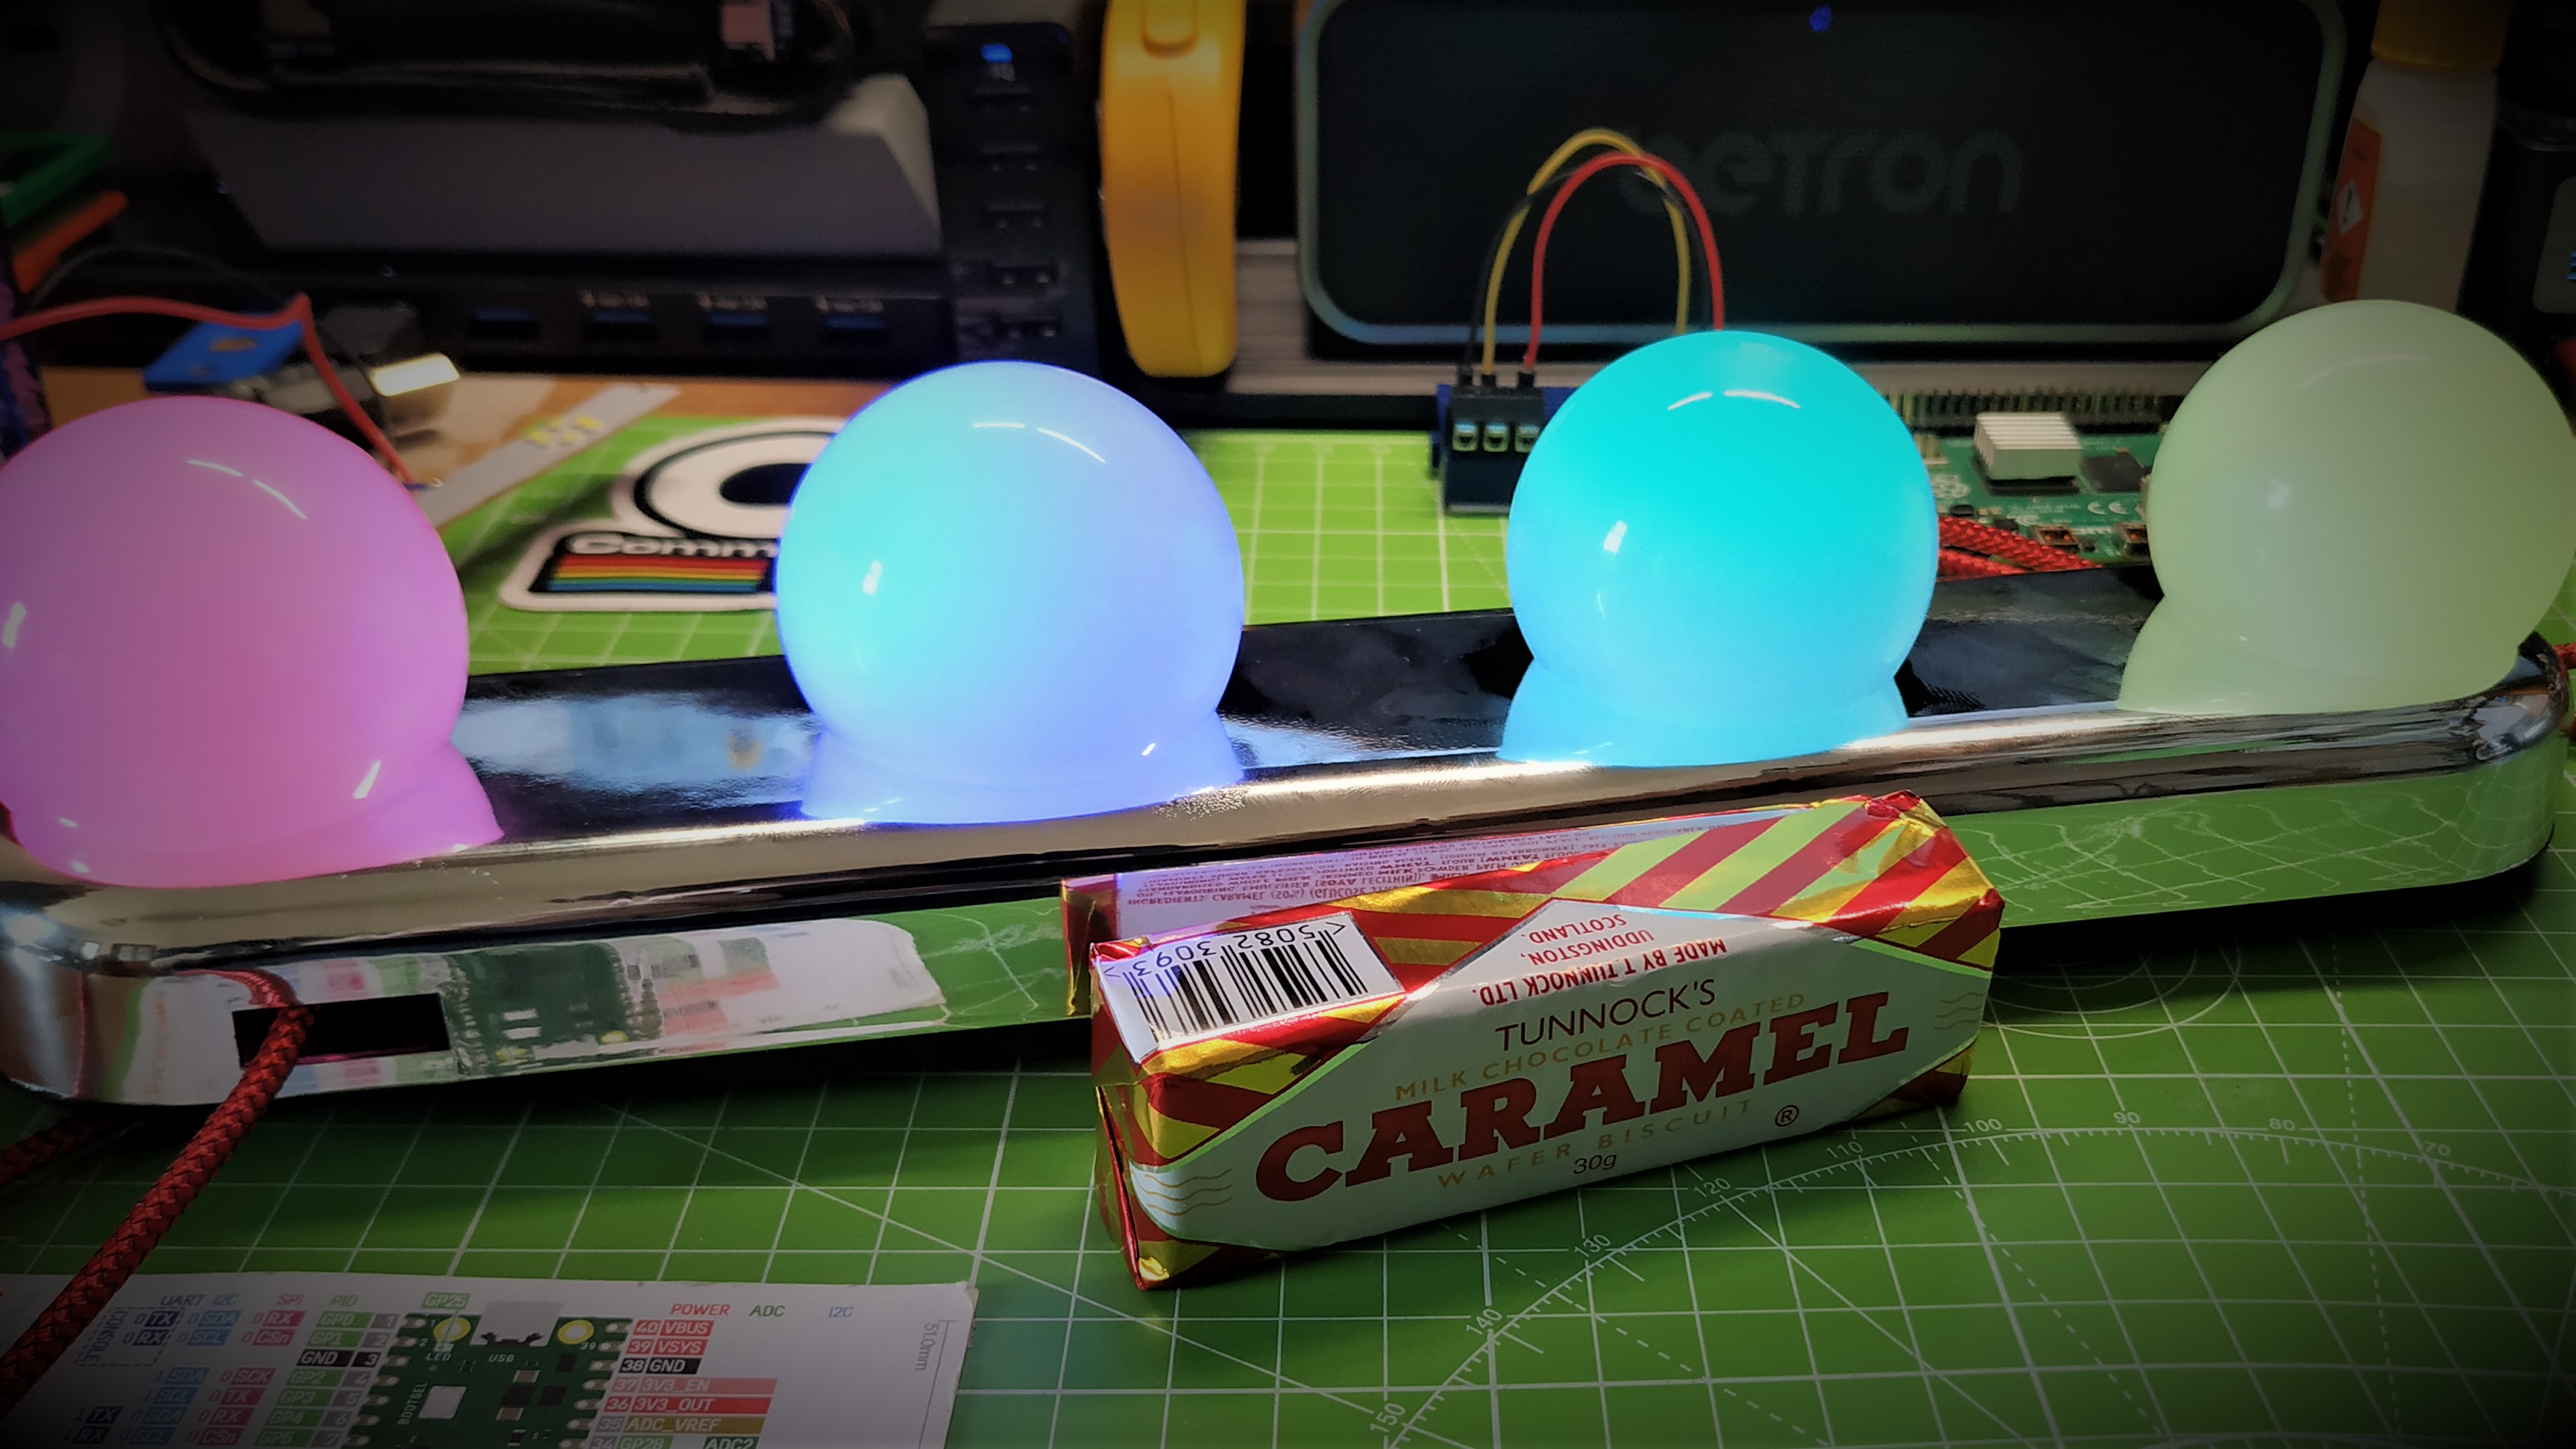
That was it! I tested the NeoPixels before I put the back panel on the light bar, then sat back and gazed upon a quick and easy hack.