Christmas Neopixel Hack 2019!
There is a tradition on this blog, and that tradition is that each year I hack a Christmas decoration with Neopixels.
The inspiration!
This blog post is inspired, and uses the code from pileofstuff who has been setting up his Christmas lights in Canada! If you are not familiar with the channel, it is a mix of eBay bargains and kit builds. Sort of like a Canadian BigClive :)
If you like what you read...
Sorry to interrupt! But would you like to buy me a cup of coffee? It helps me to pay for hosting this blog, and to buy stuff to hack from Poundshops / Dollar Stores which are used in free projects on this blog. Thanks!
So what will the finished project look like?
The kit!

For this project I had just the thing! A large plastic star which I purchased from Poundland in the January sales for £1.25, it was £5 so for £1.25 it is a bargain.
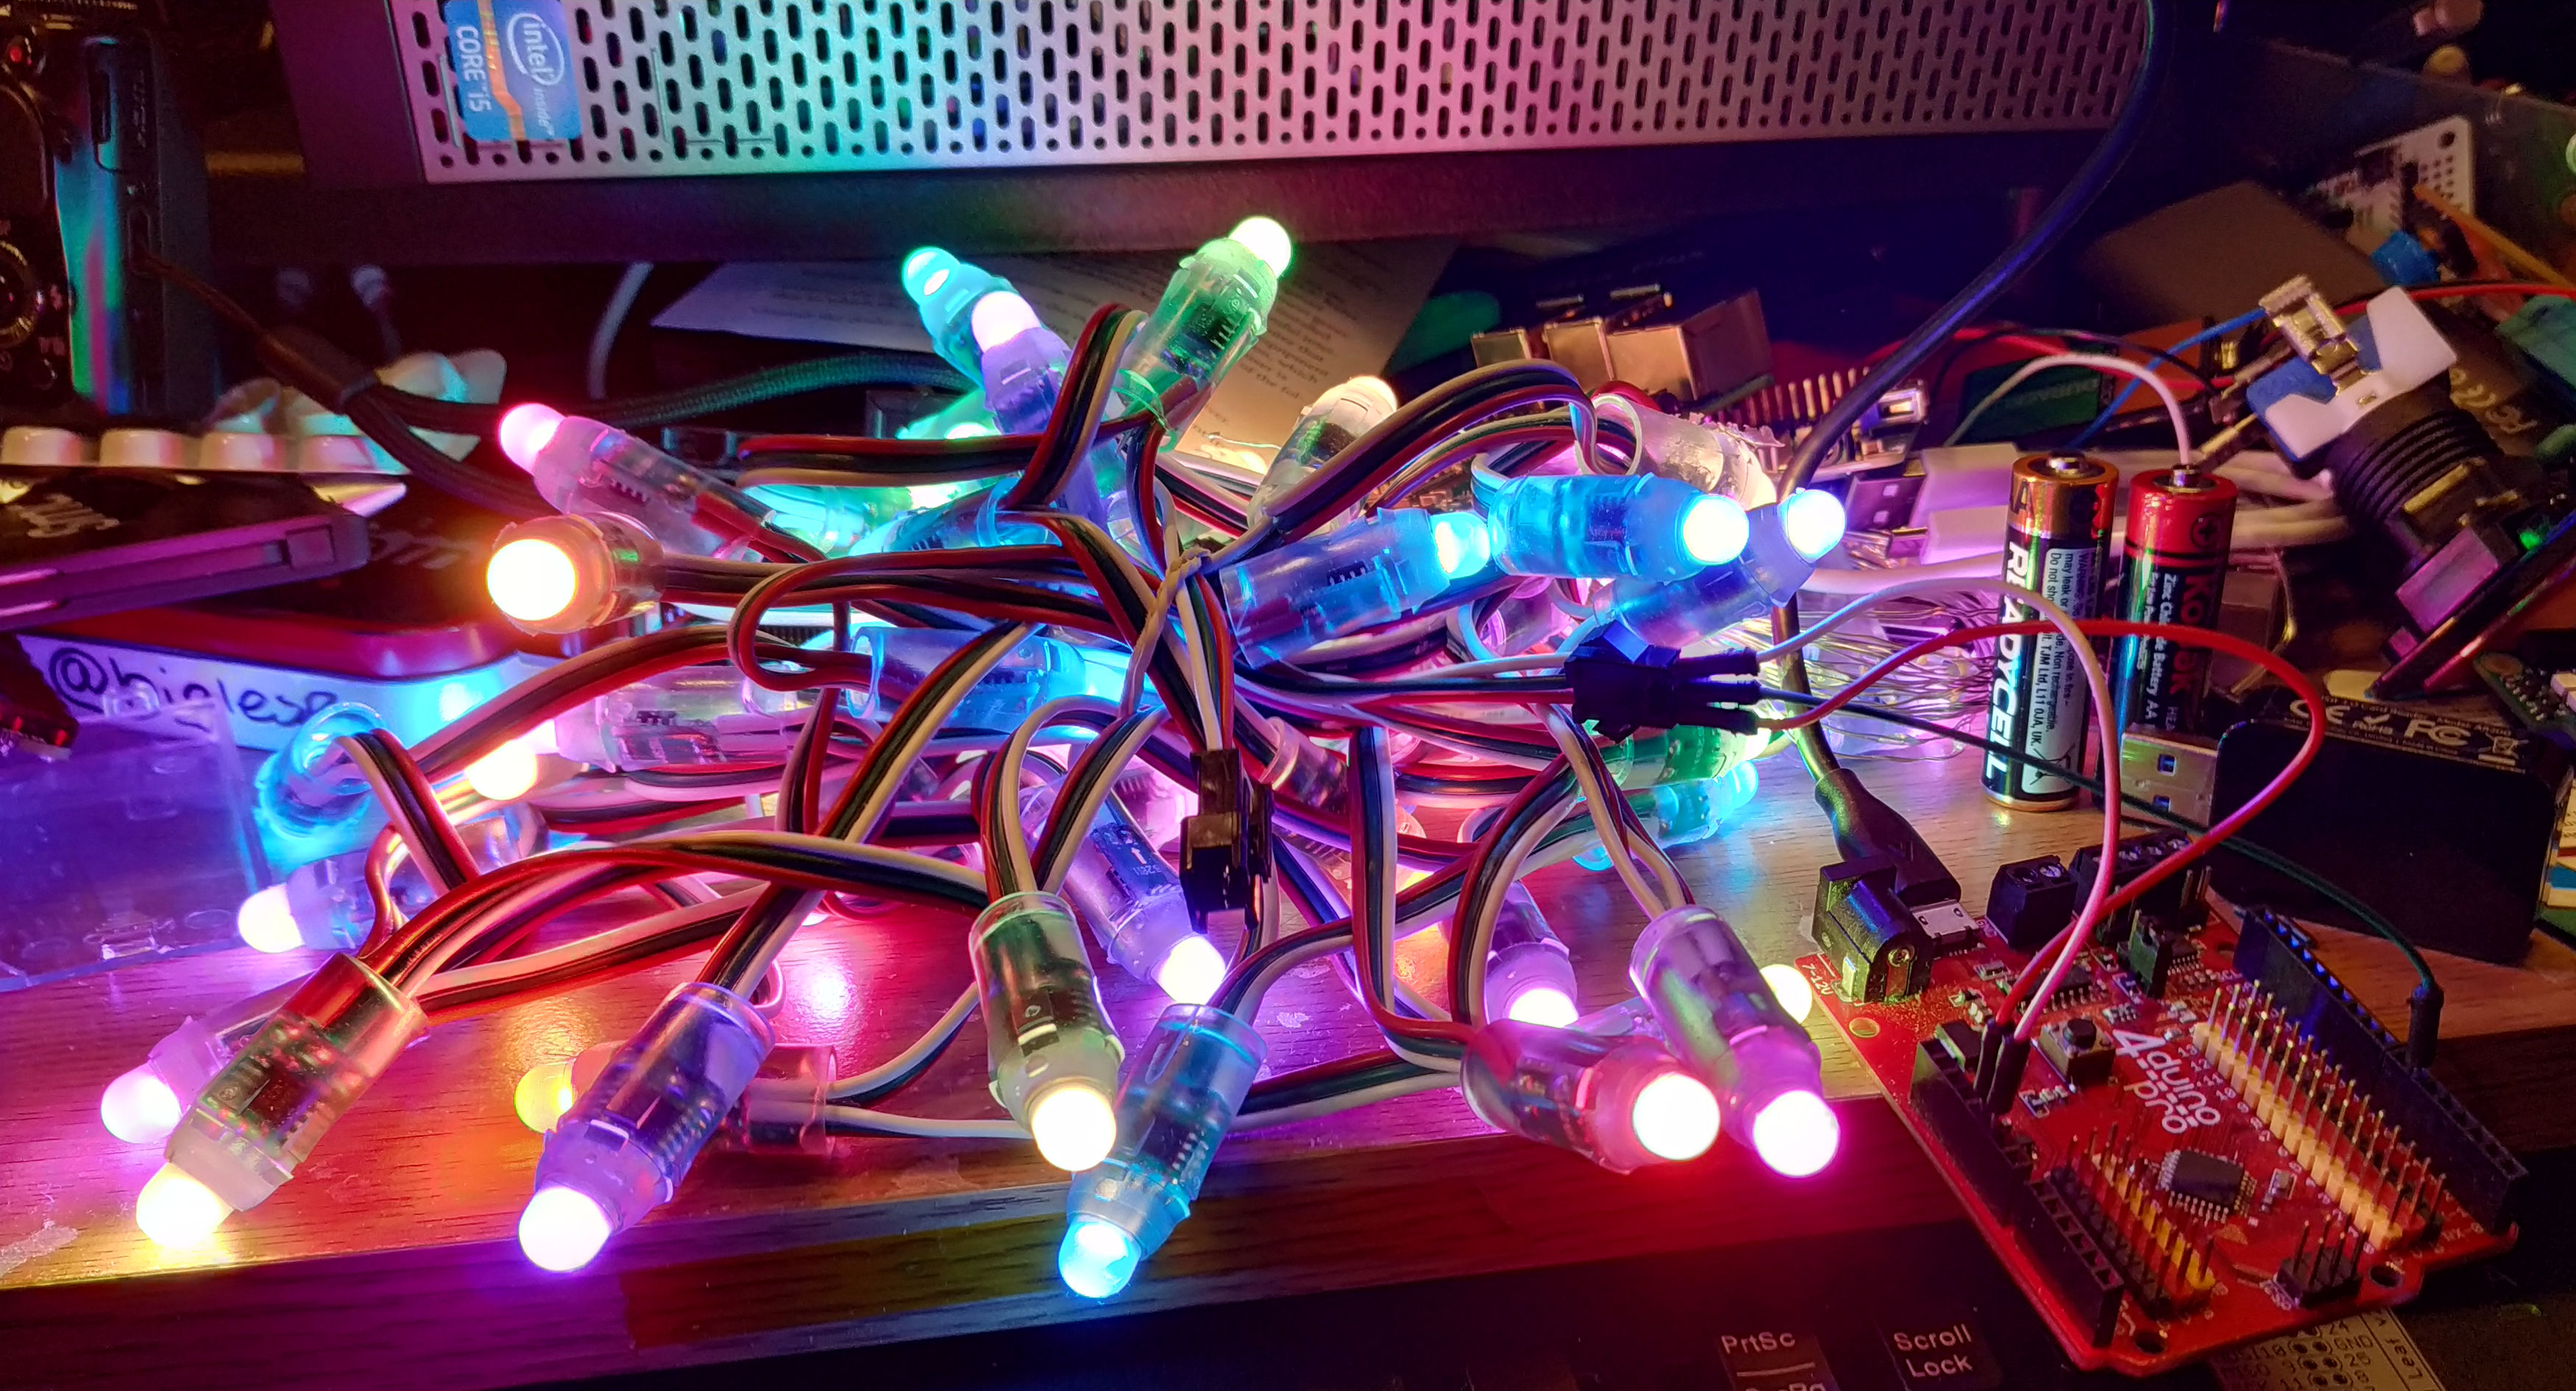
Damn that light is pretty!
I bought these "fairy lights" (as we call them in the UK) in late 2018 and after a few issues I got them working reliably. There are 50 WS2811 "Neopixel" LEDs in a long chain. They look like standard lights for a Christmas tree, but each of these LEDs can be controlled, any colour, brightness or timing I can control. Best of all they work with most boards (Arduino, Raspberry Pi, CircuitPython etc) and that means I can do lots of hacks!
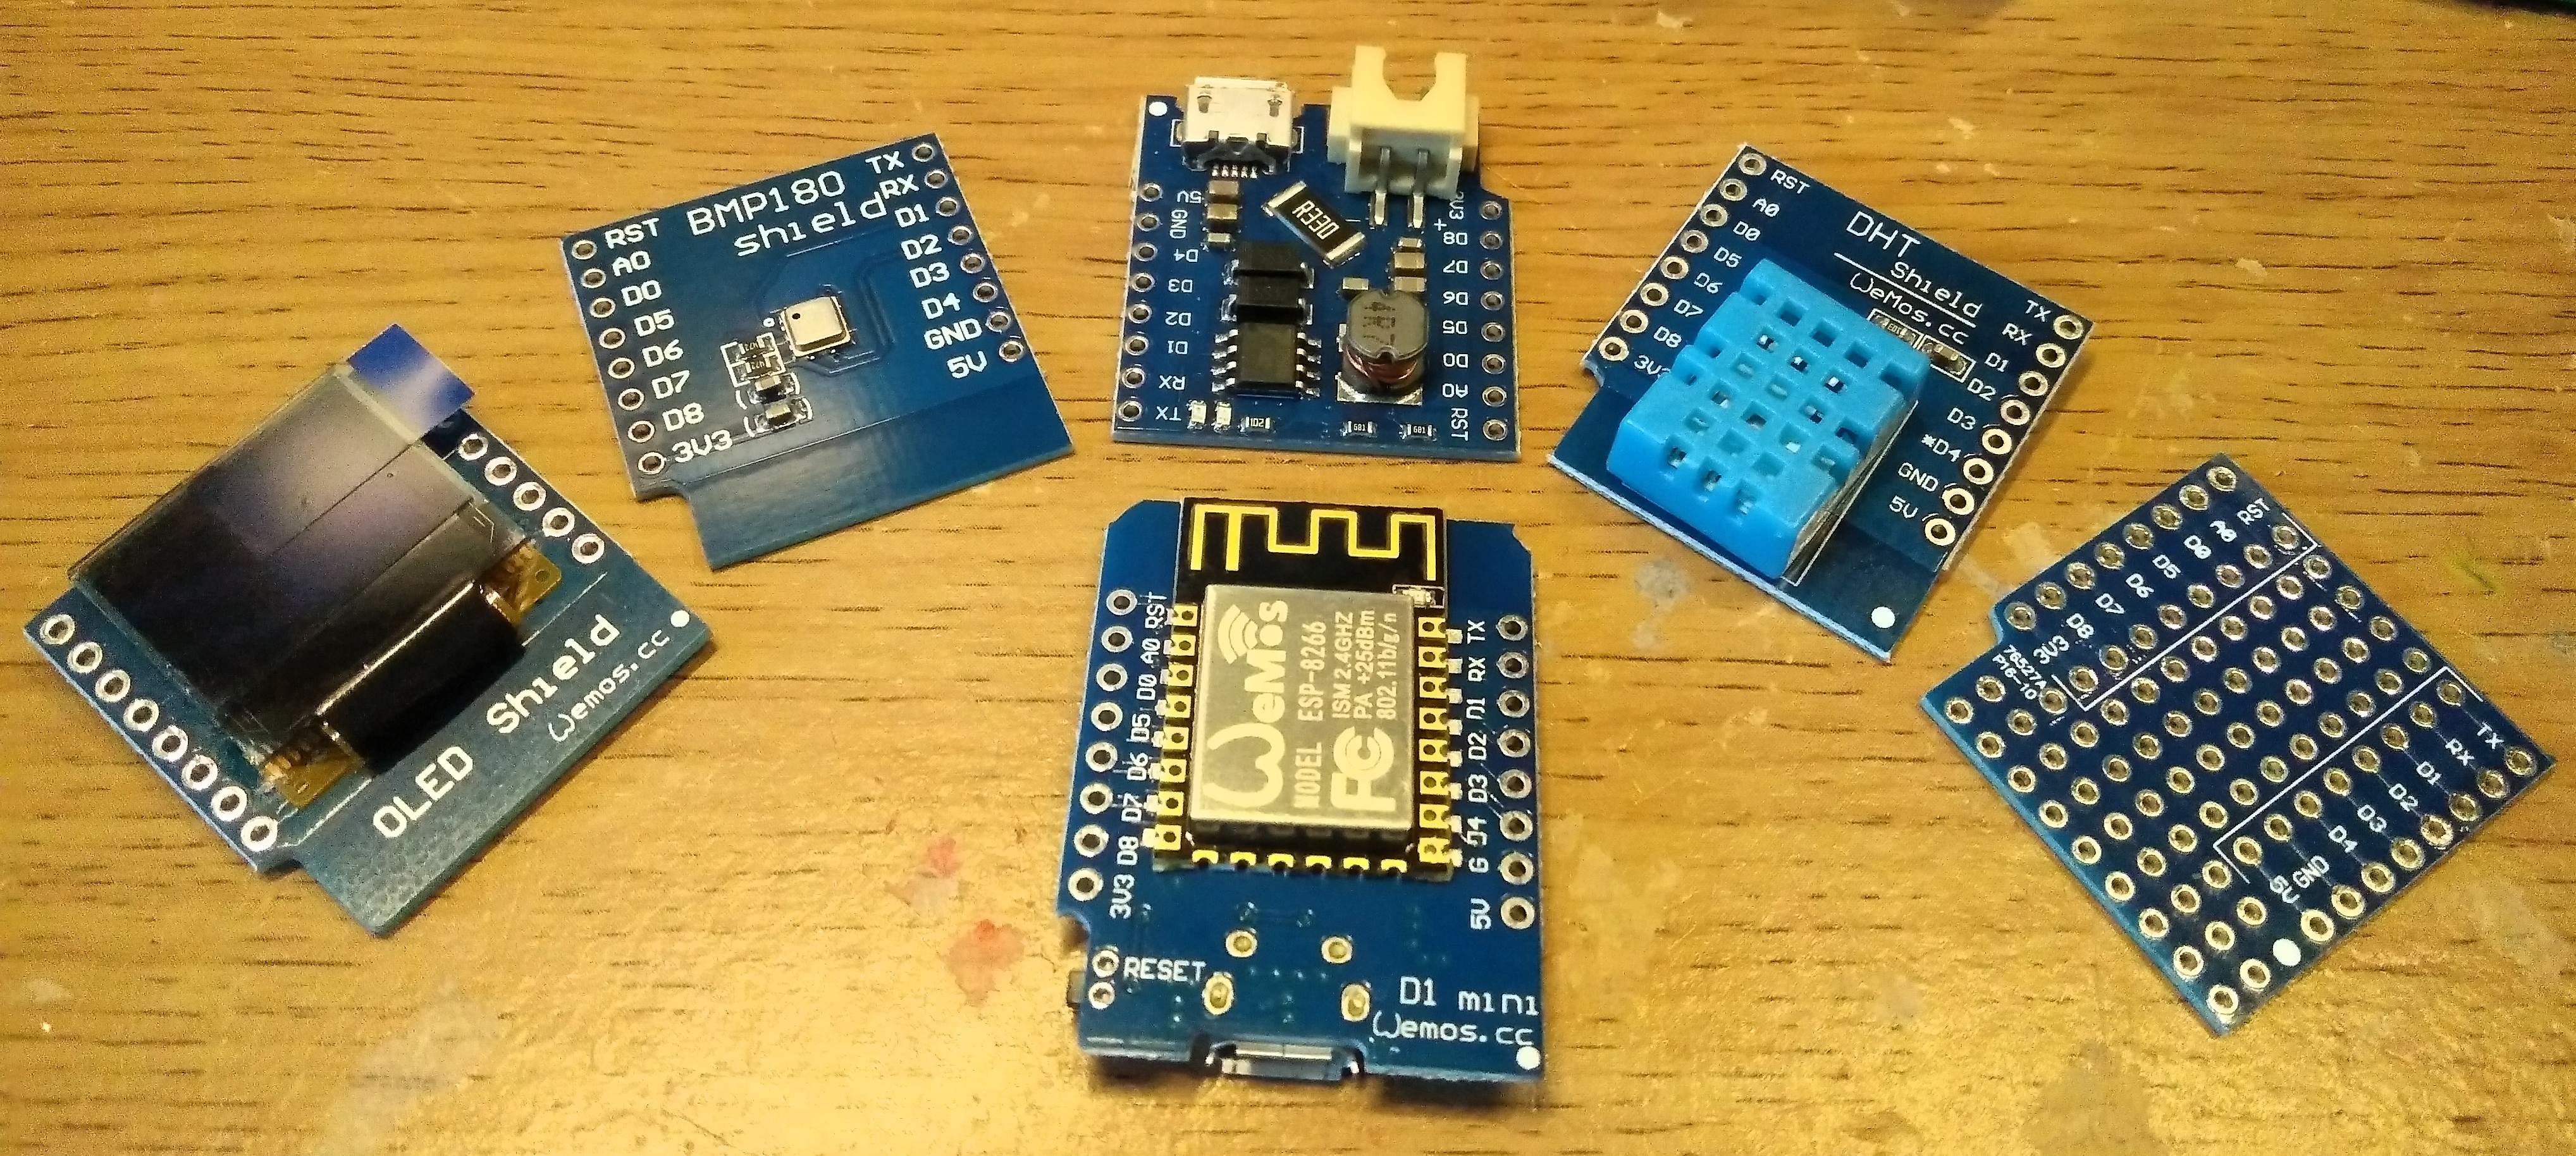
Next is the Wemos D1 Mini, a cheap and powerful board. How cheap...£1.46 + 75p = £2.21. It is an ESP8266 device, so we can connect to WiFi networks and we have a bunch of GPIO pins! In this project we shall be using this board with the Arduino IDE.
The rest of the kit
- 1 x 1000uf capacitor
- 1 x 330Ω resistor (ORANGE-ORANGE-BROWN-GOLD)
- 1 x Screw terminal with 3 connections (I only had a 4 connection terminal, but it did the job.)
- 1 x Screw terminal with 2 connections
- Protoboard / Stripboard
- 5V 2A DC power source (I used a Raspberry Pi 3 PSU and a micro USB breakout board to isolate VCC and GND. You could butcher an old 5V barell adapter, use a multimeter to determine polarity before plugging it into the project.
- Soldering equipment
- Drill with 12mm stepped drill bit
- Bodge wires
Bodge Wires?
An integral part of a circuit, especially when you make a mistake...or two! I forgot to send power to the Neopixels, so only the Wemos D1 Mini received power. The bodge wires fixed that problem!
Also YAY I FAILED! Remember kids, failing is learning!
The Hardware Build
Taking the star apart!

The card back of the star is held in place via a series of small screws which bite into the plastic of the star. Take care removing the back as the card is fragile.
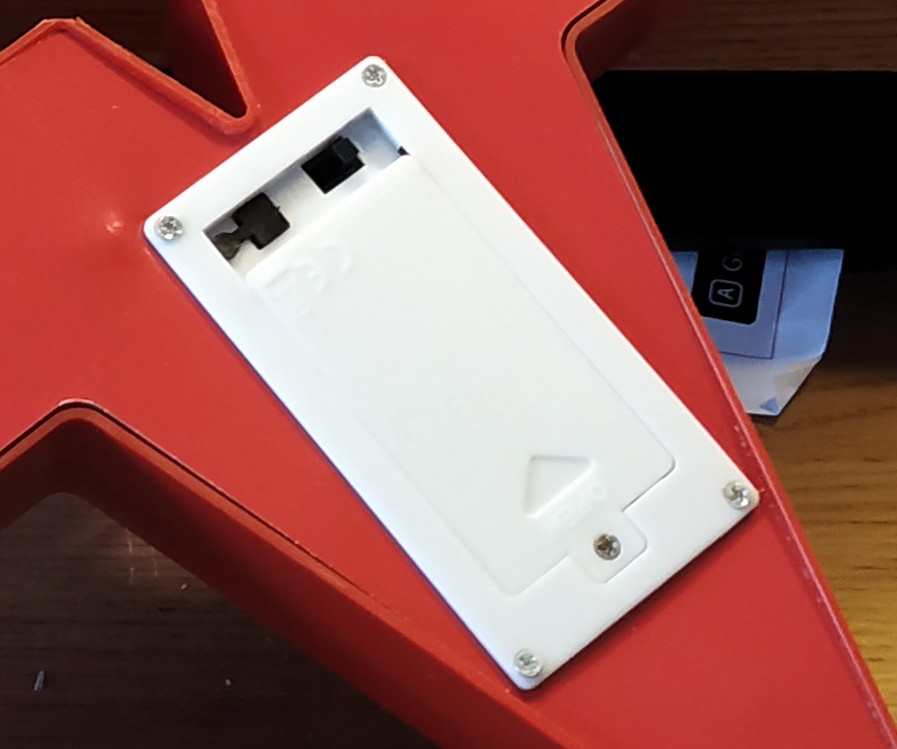
Remove each of the screws, and remember to remove the screws at the battery pack too!
Next, remove the LEDs from the star by pulling them from the plastic holders, take care as we can reuse them!
Next remove the white diffusers (bulbs) from the star. We will need to pinch the back of the plastic bulb and push. Take care as the plastic is quite firm and you may hurt your fingers. Use pliers! To pinch the bulb, not your fingers!
Next we need to measure the diameter of our Neopixel LEDs to see if they will fit through the holes left by the bulbs. If they fit, great! If not, get your drill and stepped drill bit and carefully drill the plastic to the correct size. In my case it was 12mm (the drill bit had a marking for 12mm) and I quickly drilled all 20 holes.
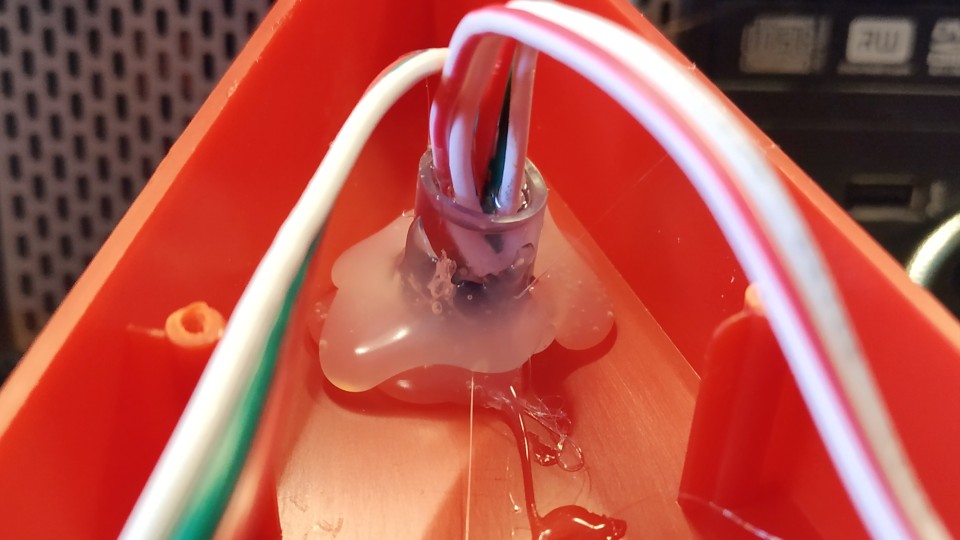
Oh no I've drilled past the size of my neopixel!
Yeah I slipped! Doh! A little hot glue will save the day.
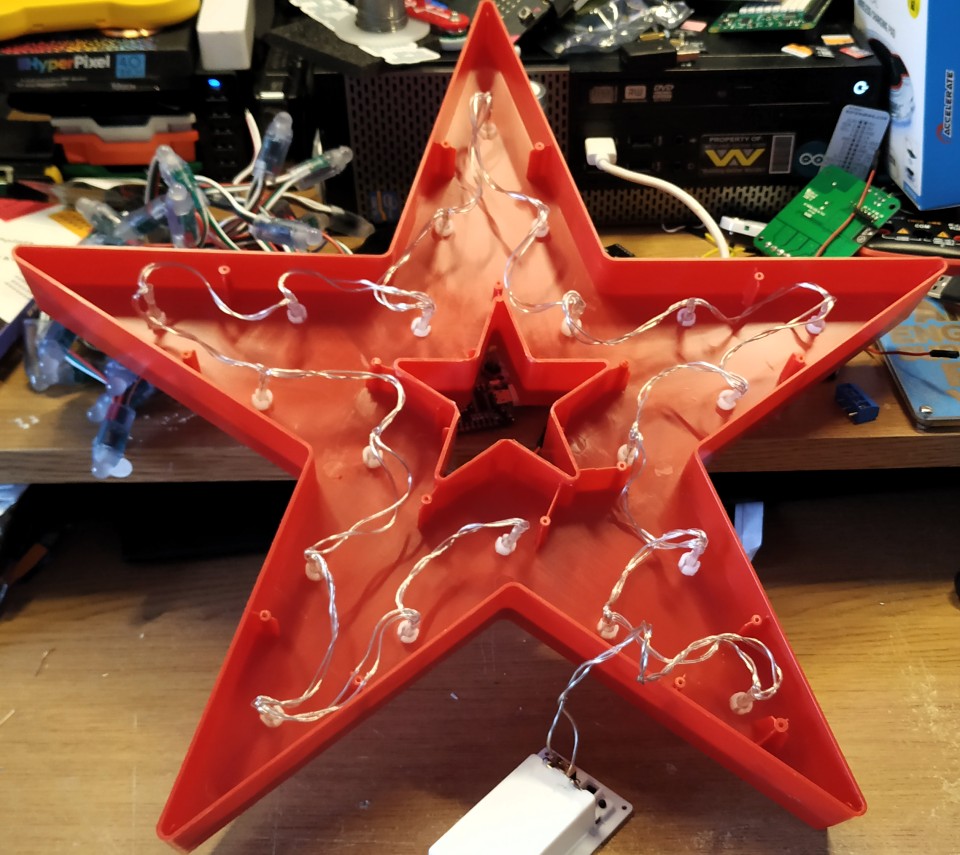
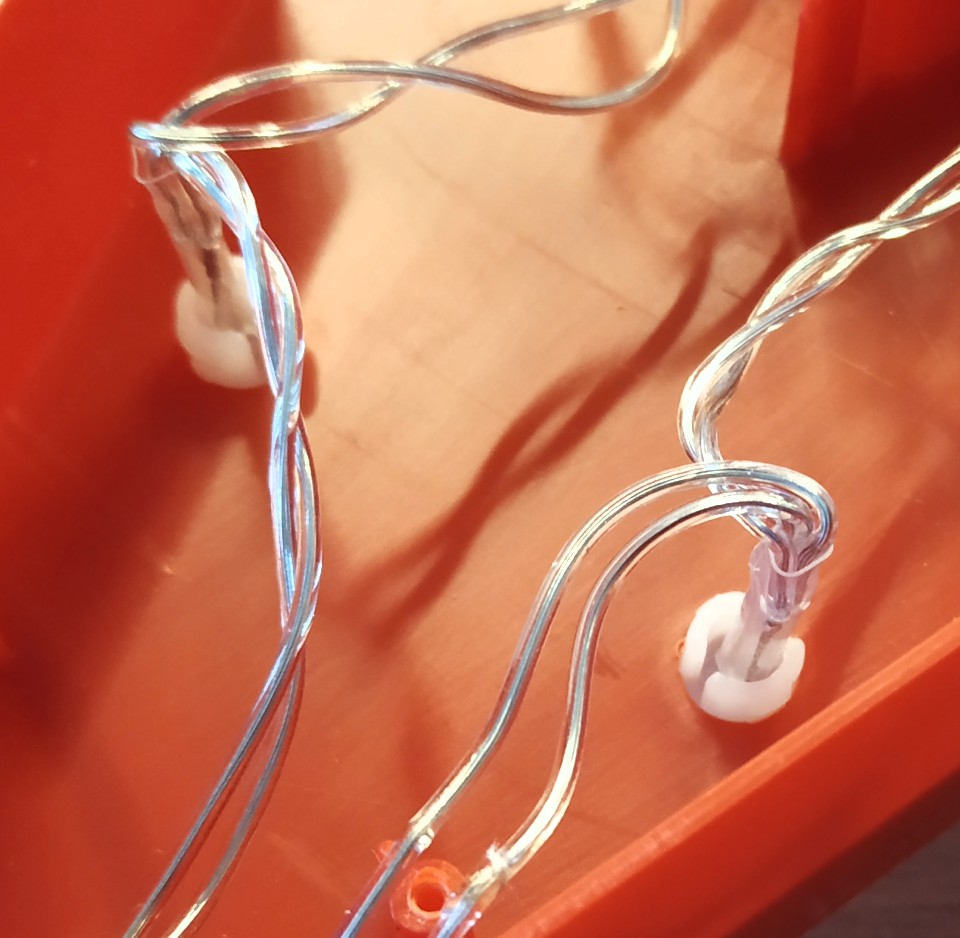
Insert the neopixels around the star, take care inserting them. They can deal with a little wiggle but excessive force will break them!
![]()
If the hole is too small, try drilling the hole again from the other side.
![]()
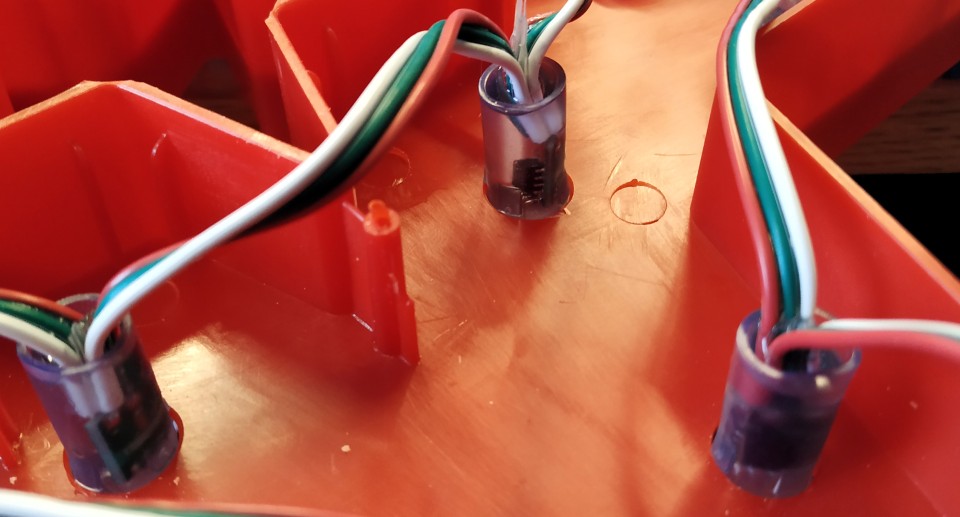
Route the cables around the inside of the star so that they go from one section to the next.
Put the star to one side! Time to make a circuit!
This circuit has two functions
- To supply power to the Wemos D1 Mini
- To supply power to the Neopixels.
I wanted a single power supply and luckily the Neopixels and the Wemos D1 Mini run from 5V.
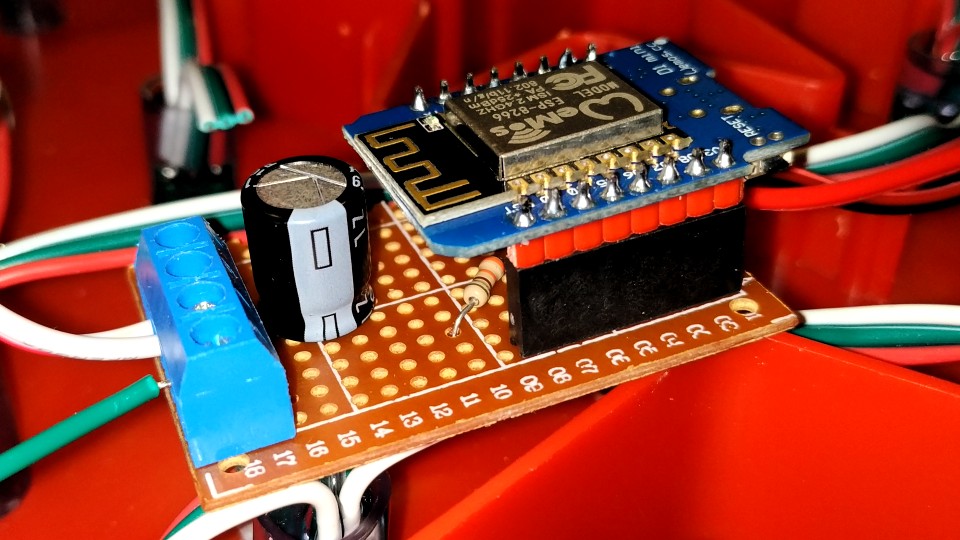
The Wemos D1 Mini can be soldered directly to a protoboard, but I wanted to solder in some female header pins, and then solder male header pins to the Wemos D1 Mini. Why? Well if the Wemos dies, then I can flash a new board and drop in the replacement without touching the cirucuit which may break if messed around with too much.
The circuit
Working from the top down.

First we have a screw terminal which is an input for 5V DC power. On the left of terminal is VCC (RED +) and on the right terminal is GND (BLACK -)
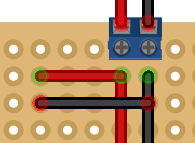
From this terminal I create a link to the top left of the Wemos D1 Mini (as per diagram) for the 5V (RED) and GND (BLACK) wires that will send power to the board.
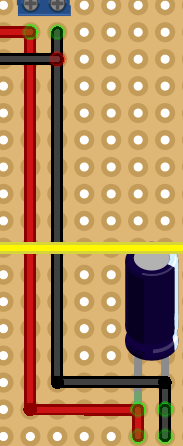
I then use some bodge wires to connect the VCC and GND to a 1000uf capacitor, observing the same polarity.
The electrolytic capacitor used is a 6.3v 1000uf capacitor rated for up to 105C temps. The polarity of the capacitor is defined by the length of the legs, long is + and short is -. But if they have been snipped equal, the negative leg is marked with a - symbol on the body. Observe the correct polarity as reverse polarity will make them go POP!
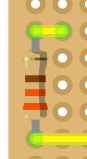
Next up we solder a connection between D2 and a 330Ω resistor.
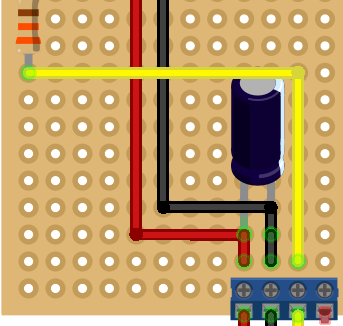
At the bottom of the circuit is the DC output and data output for the Wemos D1 Mini to control the neopixels.
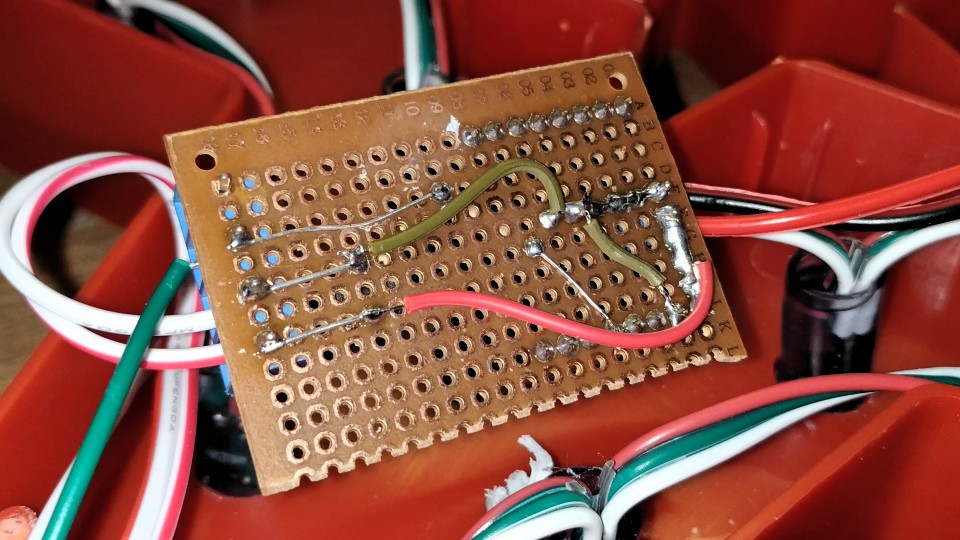
Spot the bodge
These will need to be soldered to the previous components. As per the diagram I soldered the + leg of the capacitor to the first terminal, then soldered the - leg to the second terminal. Lastly I soldered the data output terminal to the 330Ω resistor.
Complete Circuit Reference
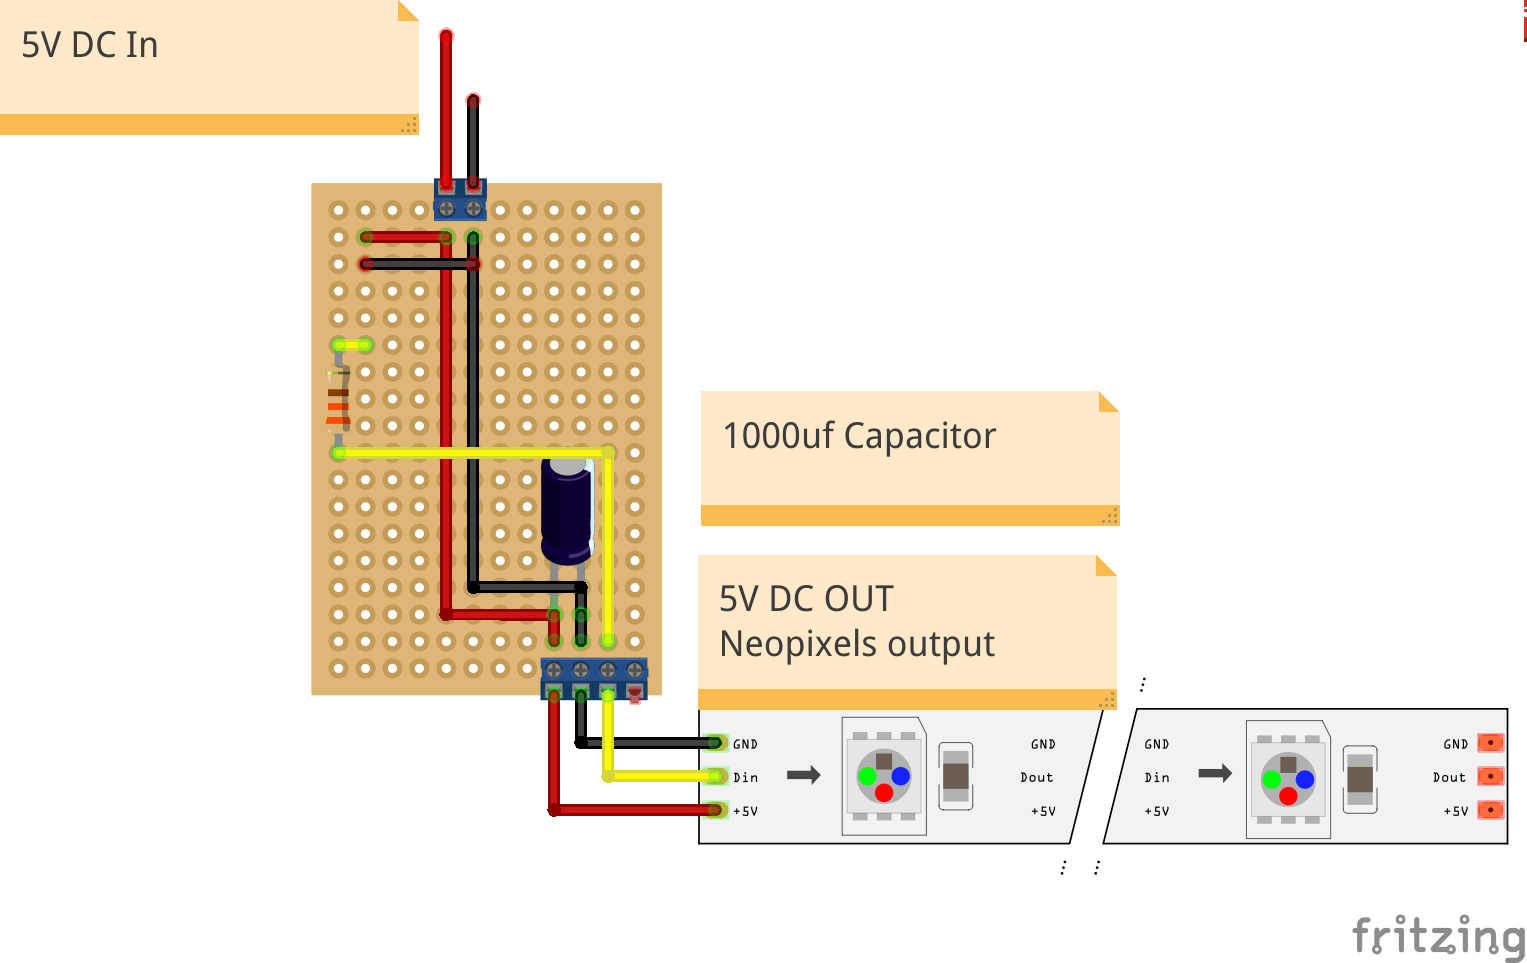
Base circuit. Note this does not show the header pins for the Wemos D1 as there was no part in Fritzing :(
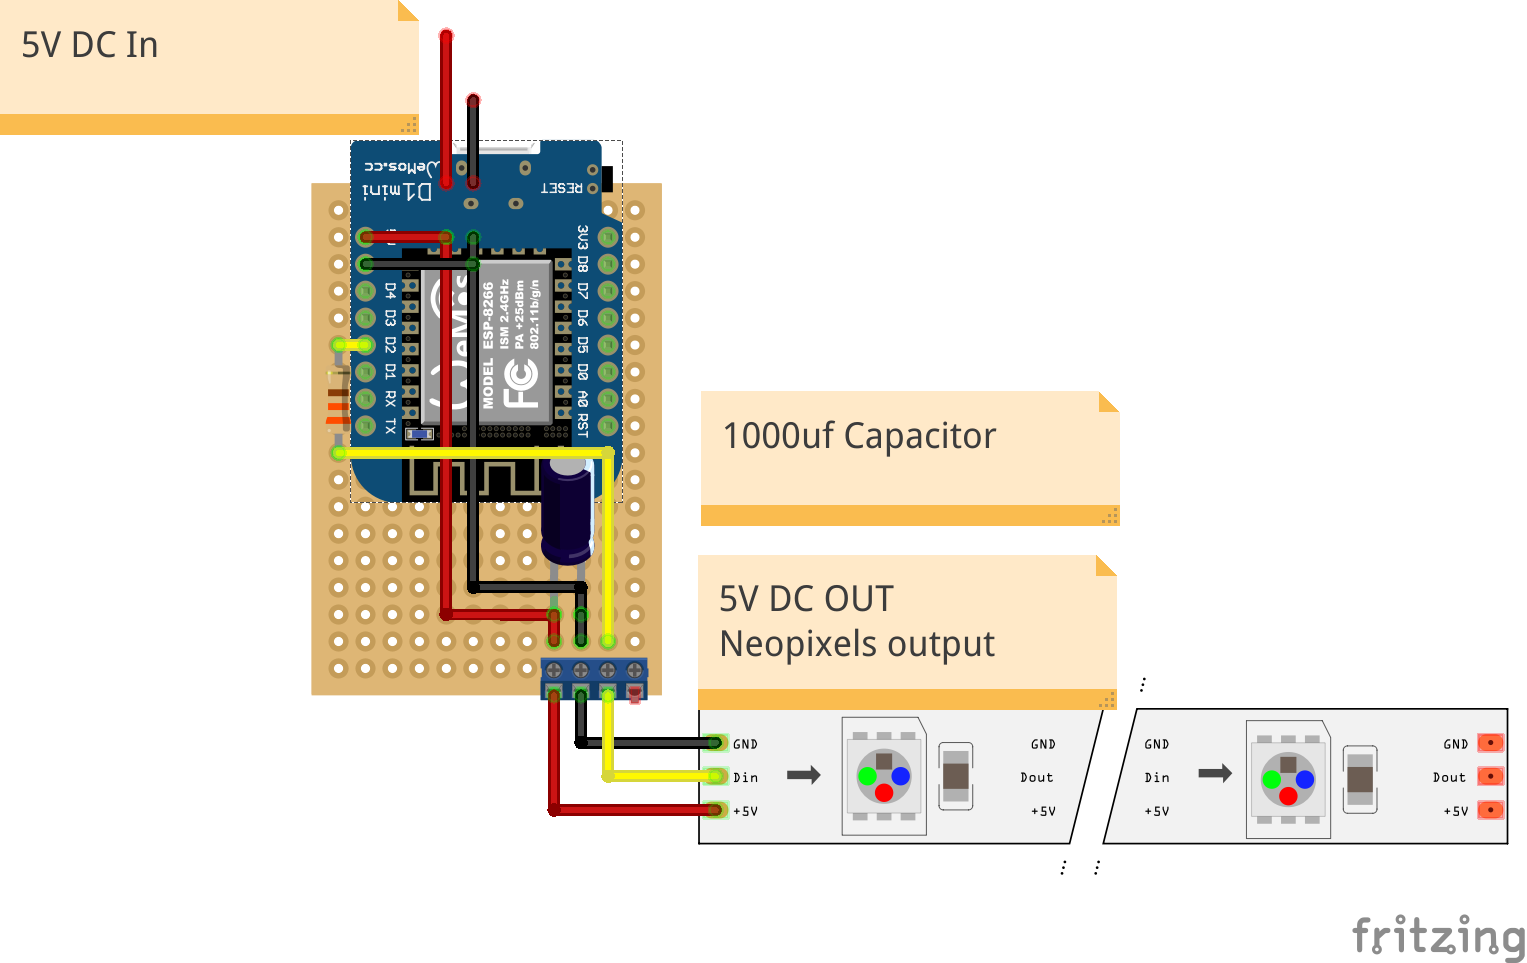
The same circuit, but the Wemos D1 Mini has been placed atop.
Finally we can programme the Wemos D1 Mini!
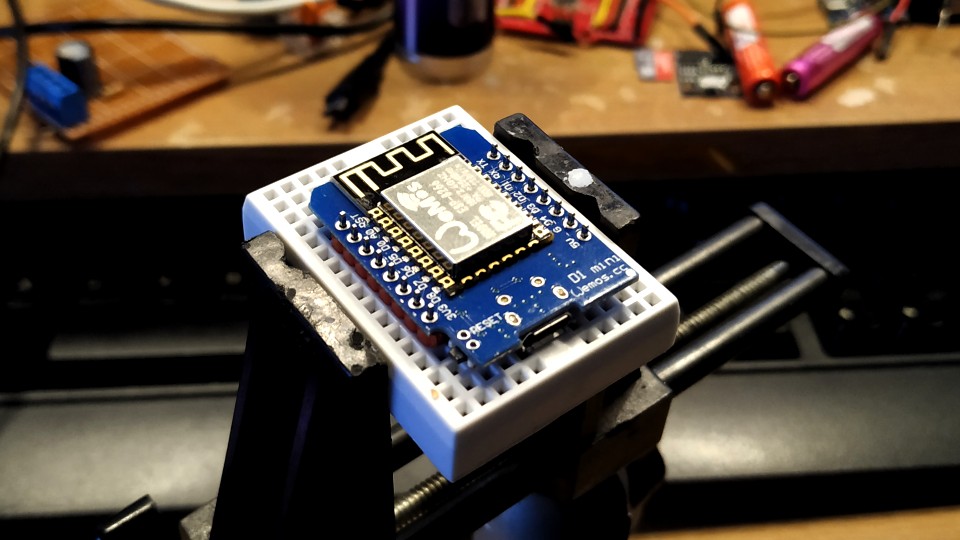
If you haven't already, now is a good time to solder the header pins to your Wemos.
Open your Arduino IDE and go to File >> Preferences and click on the button to the right of Additional Board Manager URLs to open a new pop up.
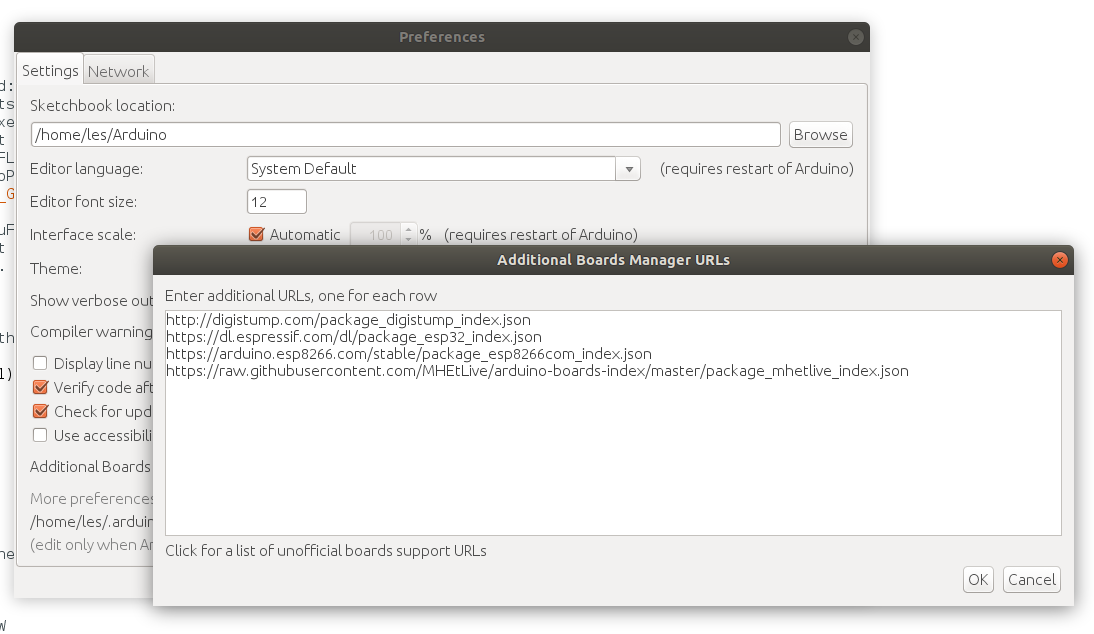
In the new window paste the following link to provide ESP8266 / Wemos boards.
https://arduino.esp8266.com/stable/package_esp8266com_index.json
Click Ok to close both of the windows.
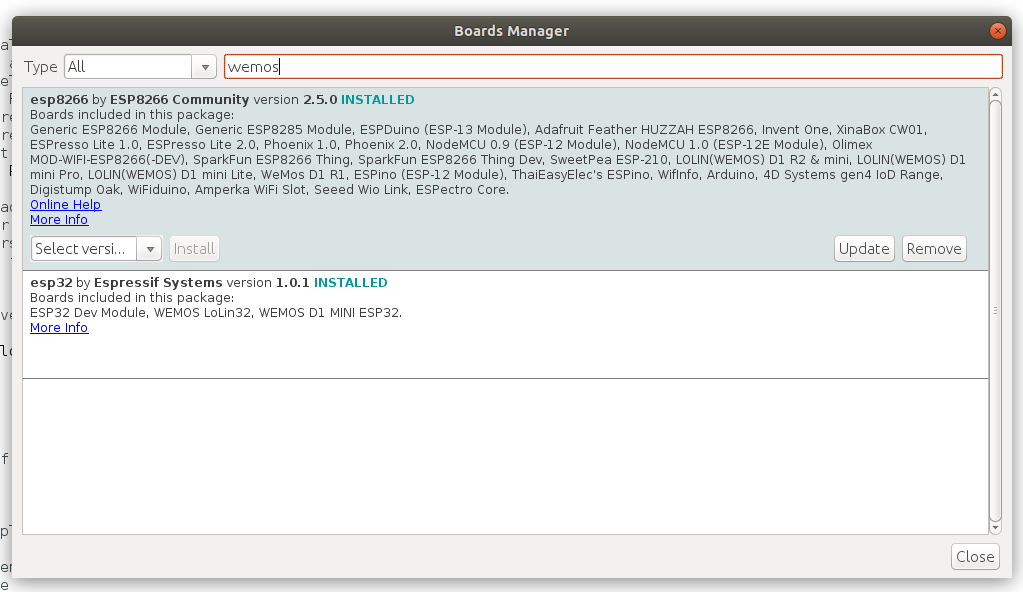
Now go to Tools >> Board >> Board Manager... and wait for a pop up to load and for the window to update. Then type Wemos into the search box. Then click install.
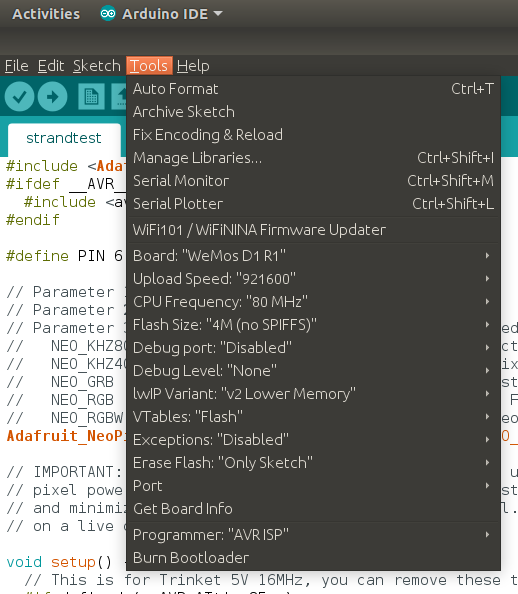
I then setup my Wemos D1 Mini settings as per the image.
Adafruit Neopixel Library
As we are using Neopixels we need to use a library that will tell them what colour / brightness to be.
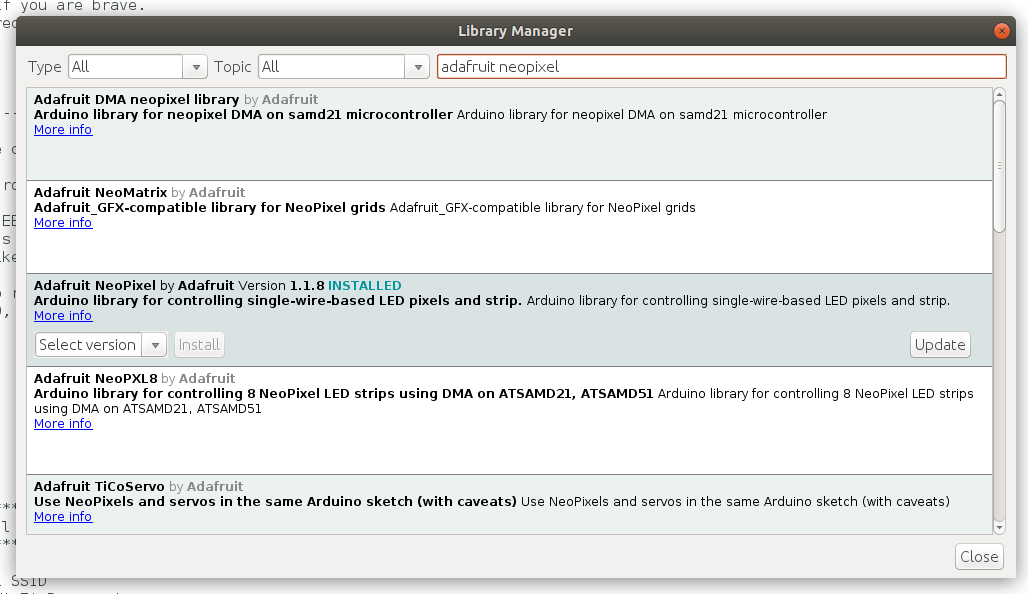
The library is from Adafruit and to install it we need to go to Sketch >> Include Library >> Manage Libraries... and then do a search for adafruit neopixel and install the Adafruit Neopixel by Adafruit library.
The code!
As I mentioned at the start of the project, this code was created by Pileofstuff's son and it is really good.
A direct download to the Google Drive folder for this code is here, please use V2 as that is what this tutorial is based upon.
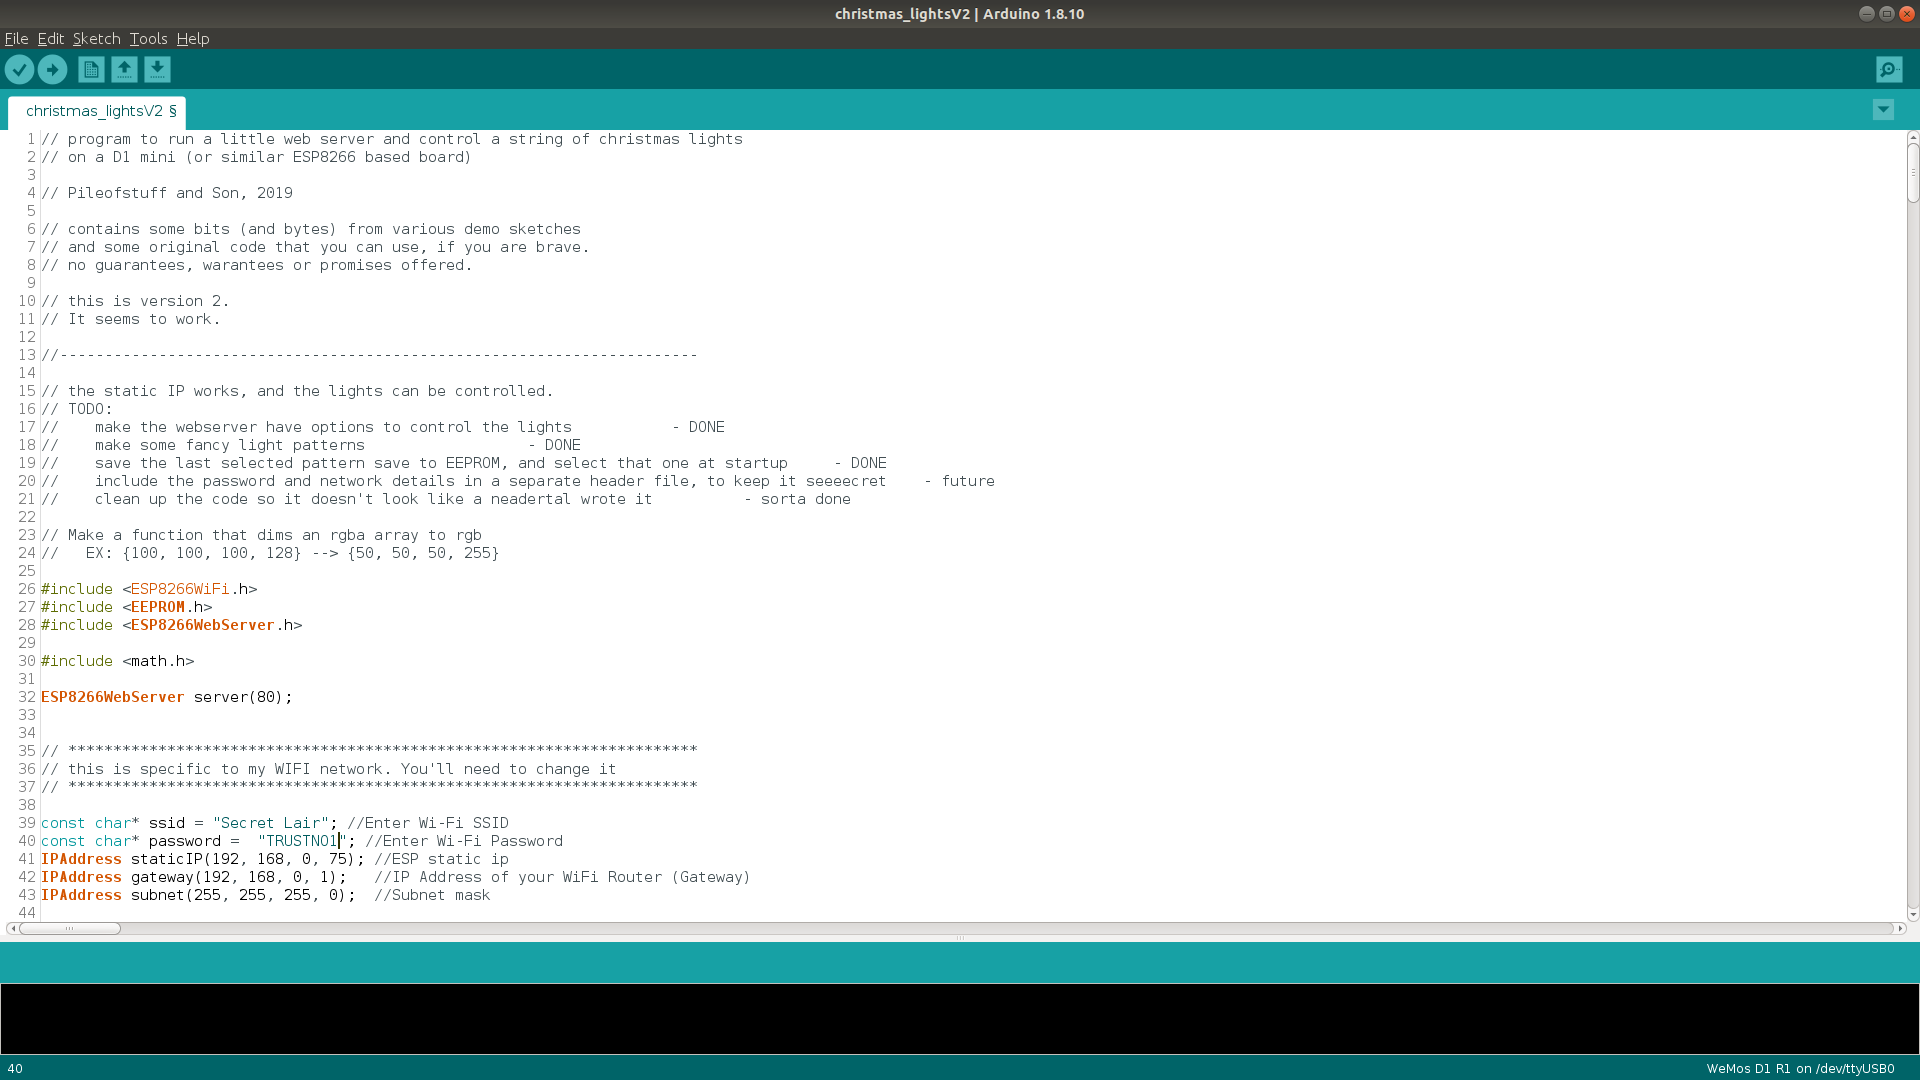
There are 555 lines of code for this project, and I won't go through them all. Instead I will show the places that we need to alter to match our home network settings.
Lines 39 to 43 are as follows
const char* ssid = "Secret Lair"; //Enter Wi-Fi SSID
const char* password =  "TRUSTNO1"; //Enter Wi-Fi Password
IPAddress staticIP(192, 168, 0, 75); //ESP static ip
IPAddress gateway(192, 168, 0, 1);   //IP Address of your WiFi Router (Gateway)
IPAddress subnet(255, 255, 255, 0);  //Subnet mask
We need to change the ssid and password lines to match our home router.
Then we need to change IPAddress staticIP(192, 168, 0, 75); //ESP static ip to an IP on our network. Make sure that you make a note of the IP address as we need that later!
Then change the IPAddress gateway(192, 168, 0, 1); //IP Address of your WiFi Router (Gateway) to match the gateway address of your router.
You may also need to change the subnet, but for 99% of us this is fine to use as is!
Check Line 52 for the D2 pin mapping
#define LED_PIN 4 //D2
In the Arduino IDE, D2, the pin we are using to send signals to the Neopixels, is called pin 4. So make sure that this is correct.
Change Line 55 to match the number of Neopixels
#define LED_COUNT 20
In my case I had 20, but the default setting is 150 so make sure you change this!
Ok, now plug in your Wemos D1 to the computer, check that the Arduino IDE has detected the board and assigned a port (Tools >> Port, then flash the code! It will take a few seconds to fully upload, and you will see the progress in the bottom of the Arduino window.
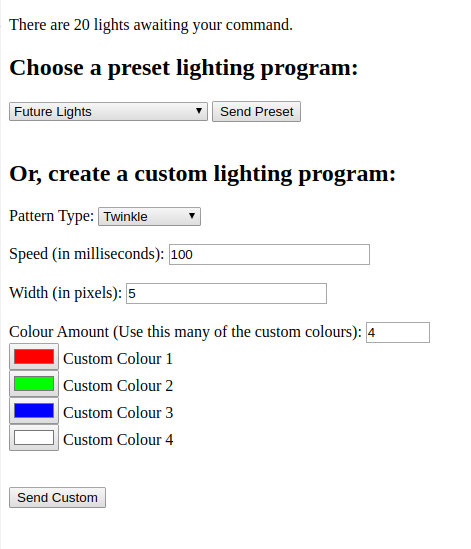
Once the code has been uploaded, open a web browser and visit the IP address of your device. In my case it was 192.168.0.75.
You will see a simple interface from which we can control the Neopixels. Change the preset a few times to ensure that the interface works, of course we can't see anything yet, as we need to connect it up to our Neopixels. But this test enables us to have confidence that we can move on.
Remove the micro USB plug from the Wemos D1 Mini and then plug the Wemos D1 Mini into your protoboard, ensuring that it is the right way round BEFORE powering up.
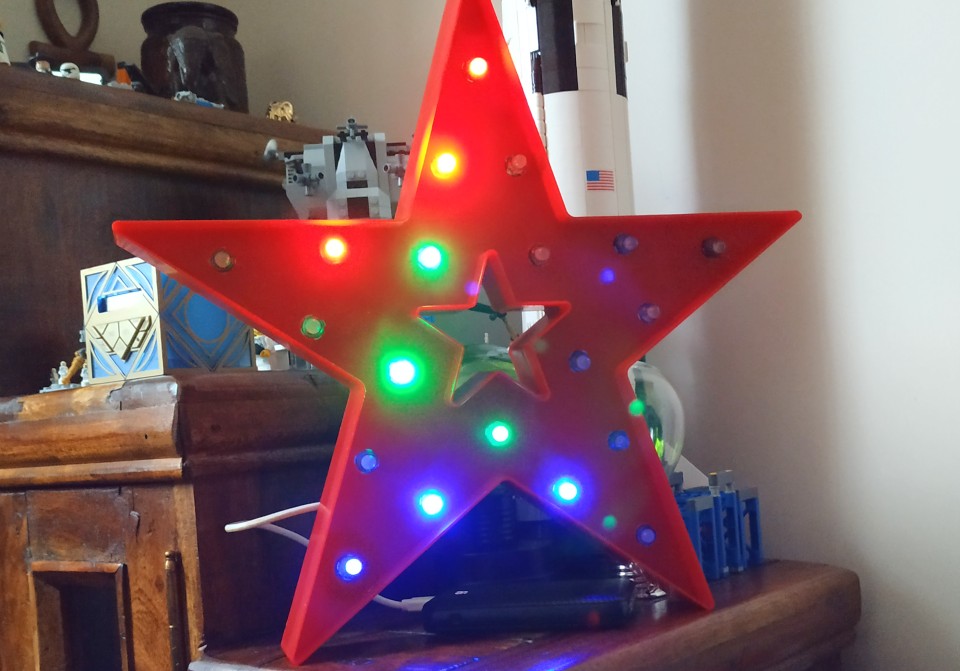
When you are happy, power up and the Neopixels should come to life. Visit the web page interface to control the lights and when you are satisfied that all is good, disconnect the power and seal the unit up again, ready to wow your friends this Christmas.