Tooling Tuesday - Ampy
Recently you will have seen me doing a few hacks / projects with the Wemos D1 Mini.
Yeah this little board is really an ESP8266 but with all the pins broken out for use and a micro USB interface.
Programming the board is easy using the uPycraft GUI application. It really is a great application that takes away the complexities of working with the ESP8266...But it doesn't work on my Ubuntu 18.04 laptop as it needs "tweaking." So I needed another tool to work with the Wemos D1 and I found Ampy.
So what is it?
Ampy was created by Adafruit so no wonder it is so good! They have a Github page for the project.
Ampy is a command line tool for Windows, Linux and Mac that enables us to work with ESP8266 and other MicroPython and CircuitPython boards. These are boards that already have MicroPython / CircuitPython flashed to them.
CircuitPython?
CircuitPython is a fork of MicroPython primarilly for Adafruit boards. Think of it as a simpler abstraction of MicroPython.
So how can I install it?
Using pip!
For Windows
pip.exe install adafruit-ampy
For Linux / Mac
sudo pip3 install adafruit-ampy
Ok I've installed it, now what?
Well ampy is a command line tool that can be used to
- Copy files to a device (put)
- Copy files from a device (get)
- File / Folder management
So to start we shall copy a file called main.py which is the code that will be run on the ESP8266 after it has booted.
An example main.py could be like this, which will flash an LED connected GPIO14 (D5 on the Wemos D1.)
from machine import Pin
import time

led = Pin(14, Pin.OUT)
for i in range(10):
    led(1)
    time.sleep_ms(500)
    led(0)
    time.sleep_ms(500)
So to copy this file to our ESP8266 we first need to find out which COM port our device is using. If not already, plug in the ESP8266 to a spare USB port.
For Windows we can use Device Manager just right click on the Windows logo and select Device Manager and you will see something like this.
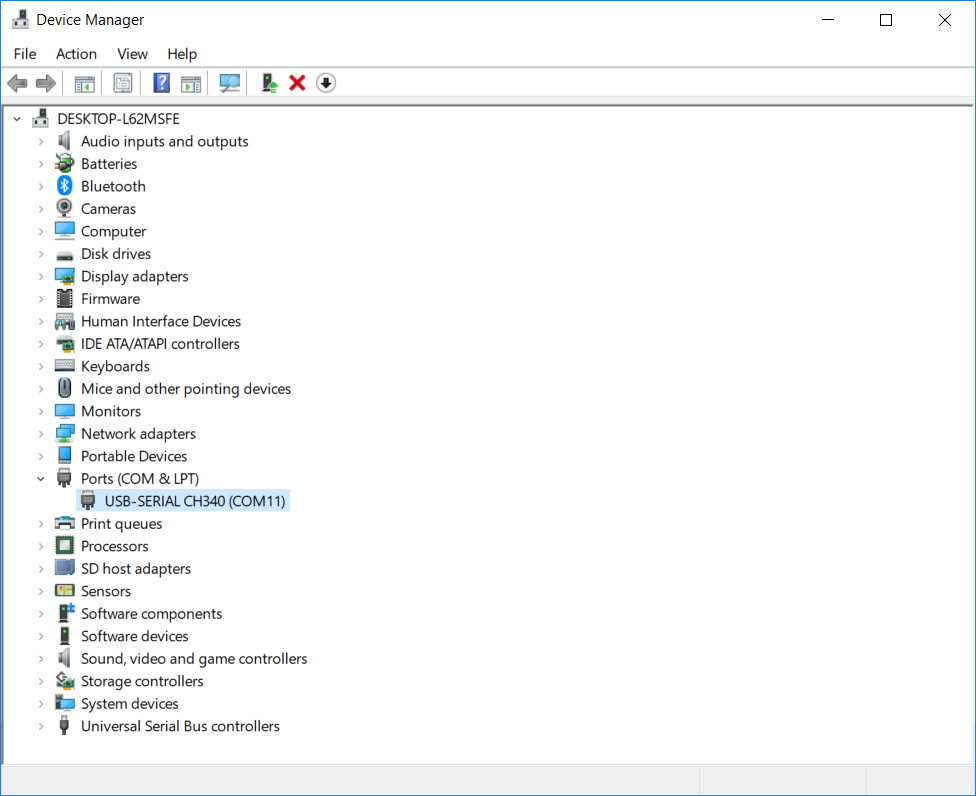
So on my Teclast F5 laptop my COM port is COM11
An additional step for Windows users is to set the environment variable with the COM port for our device. This makes it a little easier to work with.
set AMPY_PORT=COM11
Linux users can use udevadm to detect their ESP8266. To run the command, drop into a terminal and run the following command before plugging in the device!
udevadm monitor --udev
Now plug in the ESP8266 device and you will see a few lines of text and one (or two) of them will have something like this.
UDEV [17827.751852] add /devices/pci0000:00/0000:00:1a.0/usb1/1-1/1-1.5/1-1.5.5/1-1.5.5.4/1-1.5.5.4:1.0/ttyUSB0/tty/ttyUSB0 (tty)
So /dev/ttyUSB0 is the port for my Ubuntu machine!
So we know the COM port, and we have the main.py file ready to copy across...so lets do it!
Copying a file to the ESP8266
To copy our main.py file which is in the same directory as where the command is run, we need to open a Terminal / Command Prompt we run the following command.
ampy put main.py
In a few seconds the file main.py will be written to the ESP8266 and it will be ready to go! All we then need to do is reset the ESP8266 so that the new code is loaded.
Linux / Mac users
We will need to use the --port switch to tell ampy which port we are using. Like so
ampy --port /dev/ttyUSB0 put main.py
Copying a file from the ESP8266
So there may be a time where we need to download a file from our ESP8266, for example our main.py file. So in order to do that with ampy, we need to open the Terminal / Command Prompt and type the following.
ampy get main.py main.py
Linux users, remember to state the port!
ampy --port /dev/ttyUSB0 get main.py main.py
Did you just type main.py twice?
Yup, the first time tells the command that we want to download that file, and the second time tells the command where we want to save it on our computer.
If we don't specify a file to save to, then the command will dump the contents of the file to the Terminal / Command Prompt, similar to thelessorcatcommands.
What else can we do?
We can list the files on the device
ampy ls
Linux
ampy --port /dev/ttyUSB0 ls
Delete (remove) a file
ampy rm <name of file>
Linux
ampy --port /dev/ttyUSB0 rm <name of file>
Run a script on the device
ampy run <name of file>
Linux
ampy --port /dev/ttyUSB0 run <name of script>
So there we have it!
Ampy is a handy tool that enables us to write MicroPython / CircuitPython code from the terminal and on machines that do not work with uPycraft.
Happy Hacking!