Tooling Tuesday - Using VLC with Python
![]()
Another Tooling Tuesday, and this time we take a look at an easy way to play media in Python.
So what is it?
VLC is a popular media player for Windows, Linux and Apple devices (there is even a version for Android) and it also has a library for Python 3.
So how can I install it?
Using the pip package manager
On Linux
$ sudo pip3 install python-vlc
On Windows
pip.exe install python-vlc
We will also need to install VLC for our operating system, full details on the VideoLAN website.
So how can I use it?
Playing an audio file
To use the library, first we need to import the library. To do that, in your favourite Python editor we do the following.
import vlc
Then we create an object, which will store the name of a file or URL stream (for streaming media) which is set between the " ".
media = vlc.MediaPlayer("MEDIA FILE HERE")
For example if I wanted to play a 1980s megamix file on my laptop.
media = vlc.MediaPlayer("/home/les/80sMegaMix.mp3")
But it won't play until we tell it to, and to do that we call the media object that we created, and tell it to play.
media.play()
If you need to stop the playback.
media.stop()
Or to pause (even a live stream), and to unpause.
media.pause()
Testing the library

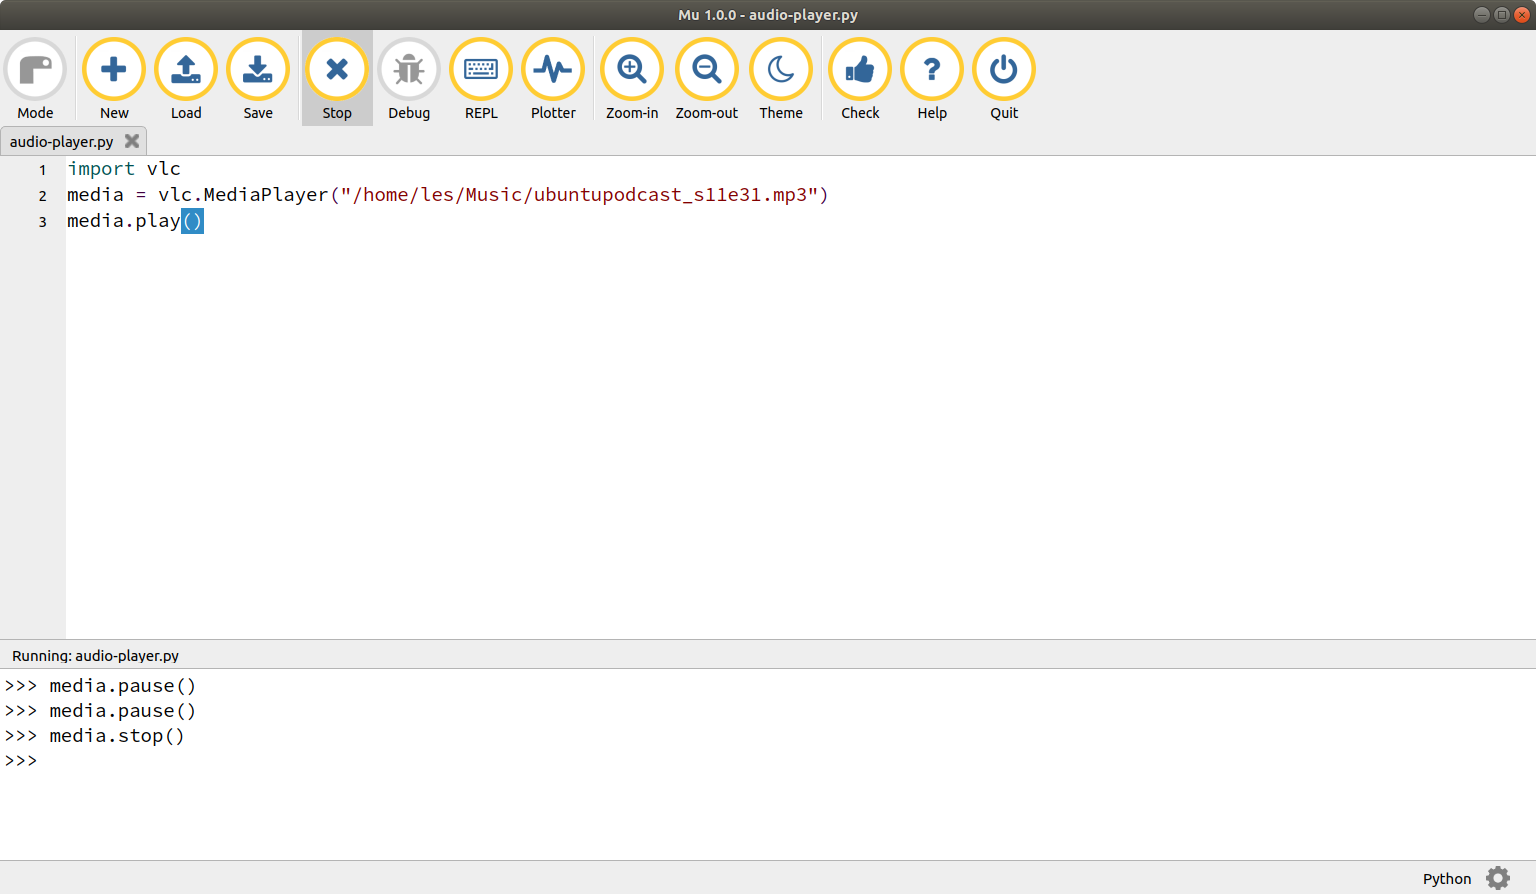
So we have an MP3 from the Ubuntu Podcast website that we can use to test local MP3 playback.
The MP3 is stored in the Music folder, so lets write a few lines of code to access and play the file using the Mu editor.
import vlc
media = vlc.MediaPlayer("/home/les/Music/ubuntupodcast_s11e31.mp3")
media.play()
That's cool but I want to make a media player!
Ok hot shot, to build a simple media player, we need only 18 lines of Python! But we do need to install the easygui library, which we covered in a previous Tooling Tuesday which shall be used to quickly create two user interfaces. So we start by importing the libraries for VLC and easygui.
import vlc, easygui
Then we create an object called media and use that to store the file that we wish to play. This is chosen using easygui's fileopenbox function which creates a dialog that we can use to select the file.
media = easygui.fileopenbox(title="Choose media to open")
Then we create another object and load the chosen media file reay for VLC to use.
player = vlc.MediaPlayer(media)
For vanity purposes, I created a variable called image which is used later to decorate the media player. Easygui only works with GIF images, and not animated GIFs :( This step can be skipped.
image = "bigles.gif"
Now we create a loop to contain, and continuously run the code.
while True:
Next we create a buttonbox which is what easygui calls a dialog box full of buttons. This button box is used to control the media playback.
The buttonbox choice is saved to the variable choice. But what does this long line of text mean?
- title - The title of the dialog box.
- msg - The message / instructions to the user.
- image = The image to display in the dialog box, in this case my vanity
bigles.gifimage. - choices - A Python list that contains the choices that the user has. These are turned into buttons that the user can click on.
choice = easygui.buttonbox(title="@biglesp Audio Player",msg="Press Play to start",image=image,choices=["Play","Pause","Stop","New"])
The next step is optional, for debug purposes we added a print function to show the choice in the Python shell.
print(choice)
In the next section we create a conditional test, which checks the button pressed against four hard coded options, "Play", "Pause", "Stop", "New"
If the user presses "Play" then it calls the player object with the option .play() and this starts playback of the selected file.
    if choice == "Play":
        player.play()
But if the users chooses "Pause", then it will call the line of code to pause the media. Note that this can also unpause the media.
    elif choice == "Pause":
        player.pause()
We can also stop media playback.
    elif choice == "Stop":
        player.stop()
But if the user selects "New" then it opens a new file dialog to select a new file, which is then pre-loaded into the player object ready for use.
    elif choice == "New":
        media = easygui.fileopenbox(title="Choose media to open")
        player = vlc.MediaPlayer(media)
The last option, else is activated if the user clicks on the X to close the dialog box. It breaks the loop and exits the code.
    else:
        break
So save the code, and click on Run.
We should see something that works as so
Video playback was a little choppy as I was using GTK Record My Desktop while playing HD video.
Complete code listing
import vlc, easygui
media = easygui.fileopenbox(title="Choose media to open")
player = vlc.MediaPlayer(media)
image = "bigles.gif"
while True:
    choice = easygui.buttonbox(title="@biglesp Audio Player",msg="Press Play to start",image=image,choices=["Play","Pause","Stop","New"])
    print(choice)
    if choice == "Play":
        player.play()
    elif choice == "Pause":
        player.pause()
    elif choice == "Stop":
        player.stop()
    elif choice == "New":
        media = easygui.fileopenbox(title="Choose media to open")
        player = vlc.MediaPlayer(media)
    else:
        break
So why should I be bothered about this?
With the VLC library for Python we can play media in our Python code. On a Raspberry Pi we can play audio files and streamed audio, but not play videos. If we mix this library with GPIO Zero, GUI Zero etc, then we can create a custom media player that uses sensors, buttons etc.
On a normal PC we can play any media files that we wish, and we can use boards such as Arduino, micro:bit to create a physical user interface.
Happy Hacking!
Update 19/10/2018

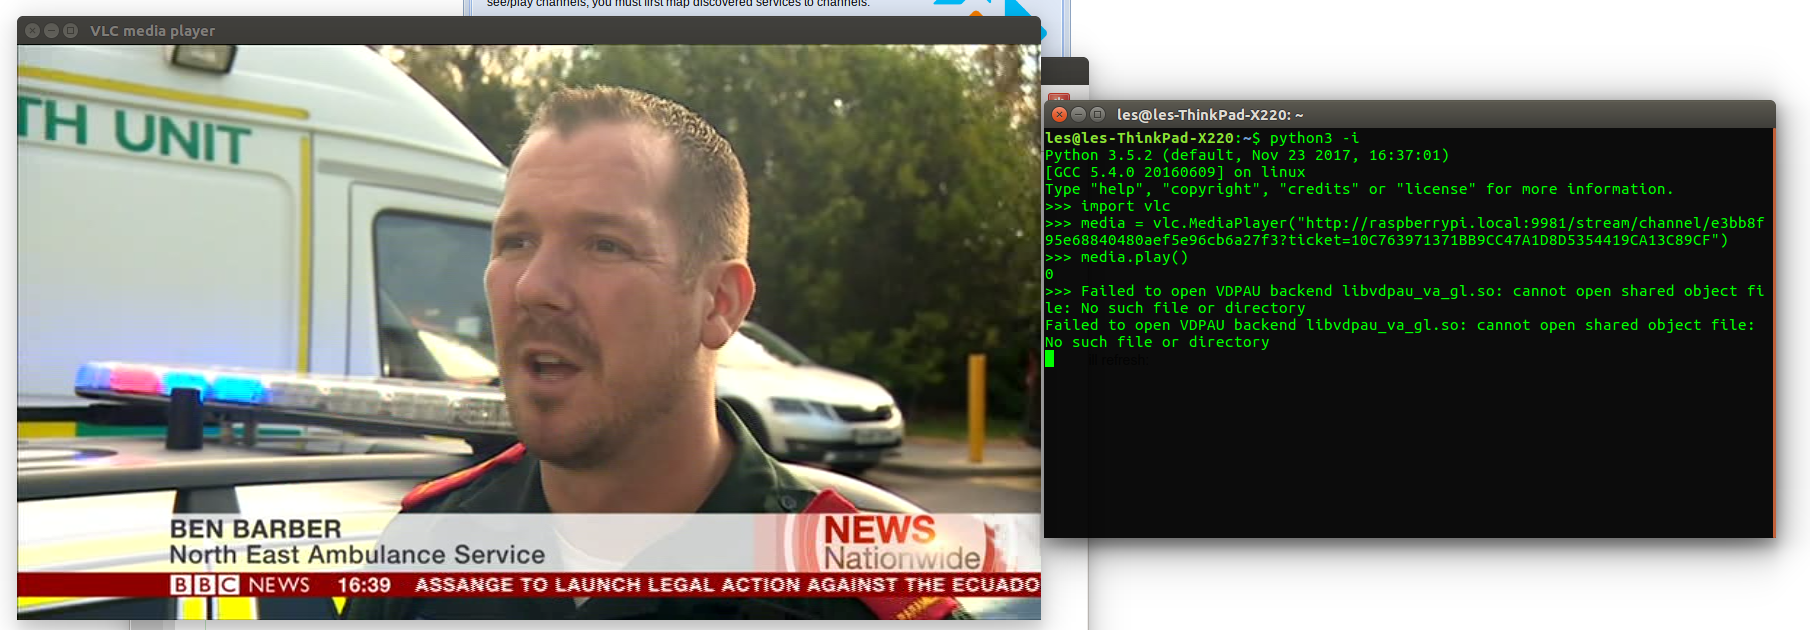
On October 18 the Raspberry Pi Trading company released a DVB TV uHAT, a small TV tuner HAT add on board that can receive live "free to air" TV and play it back on the Pi (3B+ only) or stream it to networked devices. So I had a play, found the stream details for a channel and wrote a three line Python script to stream the video to VLC. All works!
So with this we can create custom user interfaces in Python, for children / elderly to have a limited selection of channels based on their needs!