Microcontroller Monday - Simple Button Detection
If you had a button, what would you want it do when pressed?
I've asked this question to children and adults and each time I get a different answer. Generally the kids want something cool to happen and the adults want something to distract Donald Trump or Boris Johnson.
If you like what you read...
What is a button?
At the basic level a button is used to make or break a connection. It is a digital switch that has two states, on (1) or off (0).
Why did you write this post?
I was recently asked by a friend on Twitter how to connect a button to a micro:bit, and so this post was born!
Why are buttons important?
After learning how to turn on and off an LED, the next step is to use a button to do something simple, like turn on an LED of make a noise.
When I first learnt how to use a button it was via my trusty Arduino Uno and the process was a little more involved. Not complicated for someone who knows what they are doing, but if you are new to this subject, event the smallest task may seem impossible.
So what am I going to do?
First the hardware
The build for this requires
- A micro:bit
- A breakout board (such as 4tronix BIT:170 or Pimoroni Pinbetween)
- A breadboard
- 2 x Male to male jumper wires
- A push button / momentary switch
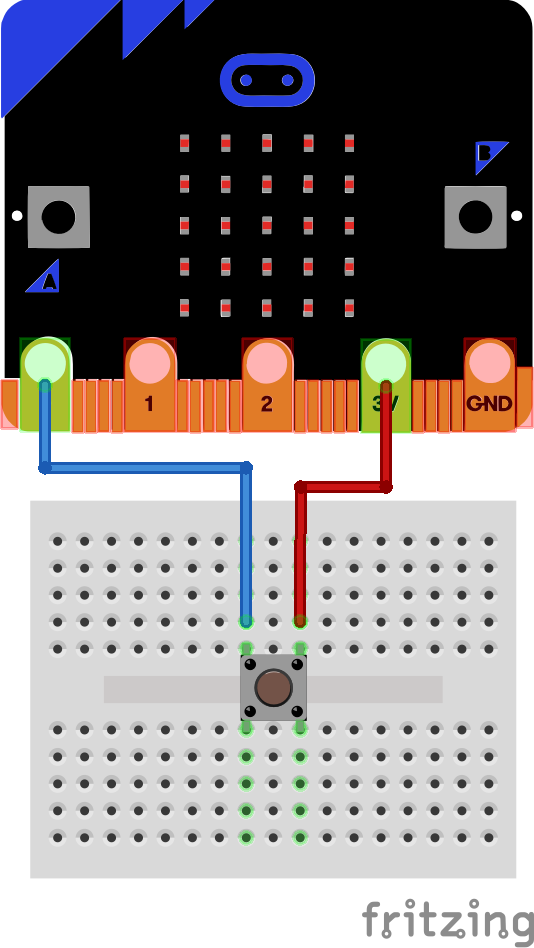
Place the push button / momentary switch so that it sits across the central space in the breadboard. Then using a breakout board connect pin 0 of the micro:bit to the top left pin of the button. Then connect the 3V pin of the micro:bit to the top right pin of the button.
Writing the code
For this I used the Makecode Editor to write a few simple blocks.
Make a new project.
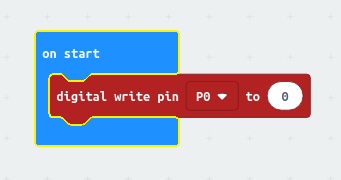
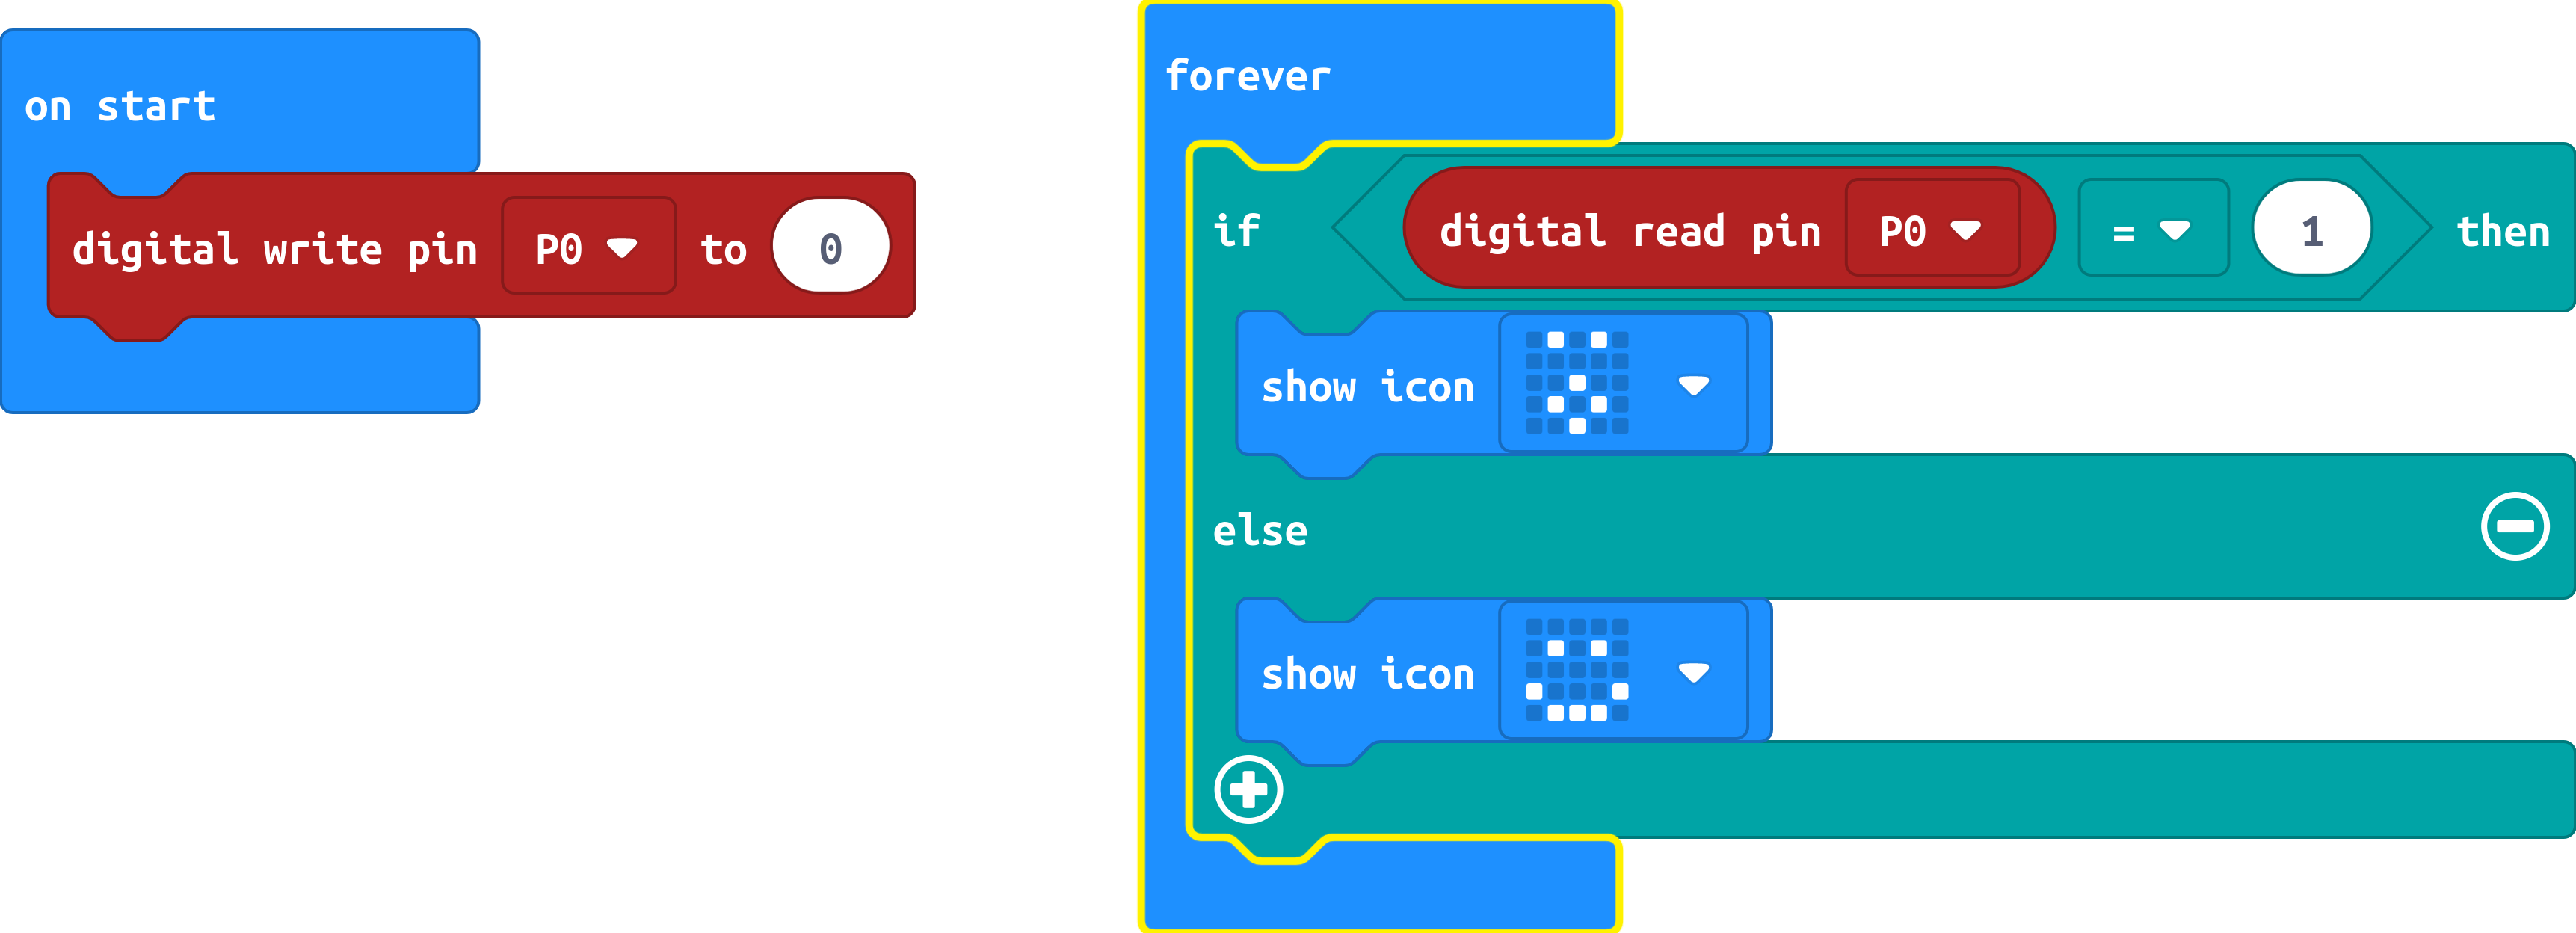
When the micro:bit starts, I want Pin 0 to be turned off (0) and so I use the digital write pin P0 to 0 block found in the Pins menu, you will need to click on Advanced to see this menu.

Inside of the forever block I am going to place an if <true> then...else block which is found in the Logic menu. This will now create a test that will run all the time when the micro:bit is powered.
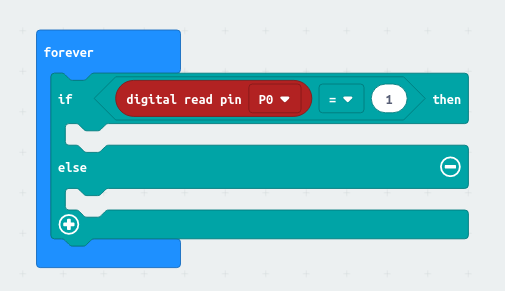
The test is to detect when the button has been pressed and so for this I used a Comparison block <0 = 0> which I dragged from the Logic menu and placed over the word true. This block will compare the value on the left, with the value on the right. And in this case I want to read the current value of Pin 0 and compare it against 1, which means that Pin 0 is connected to the 3V pin via the push button. You will find the digital read pin P0 block in the Pins menu.
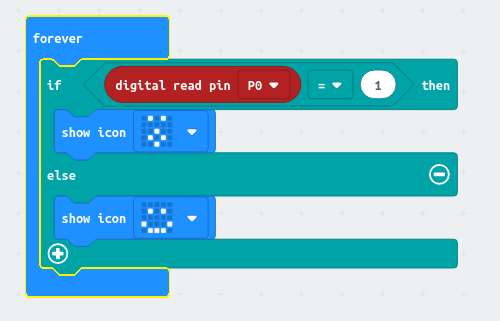
So what happens if the button is pressed? Well I used show icon from the Basic menu to show a shocked face. And when the button is not pressed, it shows a smiling face.
Write the code!
All of the code should look like this.
Save the code and then download the HEX file and copy it to the micro:bit.
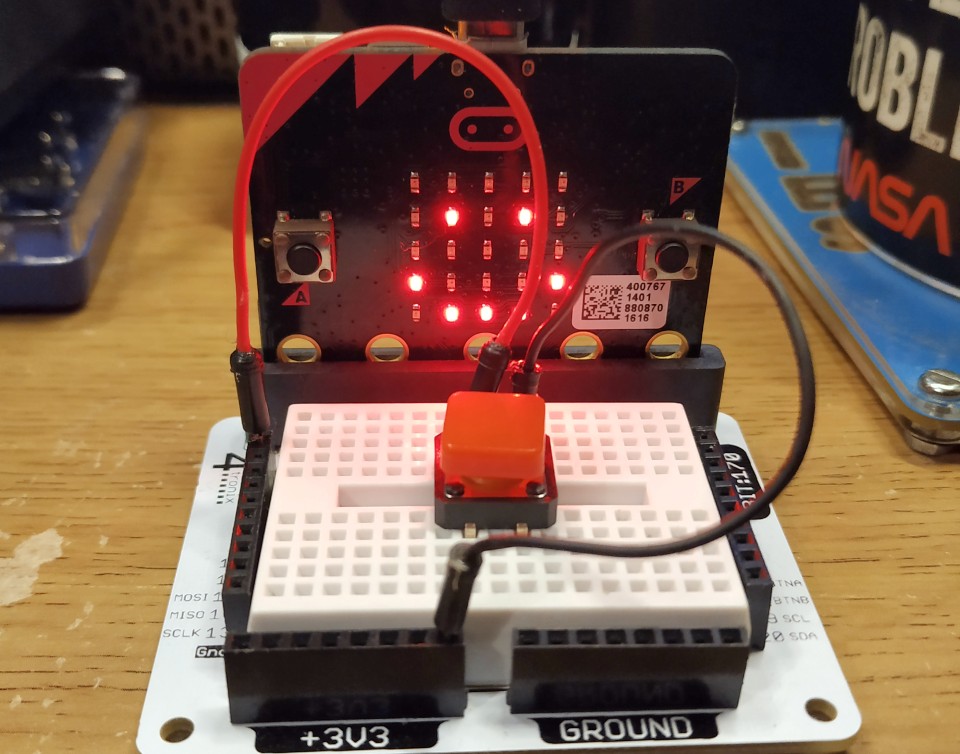
The micro:bit will show a happy face on the LED matrix.
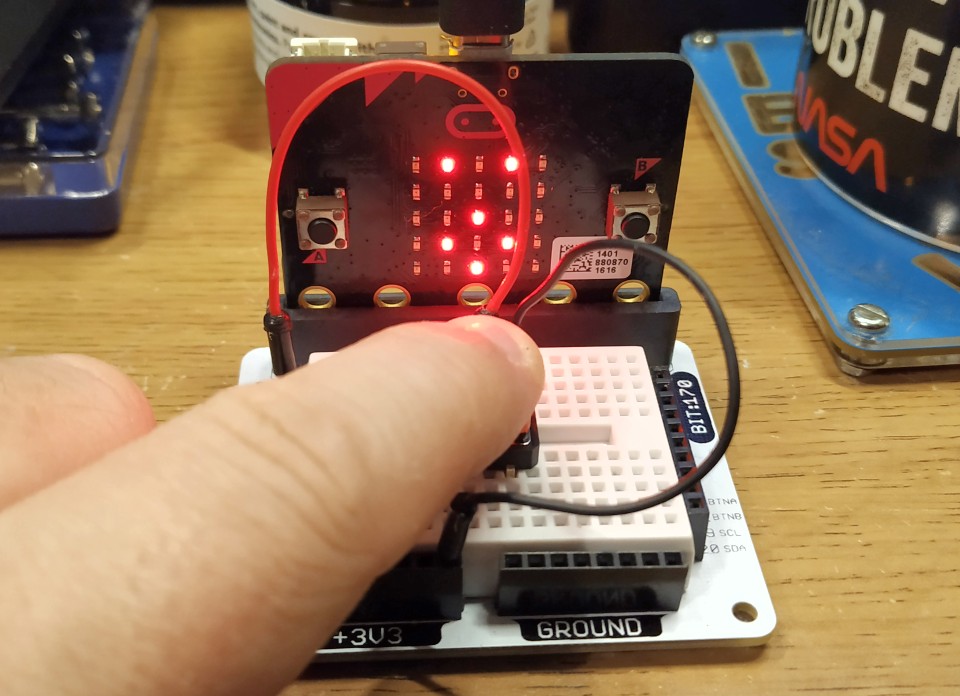
Now press the button and watch the face change!
Is that it?
Well no dear reader it is not. The code that I have written for a simple button, can also be used with other momentary switches. For example a reed switch is a simple open switch, but when a magnet is brought near the switch it will close and enable Pin 0 to connect to 3V and show the shocked face! This simple project can be used with maximum impact, just ask yourself
What do I want the button to do when pressed?