Monday Microcontroller: Adafruit Neo Trinkey
Blinky lights for fun and productivity.
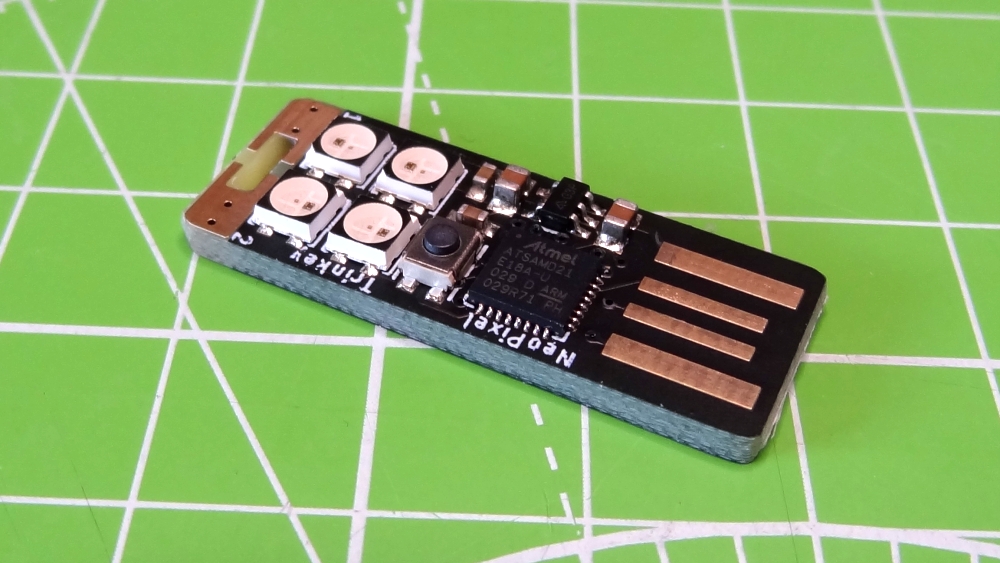
Adafruit have found another way to extract cash from my bank account. Neopixels on a USB stick may not sound like the most exciting purchase but the Adafruit Neo Trinkey is a fun little board that only costs around £6.30 / $7 but it can offer fun and productivity on the go. US / International buyers can get theirs direct from Adafruit and UK buyers can go to Pimoroni, which is where I got mine.
So What Are The Specs?
Courtesy of Adafruit's listing.
- ATSAMD21E18 32-bit Cortex M0+ - 48 MHz 32 bit processor with 256KB Flash and 32 KB RAM
- Native USB supported by every OS - can be used in Arduino or CircuitPython as USB serial console, MIDI, Keyboard/Mouse HID, even a little disk drive for storing Python scripts.
- Can be used with Arduino IDE or CircuitPython
- Four RGB NeoPixel LEDs
- Two Capacitive Touch pads
- Reset switch for starting your project code over or entering bootloader mode

Hi reader!
So What Did You Do With It?
Initially I was amazed by the Neopixels but then I thought "What can I make with the Neo Trinkey?" and then I saw that it had two capacitive touch pads and that it could emulate a USB keyboard, and so my project idea was born. Two extra keys that when pressed will launch applications that I commonly use, in this case a system monitor, bpytop, and the Linux dmesg command.
I wrote the project in CircuitPython, so I downloaded the latest version for the Neo Trinkey and followed the instructions to flash CircuitPython to the Neo Trinkey. I then downloaded the CircuiyPython 6 library packages and extracted the neopixel.mpy file and then copied it to the lib folder on the Neo Trinkey, which mounts as CIRCUITPY in the file manager. Lastly using Microsoft Visual Studio I opened the code.py file found on the CIRCUITPY drive.
Can We See Your Code?
Sure!
We start with the libraries.
Time: Used to control how long the Neopixels are lit for.
Board: Enabling our code to interact with the GPIO of the board.
Neopixel: The blinky lights.
Touchio: The capacitive touch buttons.
USB_HID: Emulate a USB device.
Keyboard: Emulate a keyboard.
KeyboardLayoutUS: Set the layout to US.
Keycode: Use keys such as CTRL, SHIFT, TAB etc.
import time
import board
import neopixel
import touchio
import usb_hid
from adafruit_hid.keyboard import Keyboard
from adafruit_hid.keyboard_layout_us import KeyboardLayoutUS
from adafruit_hid.keycode import Keycode
Next I create four objects. The first is kbd which enables me to treat the Neo Trinkey as a keyboard, the next layout makes sure that the keyboard layout is US English. The pixel_pin object links our code to the four Neopixels on the Neo Trinkey. Lastly the num_pixels variable stores the number of Neopixels, 4.
kbd = Keyboard(usb_hid.devices)
layout = KeyboardLayoutUS(kbd)
pixel_pin = board.NEOPIXEL
num_pixels = 4
Three more lines of setup, the first pixels sets the Neopixel pin, and the number of pixels on the board. I also set the brightness to 0.01 as 0.1 was still too bright for comfortable use on my laptop. The two touch objects tell the code which GPIO pins the capacitive touch buttons are linked to.
pixels = neopixel.NeoPixel(pixel_pin, num_pixels, brightness=0.01, auto_write=False)
touch_A1 = touchio.TouchIn(board.TOUCH1)
touch_A2 = touchio.TouchIn(board.TOUCH2)
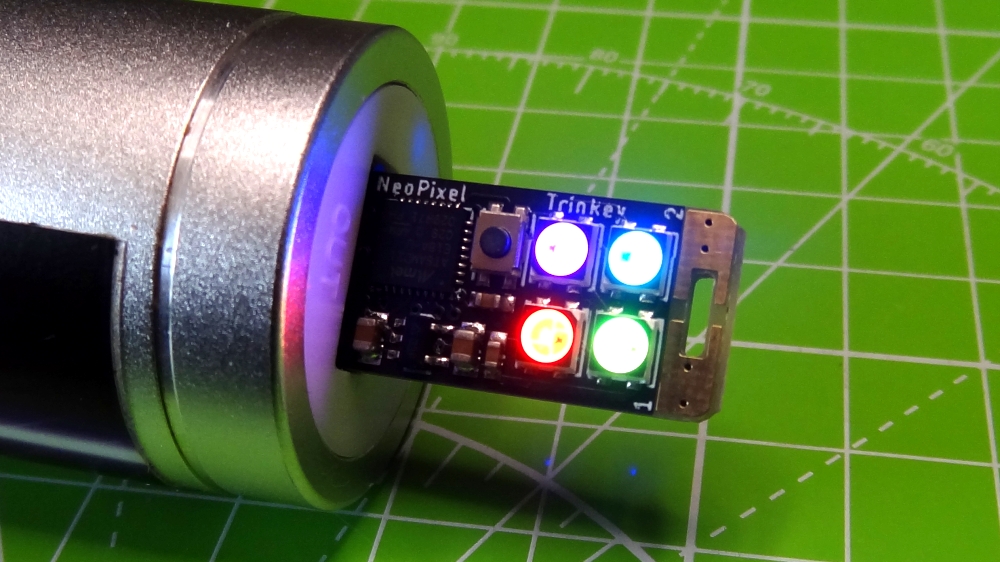
When the Neo Trinkey powers up, I want to see a short colour change animation to indicate that it is working and ready to go. For this I use pixels.fill((r,g,b)) to set the colour. First of all I want to see red, and that is 255,0,0. To see the colour I need to use pixels.show(), and then pause for half a second time.sleep(0.5) before moving on to green and then finally blue.
pixels.fill((255,0,0))
pixels.show()
time.sleep(0.5)
pixels.fill((0,255,0))
pixels.show()
time.sleep(0.5)
pixels.fill((0,0,255))
pixels.show()
time.sleep(0.5)
The main loop, while True: has three conditional tests. The first two check the status of the two capacitive touch buttons, and the final test is a "catch all" that is triggered if nothing is pressed.
If touch 1 is pressed, then we print a message to the Python shell for debug. Set the Neopixels to red and then send three keycodes for CONTROL, ALT and T which in Ubuntu will trigger a Terminal window to open. I then release the keys, wait for one second and as the Terminal window is in focus, I tell the code to write a string bpytop into the Terminal. Then I press ENTER and release all the keys.
while True:
    if touch_A1.value:
        print("Touch 1")
        pixels.fill((255,0,0))
        pixels.show()
        kbd.send(Keycode.CONTROL,Keycode.ALT,Keycode.T)
        kbd.release_all()
        time.sleep(1)
        layout.write("bpytop")
        kbd.send(Keycode.ENTER)
        kbd.release_all()
If I press touch 2, then it performs the code, but the Neopixels go green and the Terminal command is dmesg -w -T which opens the diagnostic message log, constantly refreshes the output (using the -w switch) and sets the timestamps to be human readable, -t.
    elif touch_A2.value:
        print("Touch 2")
        pixels.fill((0,255,0))
        pixels.show()
        kbd.send(Keycode.CONTROL,Keycode.ALT,Keycode.T)
        kbd.release_all()
        time.sleep(1)
        layout.write("dmesg -w -T")
        kbd.send(Keycode.ENTER)
        kbd.release_all()
The final test is else and this code will run when nothing is pressed. All it does it set the Neopixels to off. Unusually I cannot find a clear() function in CircuitPython, I am sure that there was one.
    else:
        pixels.fill((0,0,0))
        pixels.show()
Have You Got All The Code In One Block?
import time
import board
import neopixel
import touchio
import usb_hid
from adafruit_hid.keyboard import Keyboard
from adafruit_hid.keyboard_layout_us import KeyboardLayoutUS
from adafruit_hid.keycode import Keycode

kbd = Keyboard(usb_hid.devices)
layout = KeyboardLayoutUS(kbd)
pixel_pin = board.NEOPIXEL
num_pixels = 4

pixels = neopixel.NeoPixel(pixel_pin, num_pixels, brightness=0.01, auto_write=False)
touch_A1 = touchio.TouchIn(board.TOUCH1)
touch_A2 = touchio.TouchIn(board.TOUCH2)

pixels.fill((255,0,0))
pixels.show()
time.sleep(0.5)
pixels.fill((0,255,0))
pixels.show()
time.sleep(0.5)
pixels.fill((0,0,255))
pixels.show()
time.sleep(0.5)

while True:
    if touch_A1.value:
        print("Touch 1")
        pixels.fill((255,0,0))
        pixels.show()
        kbd.send(Keycode.CONTROL,Keycode.ALT,Keycode.T)
        kbd.release_all()
        time.sleep(1)
        layout.write("bpytop")
        kbd.send(Keycode.ENTER)
        kbd.release_all()
    elif touch_A2.value:
        print("Touch 2")
        pixels.fill((0,255,0))
        pixels.show()
        kbd.send(Keycode.CONTROL,Keycode.ALT,Keycode.T)
        kbd.release_all()
        time.sleep(1)
        layout.write("dmesg -w -T")
        kbd.send(Keycode.ENTER)
        kbd.release_all()
    else:
        pixels.fill((0,0,0))
        pixels.show()
Run The Code!
Save the code and the board will automatically restart and load the code. Now press one of the gold capacitive touch pads and your wish is its command!