Setting up a VNC server on your Raspberry Pi
Controlling your Raspberry Pi over a network is a really handy thing to do, but how can you do it?
Well in this tutorial I show you how to setup a VNC server on your Raspberry Pi and connect to it via a laptop / tablet using a VNC client.
What is SSH?
SSH is a secure protocol, by which I mean it enables a user to remotely and securely connect to a computer. Either across the world or in the same room. It is as if you are sat in front of the machine typing on its keyboard. SSH is mainly for terminal work (you can forward GUI applications over an SSH connection but that is out of scope for this guide, see here for more information on that), so you can run commands in the terminal to configure / use the computer, in this case our Raspberry Pi.
What is VNC?
VNC is a technology that enables the video of a computer to be sent over a network connection, not only that but you can control the remote computer using the keyboard and mouse of the machine you are sat at.
In this tutorial we install a VNC server on the Raspberry Pi, as we want to control it. We control it using a VNC client on our computer / tablet.
Please note that Minecraft DOES NOT work with VNC and there is no way to make it work at this time
Prerequisites
- Your Raspberry Pi and laptop/tablet MUST be on the same network.
- For best results use an Ethernet cable to attach your Raspberry Pi to the network.
Step by step

A full diagram can be found here
Step 1
On your Raspberry Pi, open a terminal and type
sudo raspi-config
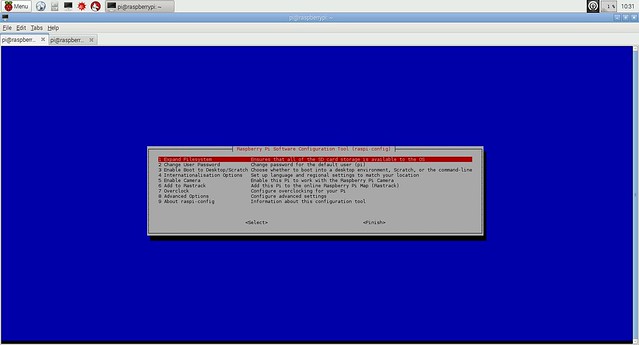
Step 2
Move the highlighted line to 8 Advanced Options and press Enter
Step 3
In the Advanced Menu look for SSH and press Enter
Step 4
Select Enable to enable the SSH server on your Raspberry Pi
Step 5
You will now be returned to the main menu, navigate to Finish and press Enter. If prompted, reboot your Raspberry Pi.
Step 6
In order for us to connect to your Raspberry Pi on the school network we need to know its IP address, an address that it is given by the router. In a terminal type in
hostname -I
Remember to write it down, it will be important later on!
If you are using the school network, ask your network technician to create a static IP address for your Pi.
Step 7
Still in a terminal, we need to install a VNC server, this will send the Raspberry Pi video over a network connection. In the terminal type
sudo apt-get install tightvncserver
We now move to our computer, in this case I used a laptop connected to the same network as my Raspberry Pi.
Step 8
We need to install a piece of software for our computer to talk to the Raspberry Pi. The most common piece of software is called Putty you can download it from here
If you are using a Mac it comes with a terminal built in.
If you are wanting to use a tablet then the best SSH client for Android is JuiceSSH
Step 9
With Putty downloaded (or an SSH client for your tablet) run Putty and you will see a screen like this.
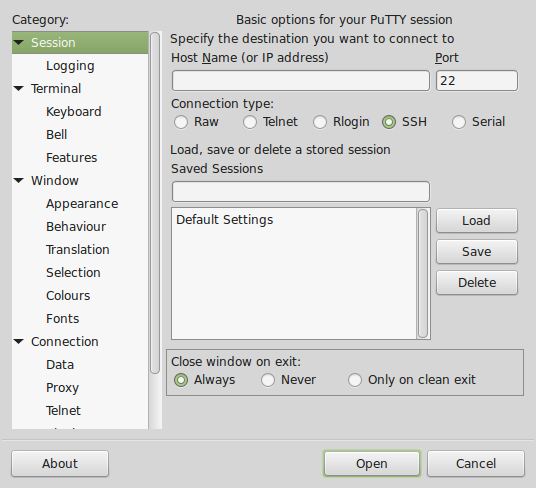
Where it says Host Name (or IP address) type in the IP address that you wrote down in Step 6
Step 10
Because Putty has never seen your Raspberry Pi before it will pop up a warning. This is normal and can be easily disregarded.
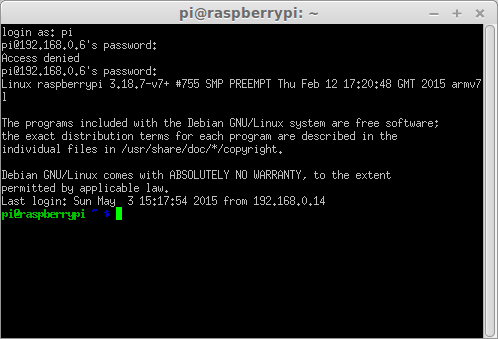
Step 11
Putty will ask you for your username and password. Typically...
Username: pi
Password: raspberry
After typing your username press Enter, you will be asked for your password. Remember as a security feature Linux will not print your password on the screen, so type carefully.
Step 12
You will now be logged in to your Raspberry Pi...and controlling it remotely! Sweet!
Any command entered in the terminal is run on your Raspberry Pi.
Step 13
So now that we can talk to our Pi remotely, we need to give it something to do. So let's instruct our Pi to start a VNC server using the following command in the Putty terminal.
sudo tightvncserver
Step 14
As this is our first time using tightvncserver it will ask us to create a password, to keep our connection secure. Choose a password and enter it, you will be asked to confirm the password.
It will ask if you would like to create a view only password, answer no.
Step 15
We have now started a VNC server on our Raspberry Pi. You will see a lot of information on the screen but keep an eye out for a number after a colon, typically it is :1. This number will be handy later on in Step 17.
Step 16
With a VNC server running on our Raspberry Pi we now need to change our focus to our laptop. Minimise the Putty terminal but don't close it.
We now need to install a VNC client on our laptop / tablet.
The best of the bunch for Windows and Mac is Real VNC and you can download a free version from here
If you are using a Chromebook then download this application

If you are using an Android tablet then download this
For Apple / iPad there will be a version of these applications in your app store.
Step 17
With our VNC client downloaded and installed let's open it and give it the IP address of our Pi (Step 6) and the number we wrote down from Step 15.
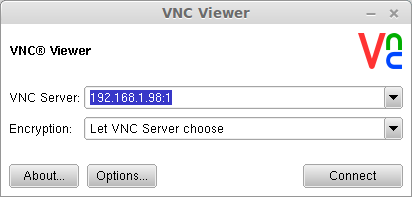
Click connect.
Step 18
You will see a warning pop up, advising you that the connection is not encrypted and as such anyone can see what you are doing. Don't panic! As we are doing this on a private / school network it is safe to continue.
Step 19
Remember the password that you created in Step 14? Well now is the time to use it :)
Step 20
You will see the screen of your Raspberry Pi appear on your laptop / tablet, and you can control the mouse and keyboard of your Pi by using those attached to your laptop!
Congratulations you are controlling your Raspberry Pi over the network!
But hang on, that's a lot of work just to use VNC on a Pi, do I need to do that EVERY time?
Simple answer - NO!
in this tutorial we had to do a lot of work to setup the Raspberry Pi ready to use SSH and VNC. To use this on a daily basis we need to do the following.
Day to day usage
Step 9
With Putty downloaded (or an SSH client for your tablet) run Putty and you will see a screen like this.
Where it says Host Name (or IP address) type in the IP address that you wrote down in Step 6
Step 11
Putty will ask you for your username and password. Typically...
Username: pi
Password: raspberry
After typing your username press Enter, you will be asked for your password. Remember as a security feature Linux will not print your password on the screen, so type carefully.
Step 13
So now that we can talk to our Pi remotely, we need to give it something to do. So let's instruct our Pi to start a VNC server using the following command in the Putty terminal.
sudo tightvncserver
Step 17
With our VNC client downloaded and installed let's open it and give it the IP address of our Pi (Step 6) and the number we wrote down from Step 15.
Click connect.
So there we have it, a step by step guide to using VNC on your Raspberry Pi.
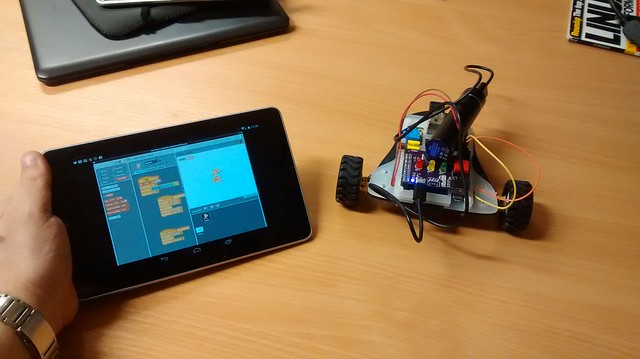
Now you can control your robot using Scratch via a tablet from across the room :D